Try the new IKO website at https://beta.ikointl.com/
Help< > Riding Tips
Author: Marica Moda
Boost Your Confidence on the Water: Essential Tips for Kitesurfing Success
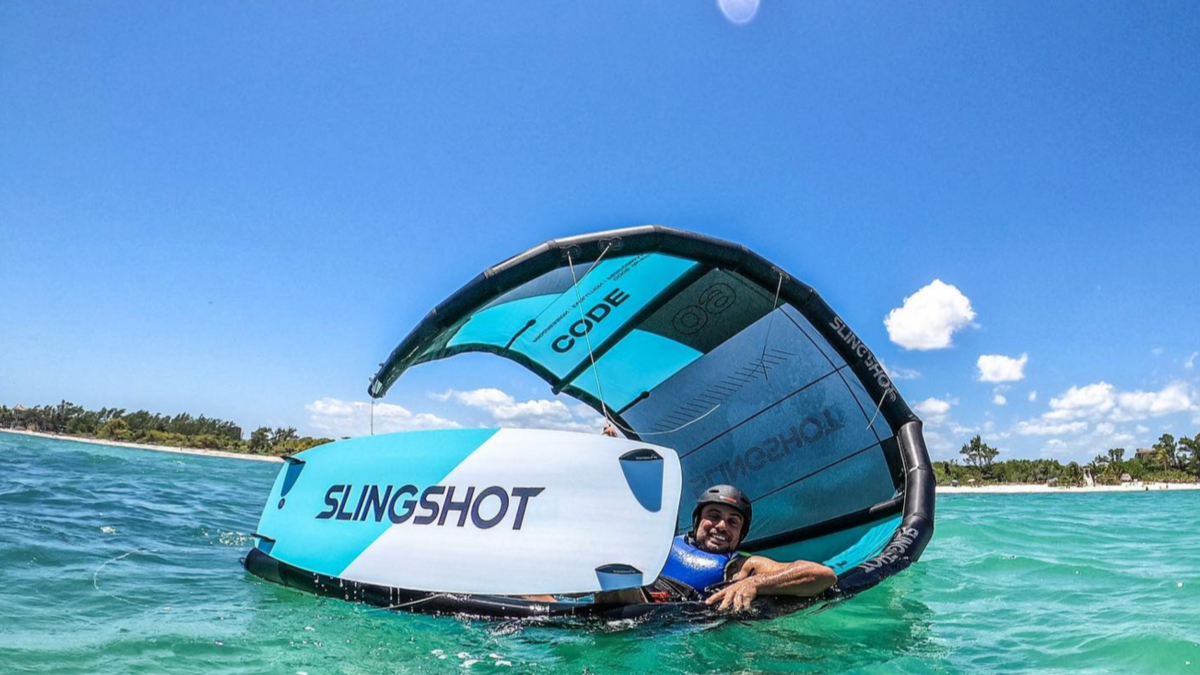
Kitesurfing is an adrenaline sport that mixes board riding with wind power for an exciting rush. It can be thrilling yet intimidating for beginners. To fully enjoy and master kitesurfing, confidence is key. Whether catching your first wind or leveling up, here are tips to boost your confidence on the water!
Nailing the Basics: Your Ticket to Kitesurfing Confidence
Mastering kitesurfing starts with the basics. Dive into lessons with an IKO-certified instructor who will guide you through the fundamentals, such as spot assessment, gear handling, how to use safety systems, launch, and land as a pilot, kite control, body dragging, steady-pull, and water starts. Also, learning how to perform self-landing during your lessons is crucial from the beginning. This skill ensures you're equipped to handle your kite safely when needed.
Why choose an IKO instructor?
- Top-Notch Training: IKO instructors provide a standardized, high-quality safety and best practices curriculum.
- Global Recognition: IKO certification is recognized worldwide, making it easy to continue improving wherever you kite. Get your IKO Vcard with an IKO instructor!
- Safety First: IKO instructors are trained to handle any situation on and off the water so you can confidently learn.
Take your time—each mastered skill builds confidence and brings you closer to pro status. The IKO Assistant Training Course - ATC is a fantastic next step in advancement. It’s ideal for independent kiters eager to enhance their skills and become a kitesurf specialist. Plus, it’s the first step towards a kitesurfing career with IKO. For more info, visit the IKO website.
Master the Skill: The Secret to Consistent Kitesurfing Practice
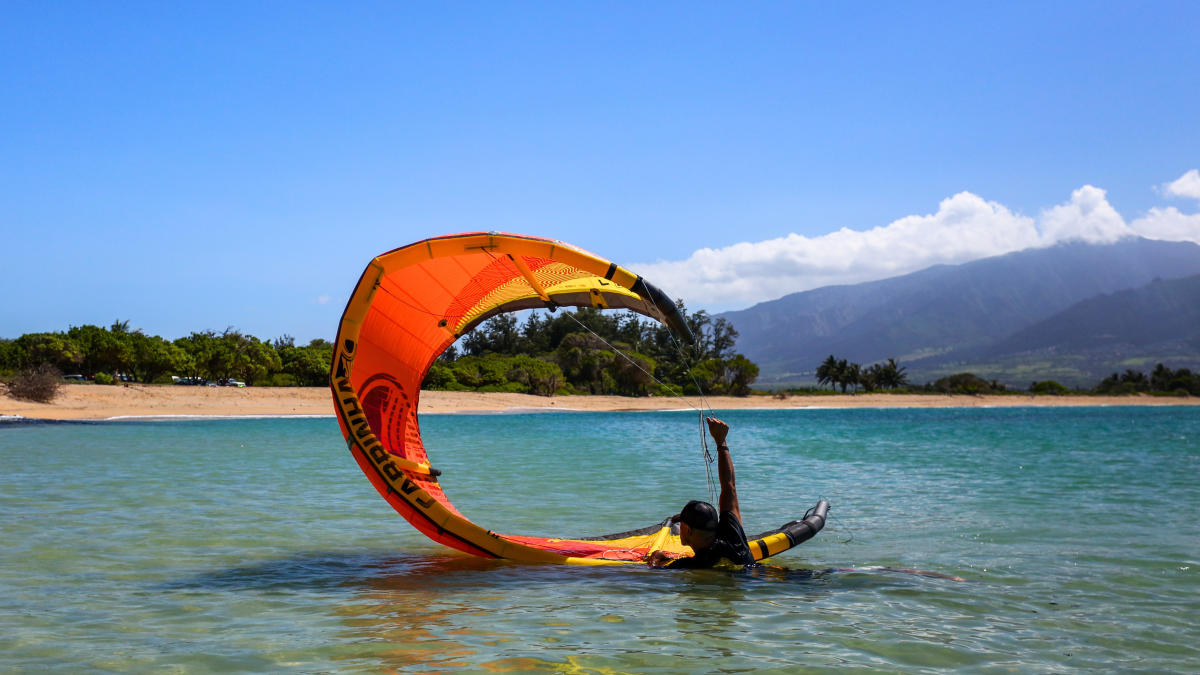
Kitesurfing improves with regular practice. The more time you spend on the water, the better you'll know your gear and handle different conditions. You'll become a versatile kiter by exploring various spots, ready for any challenge. Always prioritize safety by practicing techniques like self-rescue regularly. As you gain experience, learn how to perform self-rescue, self-launching, and pack down in deep water with an IKO instructor to enhance your skills further.
Consider attending the IKO Assistant Training Course - ATC to boost safety and skills. It’s your gateway to enhancing riding skills and mastering essential safety techniques like self-launching, board and kiter recovery, and assisting a fellow kiter. For more details, follow IKO on Instagram and Facebook, and check out the IKOIntl YouTube channel.
Get to Know Your Gear: The Key to Kitesurfing Confidence
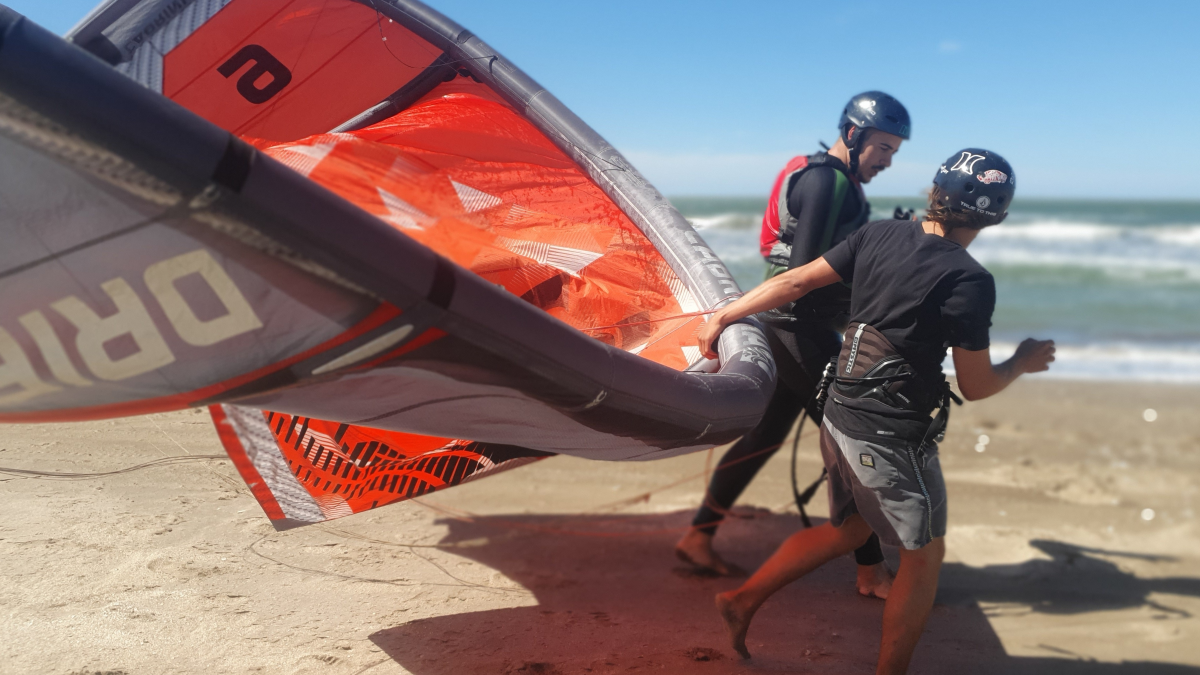
Your kitesurfing gear is your key to success. Master how to set up, pack, store, and repair your kite, manage your lines, and adjust your harness, helmet, and impact vest or buoyancy aid. Knowing and keeping your gear in top shape will boost your confidence and safety.
The IKO Assistant Training Course - ATC will give you all this information and more.
Take Small Steps and Savor Every Win
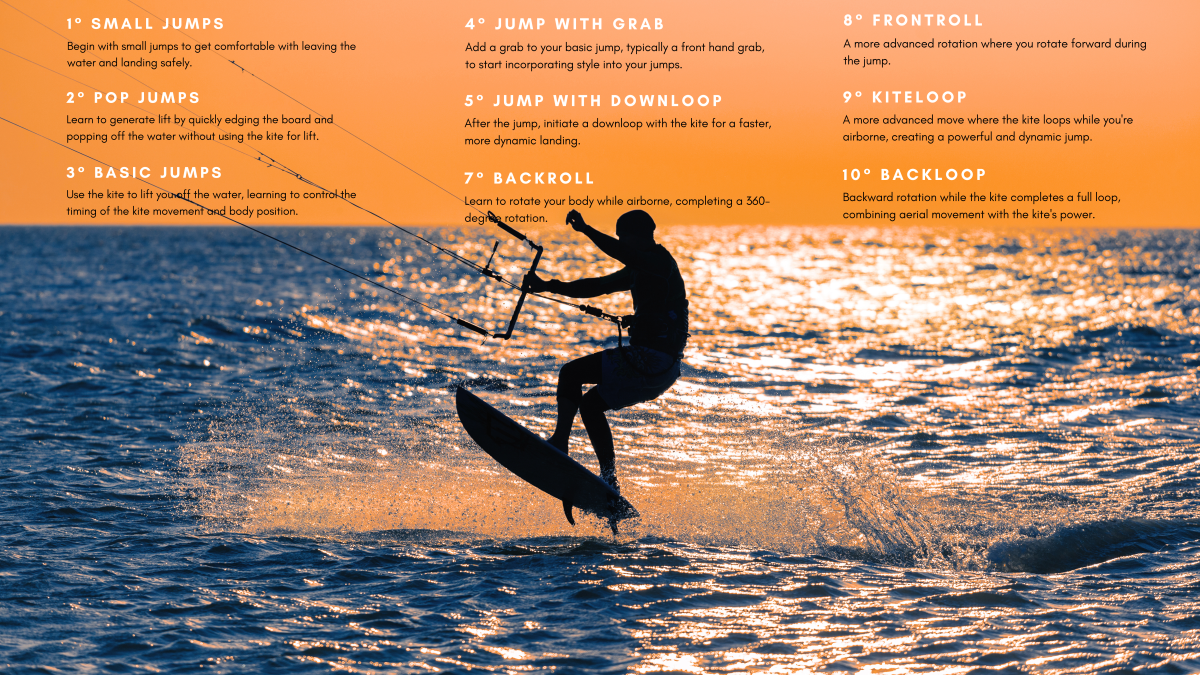
Don’t rush—mastering kitesurfing is a step-by-step process. Focus on one skill at a time and celebrate each small success. This approach ensures steady progress and keeps you motivated and confident.
The IKO Lesson Plan offers a structured guide for constant progress. Each phase builds a strong foundation, leading to continuous improvement. Your IKO certification and Vcard will proudly display your achievements once you’ve mastered the skills.
Find Your Crew: Boost Confidence with a Kitesurfing Community
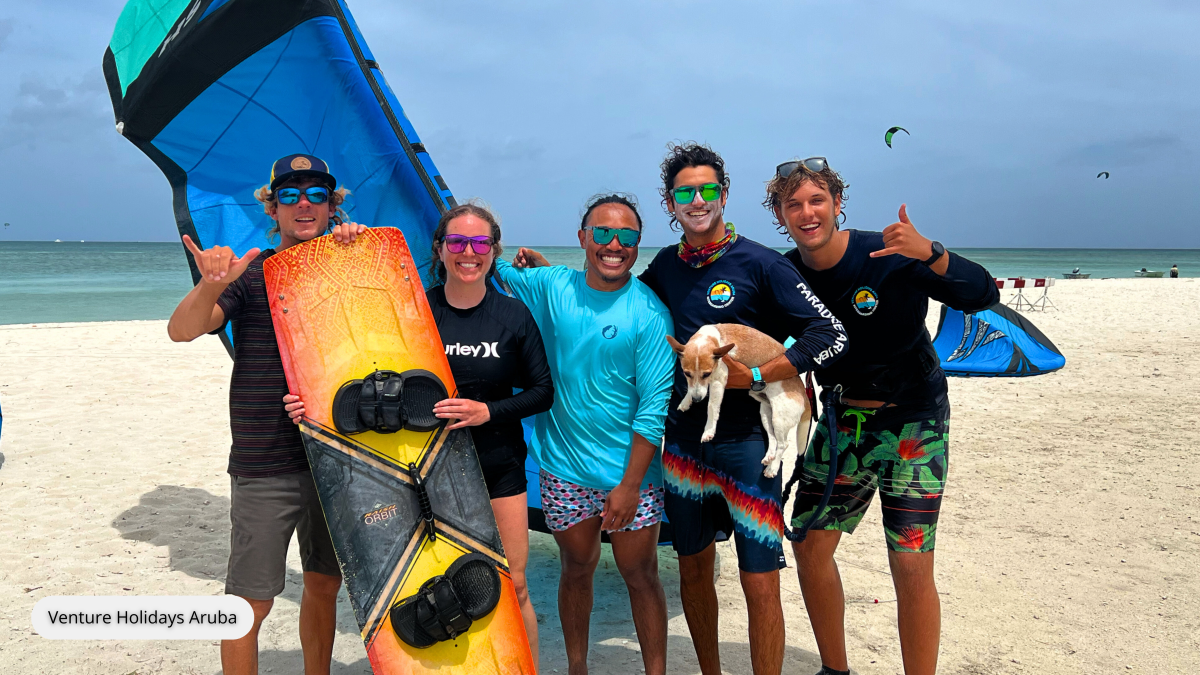
Joining a kitesurfing community boosts your confidence. Share stories, get tips from experienced kiters, and support each other through challenges. You'll also learn beach and water etiquette, ensuring respect and safety for everyone. Connect with the vibrant community through IKO’s Instagram and Facebook, and watch the inspiring videos on the IKOIntl YouTube channel.
Keep Your Head Up: Master Confidence with a Positive Mindset
Your mindset is your secret weapon. Embrace positivity, even when things don’t go as planned. Every mistake is a chance to learn and grow. Don’t let setbacks get you down—it’s all part of the journey. As you overcome challenges, your confidence will soar.
Useful Resources
Don’t miss the opportunity to deepen your kitesurfing journey further by reading the IKO blogs.
A must-read is Become a Better and Safer Kiter: Take the IKO Assistant Training Course and Instructor Training Course. Check out the helpful YouTube video that explains the self-rescue procedure, which is essential for every kiter’s safety.

Hey Kiter, Never Stop to Improve Yourself
Building confidence in kitesurfing takes time, practice, and patience. Start with the basics, practice regularly, understand the conditions, and respect your kitesurf level. Enjoy each session and consider the IKO Assistant Training Course (ATC) to enhance your skills. Every kitesurf session brings you closer to becoming a safer, more skilled kiter.
#wearahelmetlikeapro #besmartbesafe #safetyfirst #kitesurfingwithiko
Happy kiting!
Author: Marica Moda
Equipped for any kitesurfing adventure
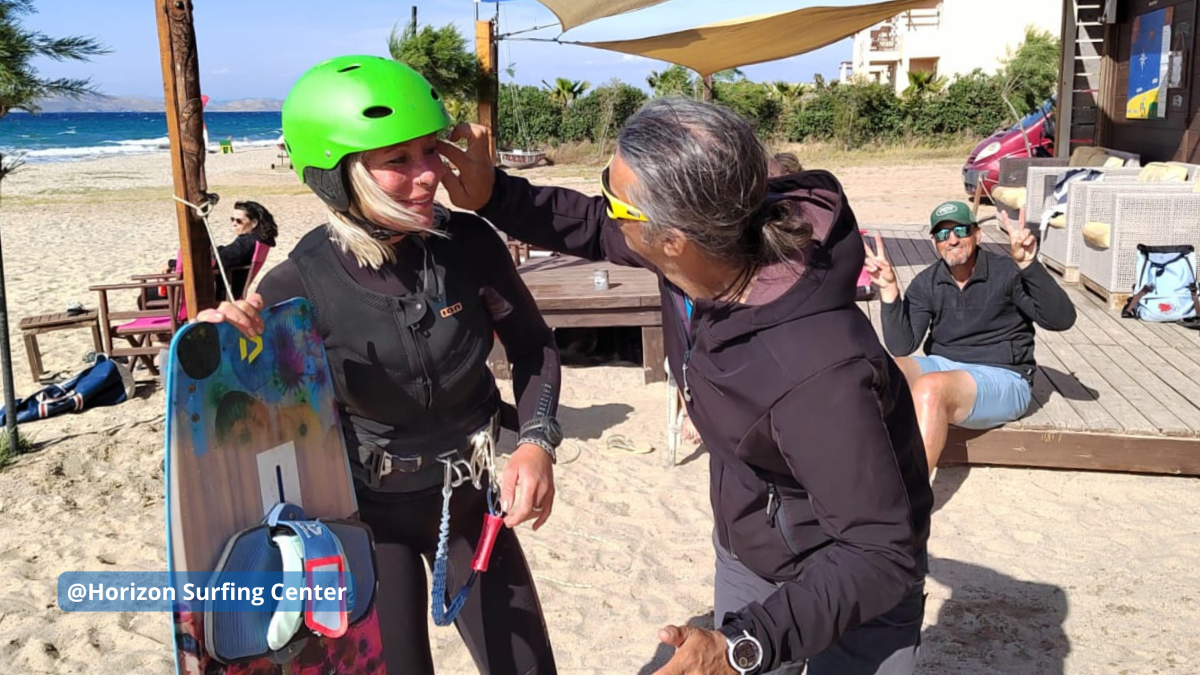
Kitesurfing is pure adrenaline, but like any sport, it carries risks. The proper safety equipment in full working order ensures safe and enjoyable kitesurf sessions; these are good suggestions that IKO wants to give you.
Helmet: Make a Difference by Wearing One.
Ever heard that "helmets are uncomfortable and only for beginners"? It's time to dispel that myth! Your helmet protects you from falls and collisions, whether the water is flat or wavy. Think of the helmet as a shield, like your cell phone cover. It protects you from the sun and defends you during unexpected falls or collisions with the water, your board, or other kiters or obstacles. Kitesurfing helmets are lightweight, comfortable, and designed to withstand hard impacts. They are equipped with drainage holes to prevent the chin strap from causing breathing difficulties underwater and help keep your head afloat if needed.
Helmets are cool and customizable! You can choose vibrant colors, add stickers, or design it to reflect your style. Remember, there's nothing more important than protecting your head. Wear your helmet proudly, just like the pro riders do. Be ready for any adventure.#wearahelmetlikeapro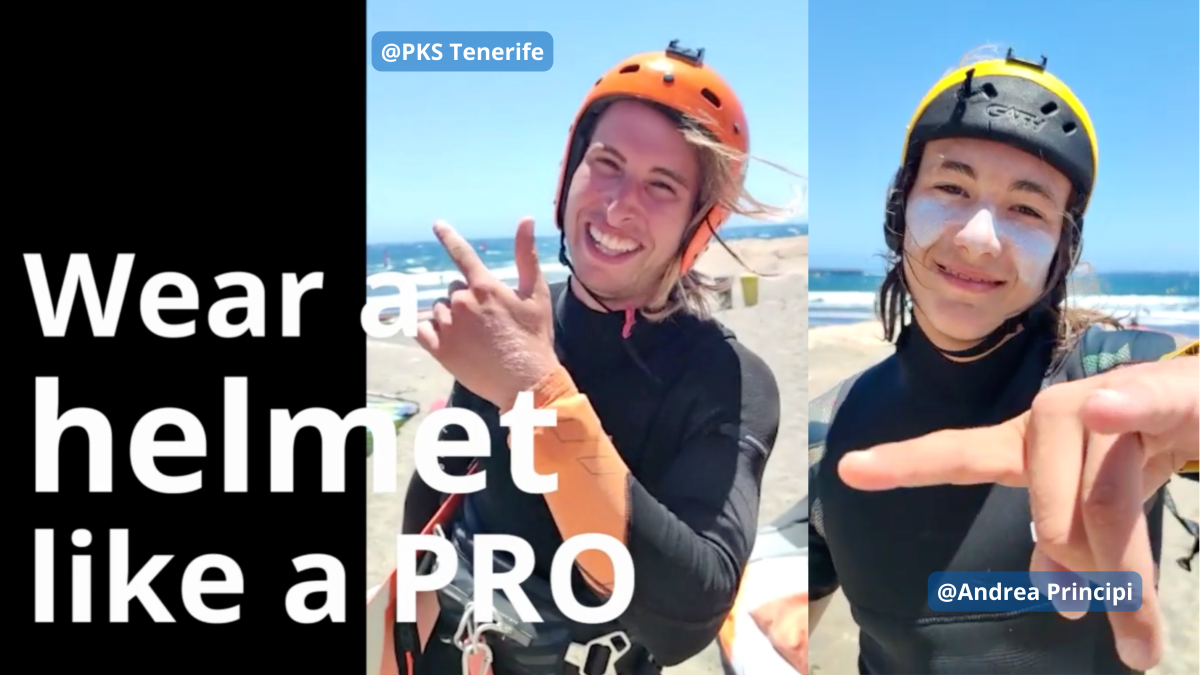
Check out the video on the IKO YouTube channel.
Buoyancy Aid (50 N): Your Protection of Safety
Wearing a buoyancy aid with 50 Newtons (N) during kitesurfing lessons is mandatory when learning with an IKO instructor. This is crucial for your safety. Even in shallow water, unexpected falls can occur. A buoyancy aid keeps your head and torso above water, allowing instructors and rescuers to assist you easily in need.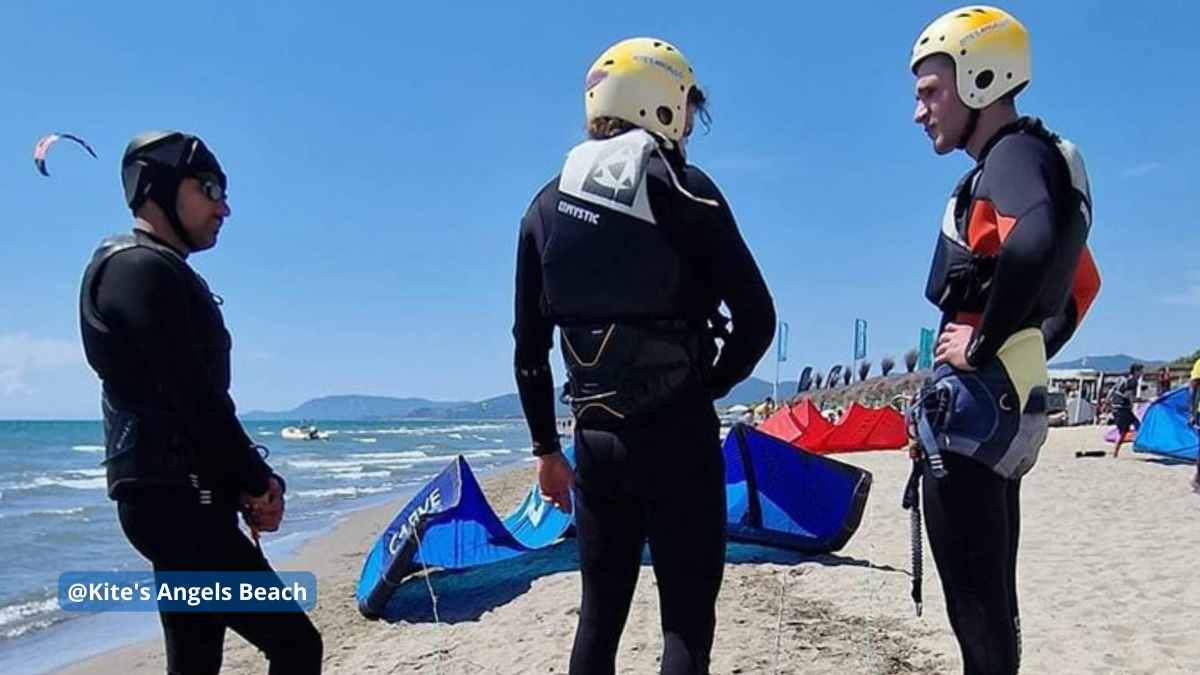
Impact Vest: Everyday Buoyancy Aid
An impact vest provides more agility but less buoyancy compared to a 50 N buoyancy aid. It is called an "impact" vest because it protects you from impacts during falls. While it offers some buoyancy, its primary function is to protect your torso from impacts during jumps, freestyle, or advanced maneuvers with a higher risk and probably hard falls, reducing injuries.
Make sure your vest is well-fitting and comfortable. It should allow you to breathe well without overtightening your rib cage and provide full mobility. This ensures you can perform all maneuvers without feeling restricted.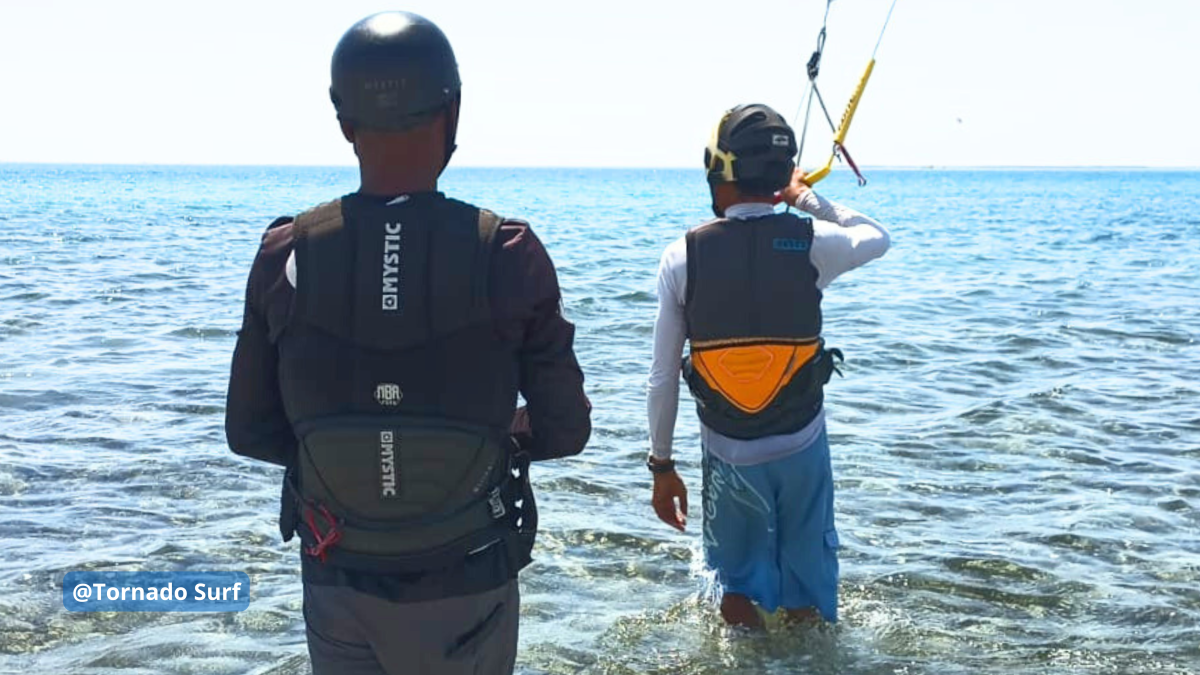
Kite Leash: Your Inseparable Companion
The kite leash is a crucial piece of safety equipment in kitesurfing. According to IKO standards, attaching the kite leash to the front of your harness is essential. This ensures you can easily reach it with both hands in an emergency. Fastening it behind or to one side of the harness can pull you backward or sideways, making it hard to reach the quick-release system.
Attaching it to the front ensures the quick-release system works properly and doesn't snag on your harness hook. Always test the kite leash before entering the water to ensure it is not blocked by salt or sand, including the quick release of the chicken loop. It's better to know it works before you enter the water than to find out in an emergency.
Kite Line Cutter: Your ace in the hole
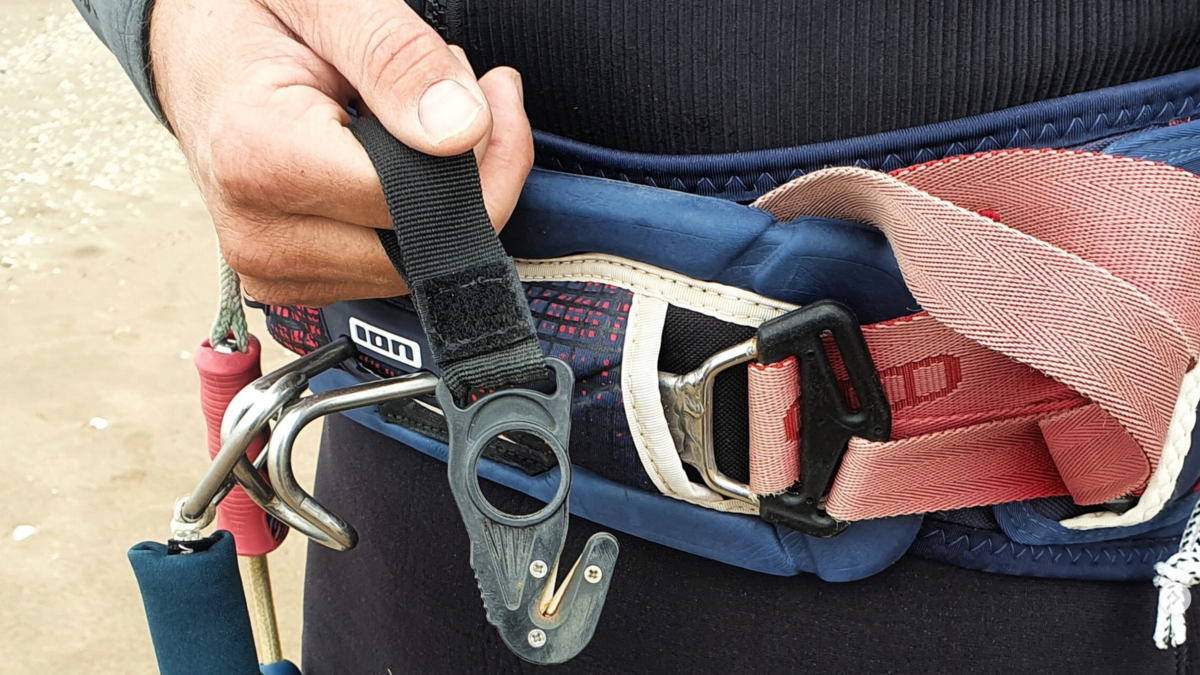
IKO recommends having a line cutter as part of your safety gear. Keeping it on your harness can turn a dangerous situation into a story to share with friends on the beach at sunset. It’s an investment in safety for you and other kiters in case someone gets tangled in the lines. Be aware that not all harnesses come with a line cutter included. Check your harness to see if it has one, and if it doesn't, make sure to get one separately. Regularly ensure the blade isn't rusted, just as you check your phone's battery before leaving the house.
To prevent the blade from rusting, cover it with candle wax. This will protect the blade from water, salt, and sand, but it will also ensure that if you need to use the line cutter, the wax will quickly come off, allowing the blade to work effectively.
#BeSmartBeSafe
Equipping yourself with the must-have safety gear is about following guidelines and embracing a preparedness mindset and respect for the sport. Your helmet, buoyancy aid, impact vest, kite leash, and line cutter are critical in safeguarding your kitesurfing adventures. They turn potential hazards into manageable risks so you can focus on the excitement of your kitesurfing session. Each item is designed not only to protect but also to enhance your overall kitesurfing experience.
Next time you go kitesurfing, wear your helmet with pride and your buoyancy aid or impact vest confidently, and check that every piece of your equipment is in top condition. You protect yourself and set an example for others in the kitesurfing community.
Stay safe, ride hard, and make every session an epic adventure.+
Happy kitesurfing!
#wearahelmetlikeapro #StaySafe #KiteSmart #SafetyFirst
For more tips and safety guidelines, visit the IKO YouTube channel: @IKOintl
Author: Marica Moda
How to make a theoretical kitesurfing lesson interesting.
You are a good instructor if you are good at teaching. It sounds like a silly concept, but therein lies the essence of our profession.
To teach means to present and provide information or instructions in a manner that suits the learning abilities of others, while also adding passion and creativity to the process.
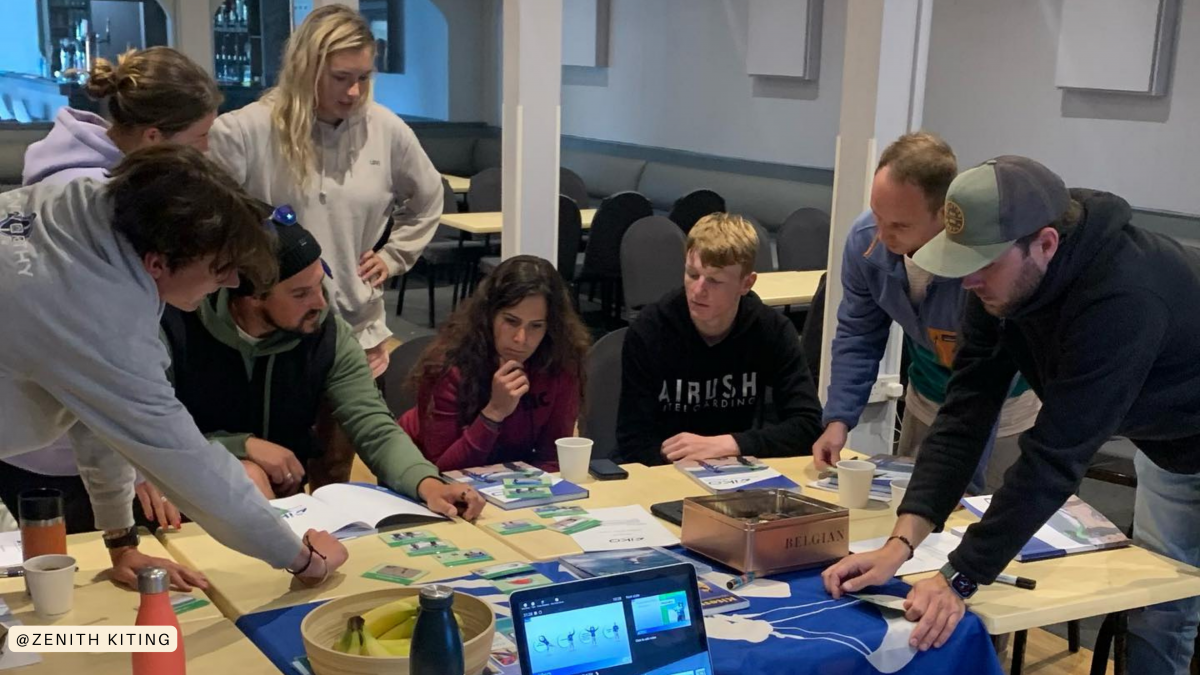
Knowing "what to teach" doesn't mean knowing "how to teach" it.
If you are an IKO Instructor, you must understand that it's not sufficient to only know how to kitesurf; you must train yourself and be focused on teaching techniques to address "how to teach" the theoretical part, not just the practical aspect.
To be a good instructor, it’s necessary to explain both topics well. For a student, the theory of kitesurfing is an essential part of the learning process as it helps them understand the principles and techniques behind the sport.
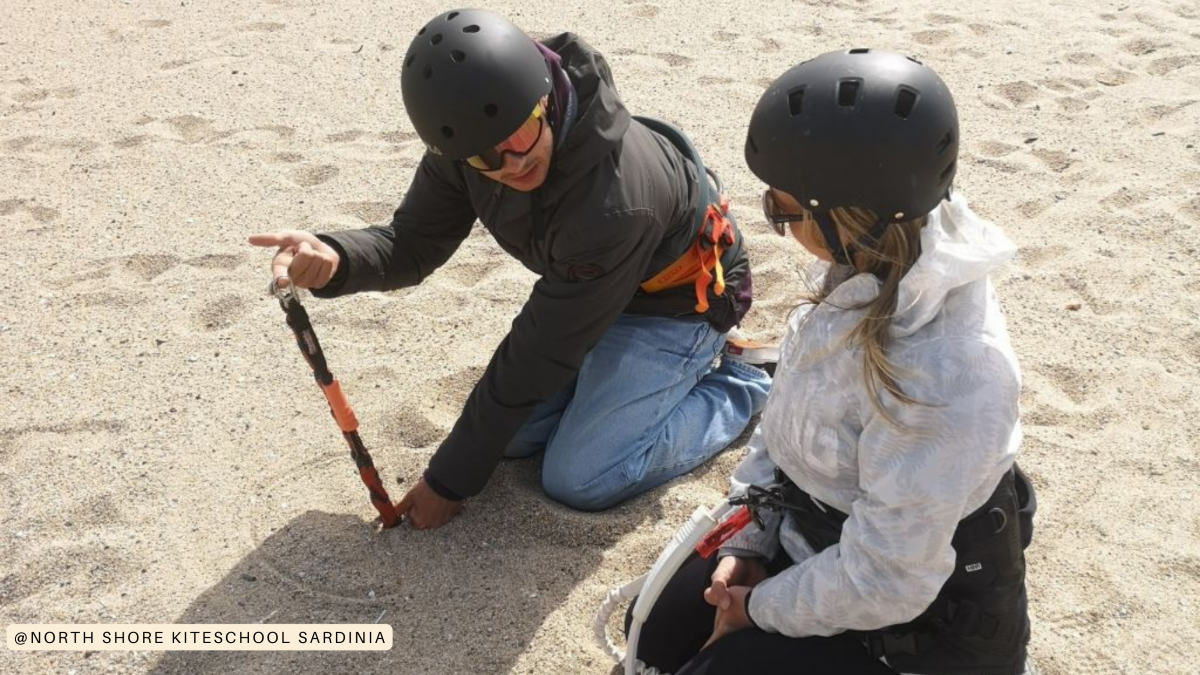
We want to give you some tips on teaching a kitesurf theoretical class.
Here are some steps you can follow to teach theory to your students effectively, to keep the quality of your lessons high, and give you the tools you need to be a successful instructor of kitesurfing theory.
The better you are, the more KISS - Keep It Short, Simple, and Fun you will be!
Prepare a lesson plan you will follow, but use it only as a guideline.
Plan the lesson beforehand,but be ready to adapt and modify the plan during the lesson if necessary.
- Take notes on the topics you will cover.
- Don't write a script, just the key points that you will then go into more detail.
- Prepare all the necessary equipment.
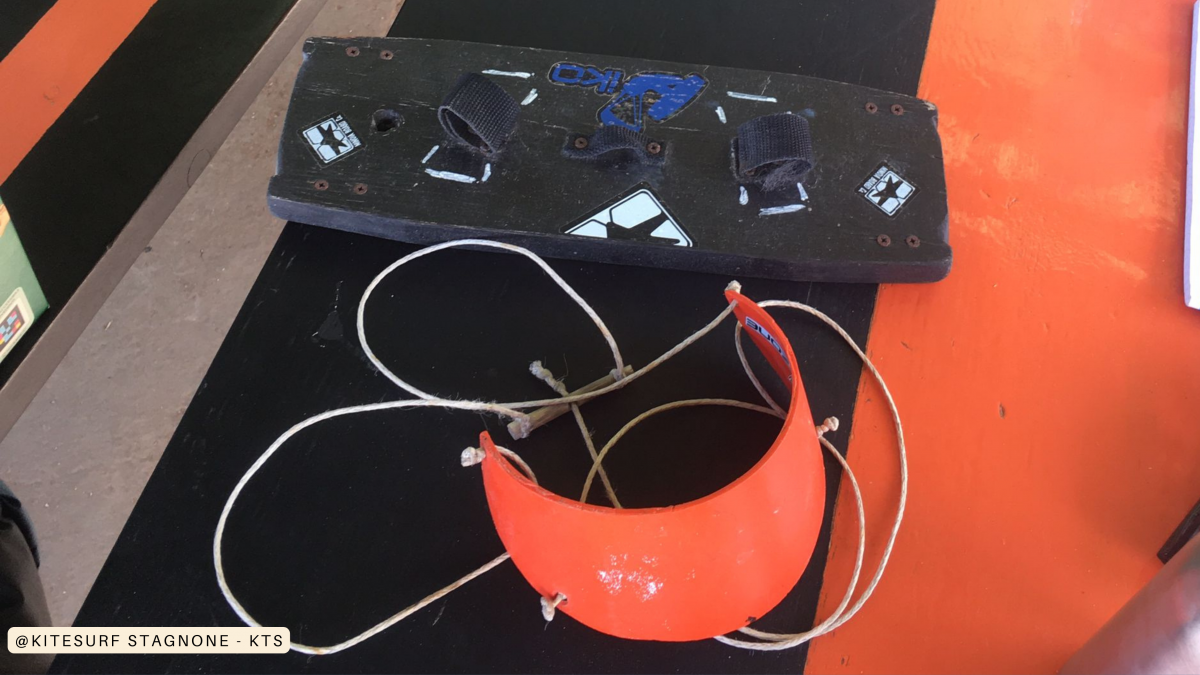
What does a theoretical class need to include?
- Introduction: Describe what the objective of the lesson is and why it’s important.
- Feedback: Ask your students what they already know about the topic.
- Key points: Include 3 or 4 important points for students to remember at the end of the lesson. Use them in the introduction, during the lesson, and at the end to summarize.
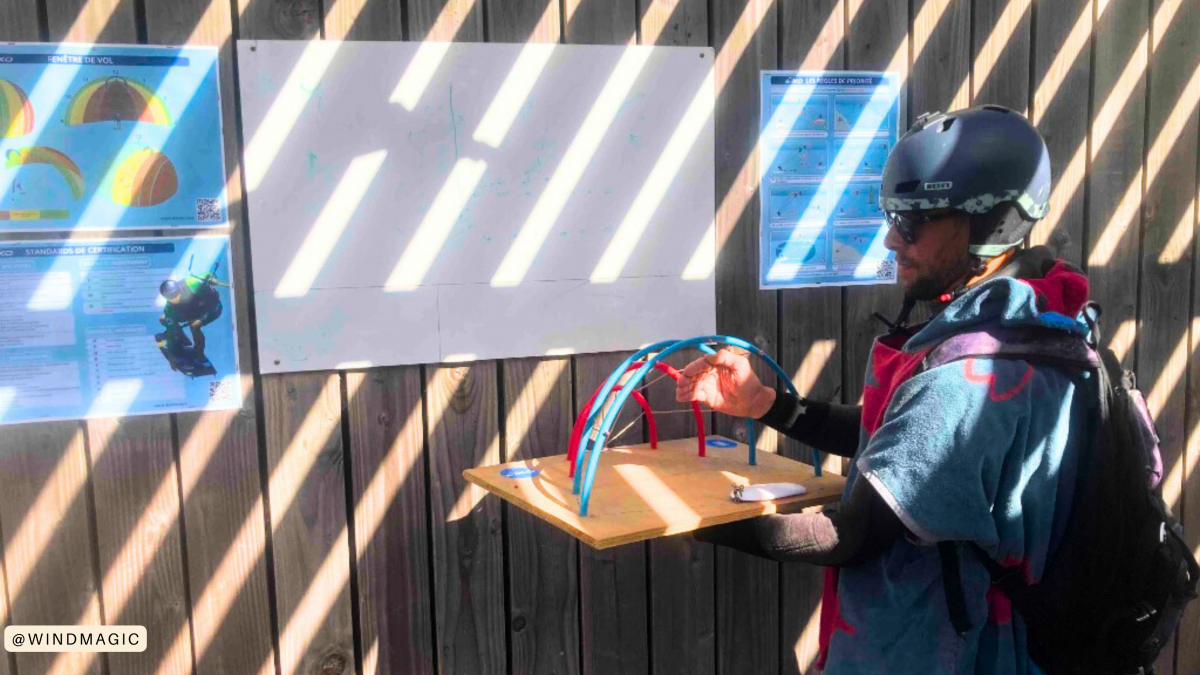
Your communication skills are very important.
Creativity is the key to being a good instructor during a theory lesson.
- Speak loudly (but not too loudly) and clearly.
- Don't speak monotonously; instead, moderate your tone and change your voice according to your explanation.
- Maintain eye contact.
- Consider the cultural aspects of your students and respect them.
- Use different communication channels.
- Use various tools such as computers, smartphones, whiteboards, sandy beaches, 3D models, and simulators - large or small. Give your creativity free rein..
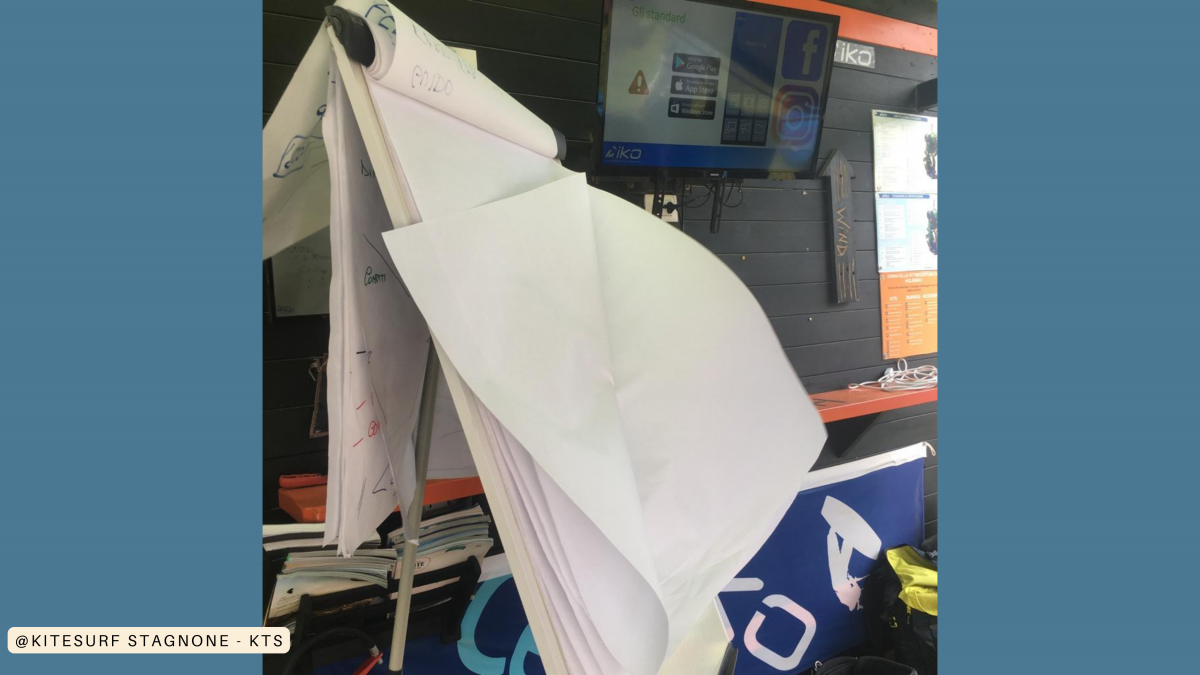
Interact with your students.
- Involve your students in the lesson to keep them engaged and focused.
- Avoid asking closed-ended feedback like, "Do you understand?" - "Yes/No." Let them explain what they understood in their own words and provide constructive feedback to help them improve their skills.
- Encourage your students to continue learning and exploring the sport even after the first lessons. Offer them resources such as instructional videos, apps, ebooks, and websites, where they can further enhance their understanding of kitesurfing theory.
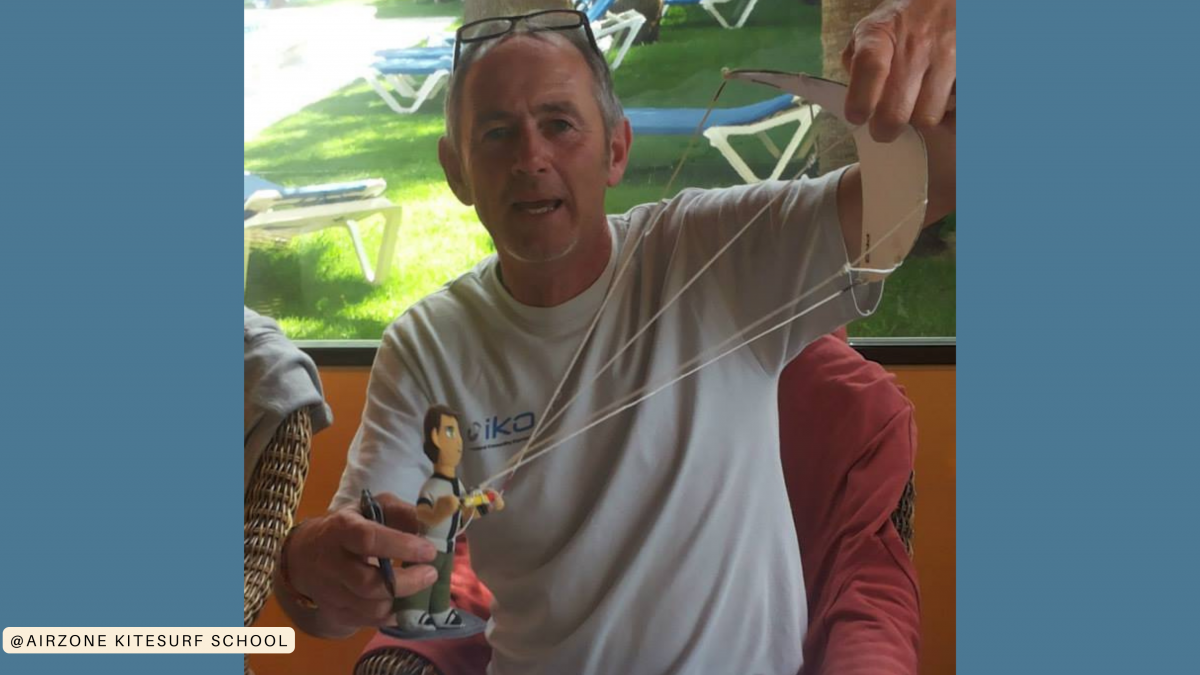
Theoretical kitesurf topics.
During your kitesurfing lessons, you may need to explain some theoretical topics. You can develop these topics using a whiteboard, a computer, a smartphone, posters in the school, or even 3D models and simulators. Unleash your creativity and imagination to make the 3D models and simulators, and your class will be a success.
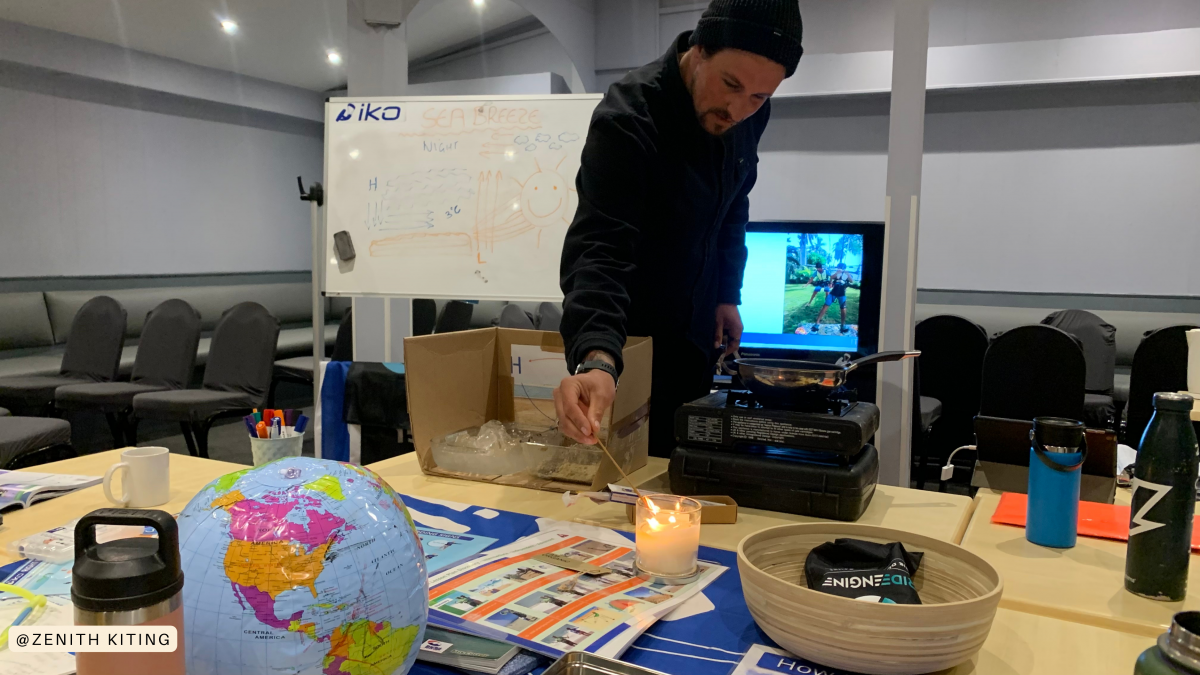
The topics you might need to cover during your kitesurfing lessons on a theoretical level are as follows:
- The five wind effects.
- Sea breeze diurnal and nocturnal.
- Tides.
- Basic principles of aerodynamics.
- Sea marine currents.
- Meteorology, High and Low Pressure.
The five wind effects:
1) The Venturi effect.
2) The wind shadow.
3) The wind gradient.
4) The Bay effect.
5) The compression effect
TIP
Focus on the dangers and possible benefits of the five wind effects, like the impact of the space for riding, launching, and landing the kite safely, wave conditions, upwind and downwind riding, and the consistency and quality of the wind.
Draw the five wind effects. For example, if you have a whiteboard available, you can use it, but drawing in sand is also perfect. You can also use common objects in the school to illustrate the effects.
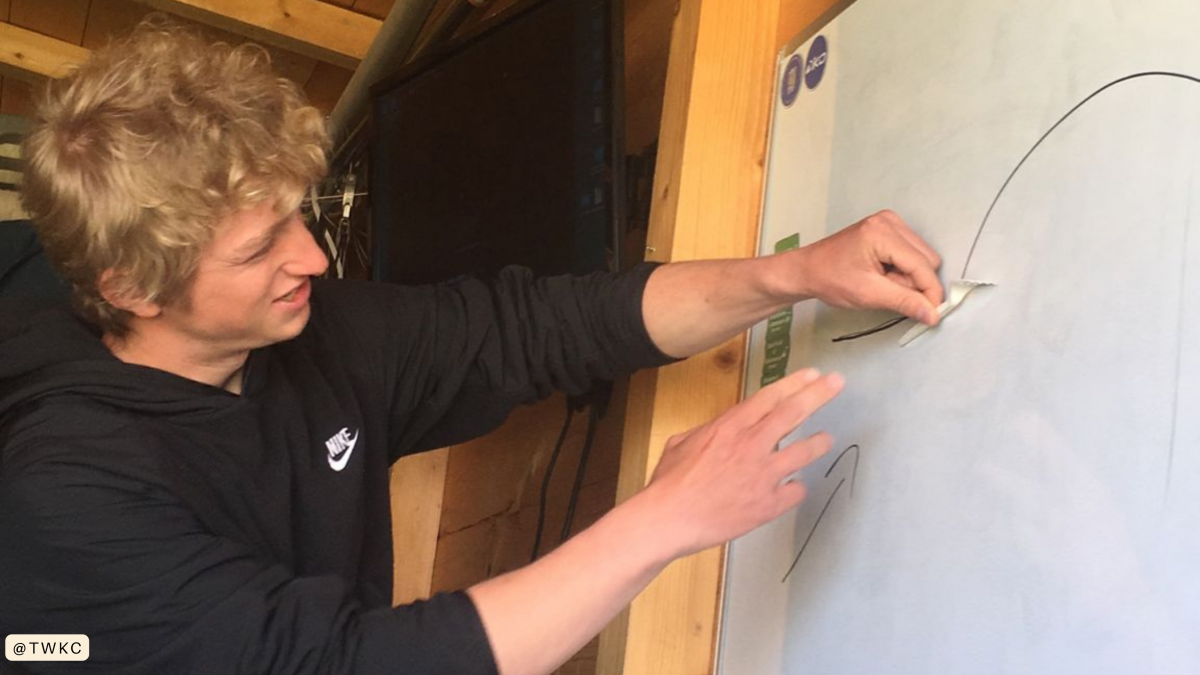
Sea breeze diurnal and nocturnal.
Explain how sea breezes are generated, when they occur, and the potential dangers they may present.
TIP
Focus on the impact of a sea breeze on a kitesurfing session, such as the change in wind strength, the eventual change in wind direction, and its duration.

Tides.
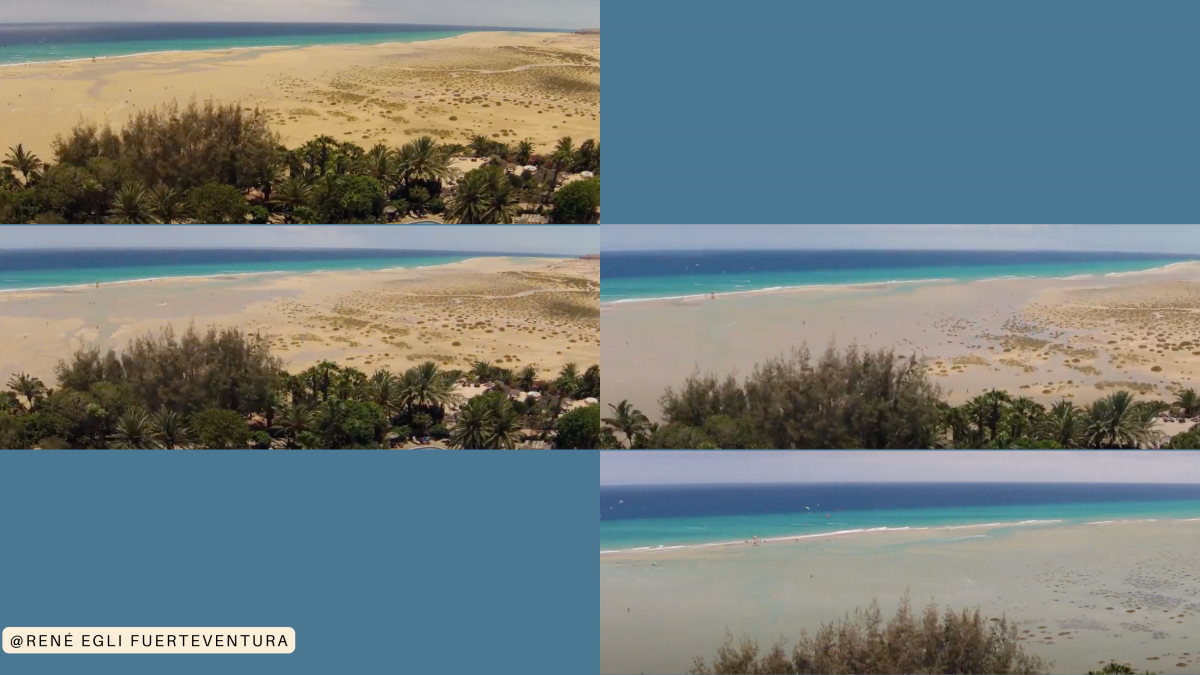
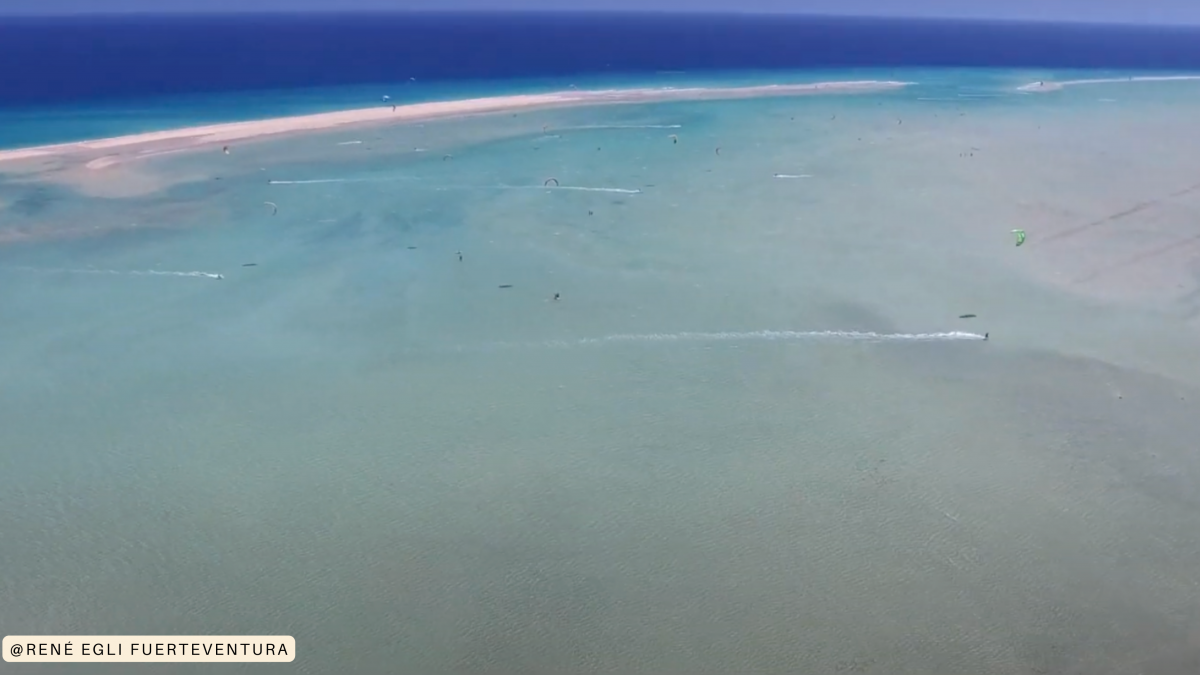
Explain the potential dangers and benefits the tides can have and how they can completely change the spot.
TIP
Even if they don't have much impact in your spot, always consider that your students may visit places where having high or low tides can really make the difference between kitesurfing or not kitesurfing (an example is Sotavento Lagoon in Fuerteventura - Canary Islands).
Focus on how to maximize the kitesurfing experience and ensure safety. Explain to your students how to check tide charts or consult local knowledge to understand the tide patterns and their impact on the specific location where they plan to kitesurf. Being aware of the tide conditions will help them to make informed decisions and adjust the session accordingly.
Basic principles of aerodynamics.
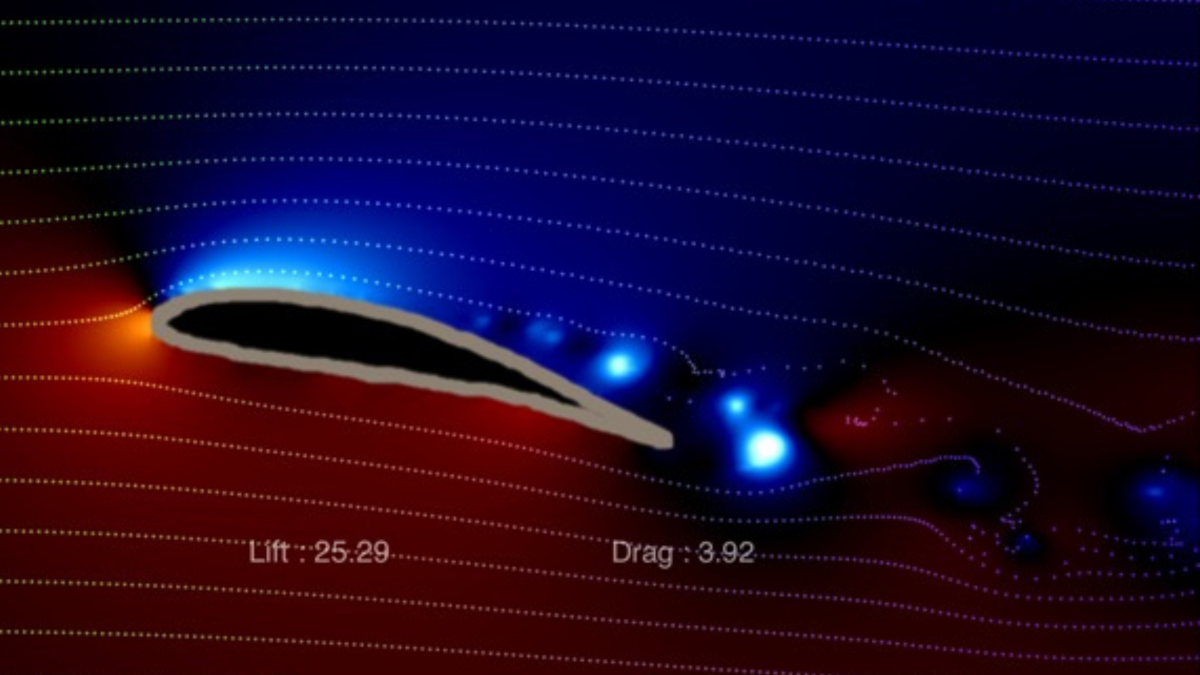
This topic is very technical and broad, so it’s fine to treat it in a simplified way, focusing on why kites fly and pull.
TIP
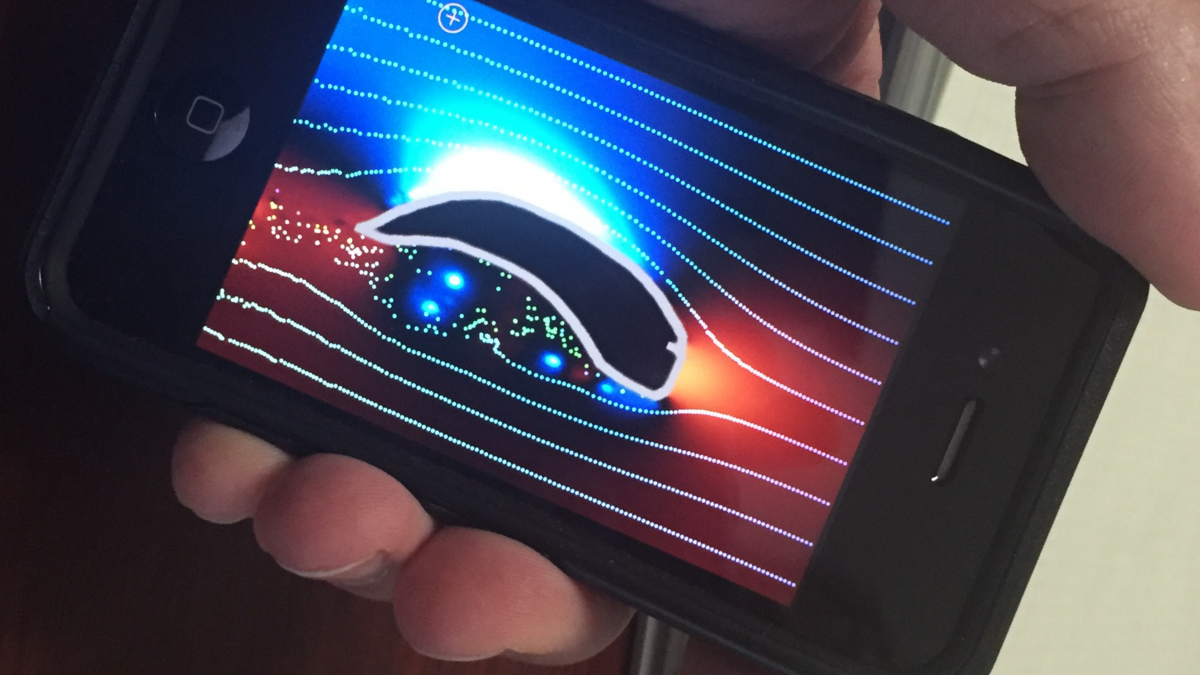
To help you with the explanation, download an app that simulates the wind tunnel.
This tool will allow you to make a complex concept visual and simple, making clear the forces generated once the kite is in the air.
Sea currents.
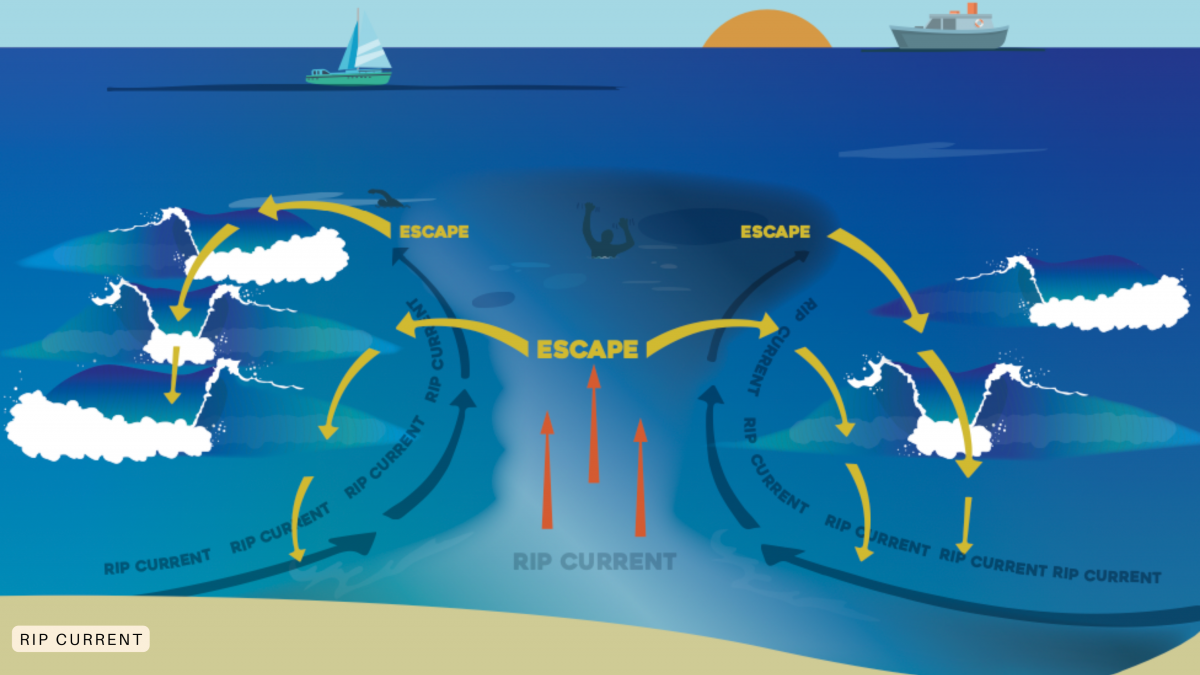
Explain how to recognize sea currents and their potential impact on a kitesurfing session.
Draw your students' attention, particularly to rip currents, teaching them how to identify these currents and how to respond appropriately..
TIP
Download and print IKO's free posters on sea currents; they are free and make it clear how to act correctly.
Emphasize the importance of having a good understanding of the local conditions, including tides and current charts, as well as local knowledge from experienced kiters. Explain how to assess the current conditions before entering the water, adjust the riding technique to compensate for the currents influence, and prioritize safety by choosing appropriate locations and being prepared.

Meteorology, High and Low pressure.
Meteorology is a very complex and extremely broad subject. It would take many hours of class time to cover the topic, so we recommend that you approach it by focusing on the basic concepts of meteorology.
TIP
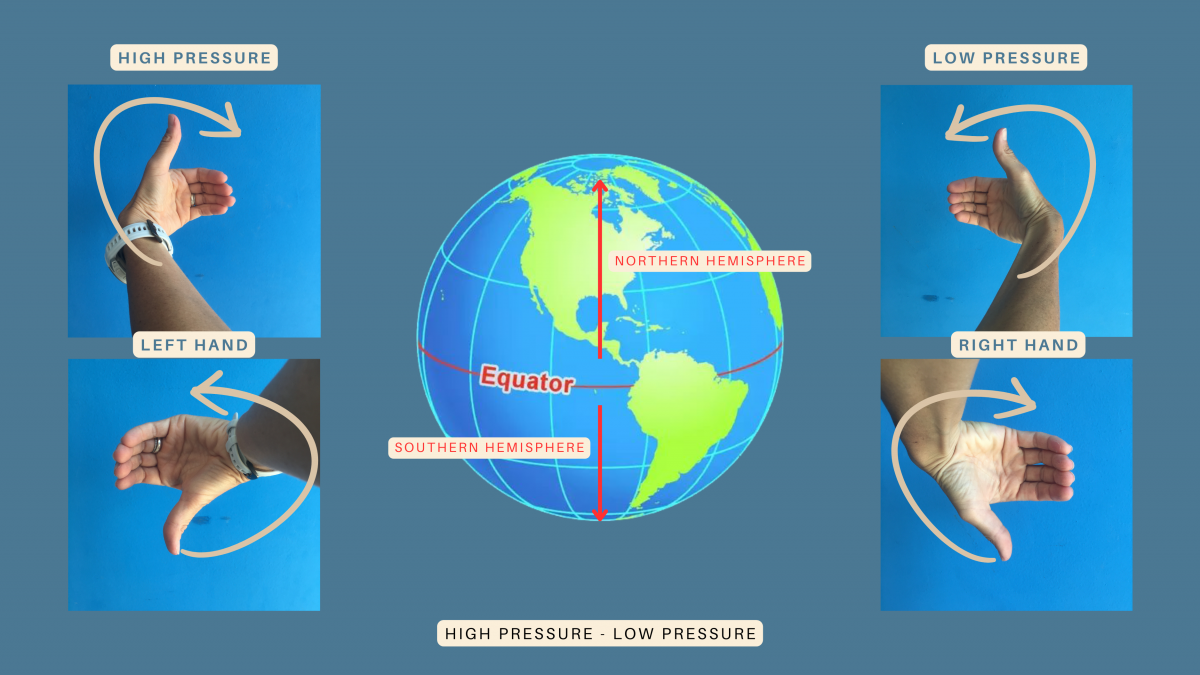
Focus on High and Low pressure and why they are essential for kitesurfing. Use the thumbs technique to memorize high and low pressure in the two hemispheres.
Also, focus on the impact of high-pressure and low-pressure systems based on regional and local factors. Advise your students to check the weather forecast, consult experienced local kiters, and assess the conditions on-site to decide if it is suitable and safe to kitesurf during specific high or low-pressure systems.
Practical kitesurf topics.
When teaching practical topics, remember to always follow the 8 IKO’s Steps Teaching Concept.
The IKO’s 8 Steps Teaching Concept.
The IKO teaching concept is based on achieving physical skills through a combination of your student's trial and error, along with your evaluation and correction.
Additionally, it involves developing your student's background knowledge and skill consolidation, ensuring they understand why they are performing an exercise.
The 8 steps are:
- Evaluation: Who?
- Set a goal: What?
- Incentivize and motivate: Why?
- Give reference points: How? When? Where? Which exercises?
- Get student’s feedback (1): Did the student visualize well?
- Observe: Student’s trial and error.
- Get students’ feedback (2): 90% of the learning process.
- Correct: Only when necessary!
Riding upwind.
Explain the prerequisites and, if necessary, discuss possible reasons for failure.
TIP
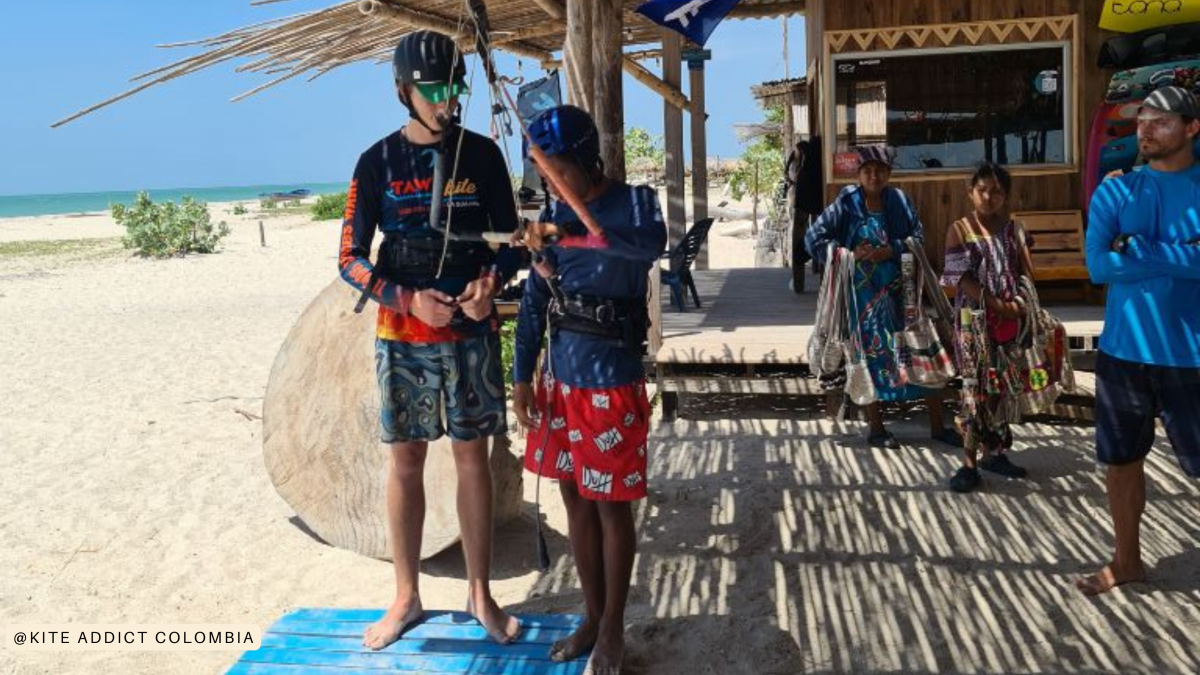
Focus your explanation on what combination of the kite, body, and legs/board your student should maintain.
Videos on the IKO App, a 3D model, or a small simulator can help your student gain an outside perspective and better understand what to do once on the water.
First jumps.
Explain the necessary prerequisites and discuss potential reasons for failure.
TIP
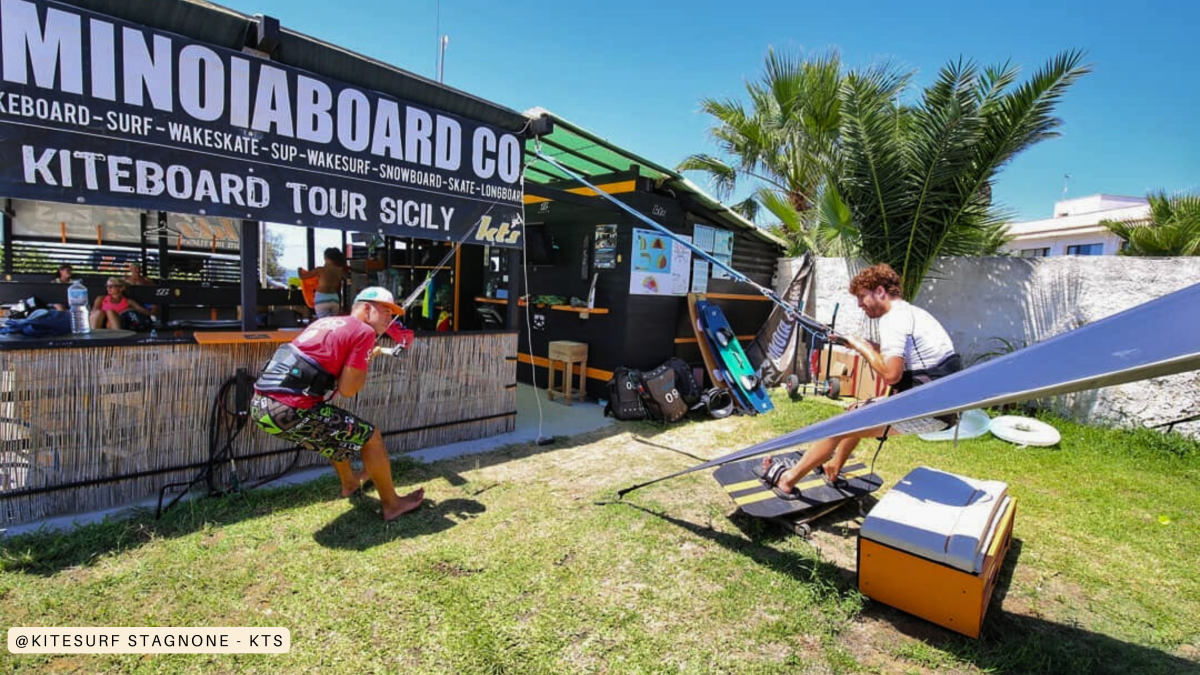
Focus your explanation on what combination of the kite, body, and legs/board your student should maintain; also, encourage them to practice with a physical simulator.
Using a physical simulator can help reduce the stress of trying something new before attempting it in the water, and it aids in building muscle memory.
Remember to adapt your teaching approach to your student's learning style and pace. Create a positive rapport with your student. Be funny, dynamic, patient, and supportive, and promote a safe and enjoyable learning environment.
Do you really know how your kitesurf bar’s safety system works?
Author: Marica Moda
Kitesurf bars and safety systems, let's clarify.
Kiters at the beach often argue about which brand makes the best bar, what materials are used, and which safety systems work better than others.
But do you really know how your bar's safety system works? Did you simply rely on the shopkeeper, the owner of the kitesurf school that sold it to you, or the friend who recommended it?
How many kitesurf bar safety systems do you know?
Kite companies are always trying to innovate in equipment performance and safety. If you compare the performance and safety of kitesurf from its origins to today, we have made great progress.
We have moved from essential two-line bars with no depower capabilities and no quick releases to bars with depower systems, simple adjustments, and quick releases that can be used with one hand.
One of the most important features in the design of a kitesurf bar is the operation of the safety system.
Bar security systems: safe and unsafe.
First, it's necessary to clarify that no safety system can completely depower a kite, especially in high winds.
Some safety systems come very close to 100% depowering; that is why IKO recognizes and approves safety systems if they can release most of the kite's power in any wind condition (from very light to strong).
This occurs in bars with front re-ride or 5th-line safety systems and doesn’t occur with other safety systems on the market.
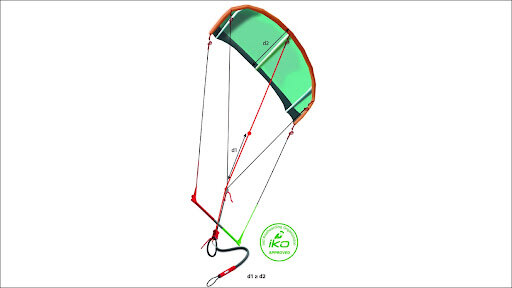
Approved by IKO: front re-ride security system.
It's one of the 4-line bar safety systems, most commonly used on LEI (Leading Edge Inflatable) kites, thus with the inflatable leading edge.
The safety line is one of the two front lines, and in order for the system to work, the bar must be able to slide along this line in the direction of the kite for a distance equal to at least one wingspan of the kite (in the graphic: d1 ≥ d2).
Once the chicken loop's quick release with the front re-ride system is activated, the bar will slide toward the kite on the front safety line, and the kite will instantly and safely lose most of its power.
Be careful not to have the front lines too tightly rolled together (related to jumps with rotation and kite loop), because this could still cause the security system to malfunction (in this case, use the swivel to keep them separated at all times).
The front re-ride system is the safest, which is why it’s IKO-approved, and fortunately, today, it's the most widely used by major kitesurf equipment manufacturers.
For the front re-ride system to function correctly and be approved by IKO:
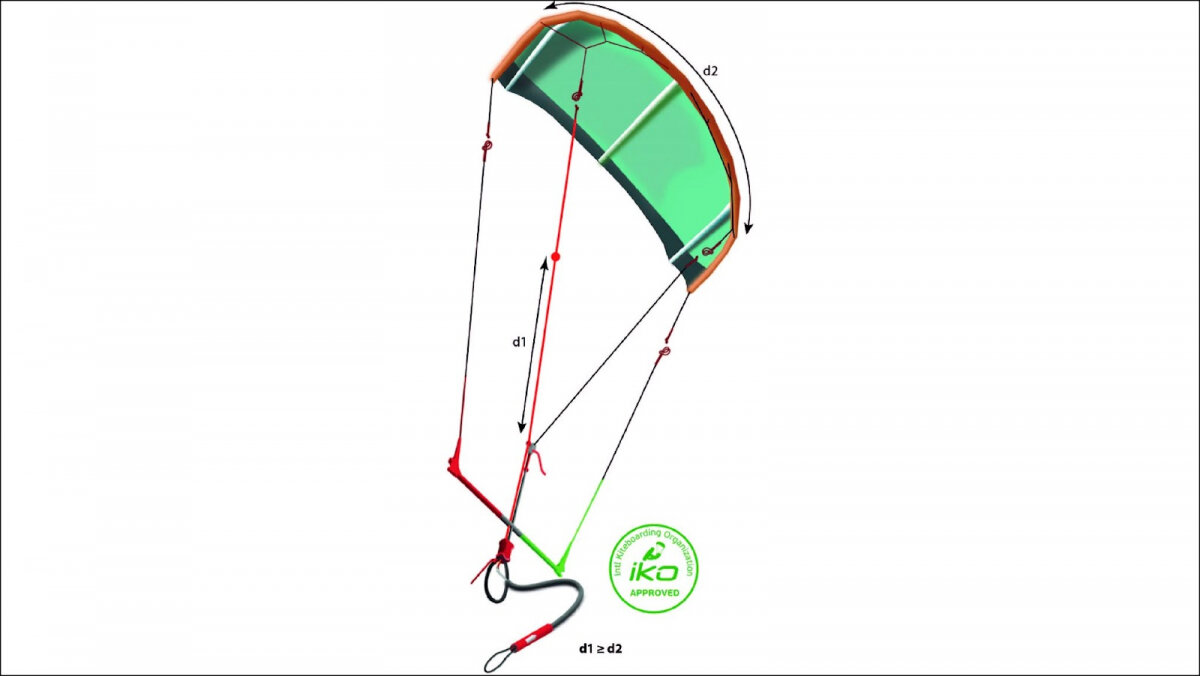
d1 must be equal to or bigger than (≥) d2 (wingspan of the kite).
Approved by IKO: 5th line security system.
The safety line is a 5th line, connected to the center of the leading edge on LEI kites and the center of the trailing edge on foil kites.
For the safety system to work correctly, the bar must slide along the 5th line in the kite's direction for a distance equal to at least one kite string (in the graph: d1 ≥ d2).
It facilitates the relaunch from the water of a C-Kite, and some brands use it to ensure more excellent structural stability of the kite.
IKO approves it; however, the depowering is less than the front re-ride system, and the risk is that the 5th line wraps around the kite since it’s attached to the kite tow point (where the pump leash connects).
Activating the quick release of the chicken loop allows the kite to lose most of its power; still, you must be careful because, as mentioned before, the 5th line could wrap around the kite and damage it.
For the 5th line security system to function correctly and be approved by IKO:d1 must be equal to or bigger than (≥) d2 (kite chord).
NOT approved by IKO: OSR (Oh S**t Ring) safety system, asymmetric and mini 5th line.
Fortunately, few brands use these security systems, and IKO recommends that you never use them in any circumstances. If your bar has one of these security systems, we recommend that you change it to protect your safety and the safety of others.
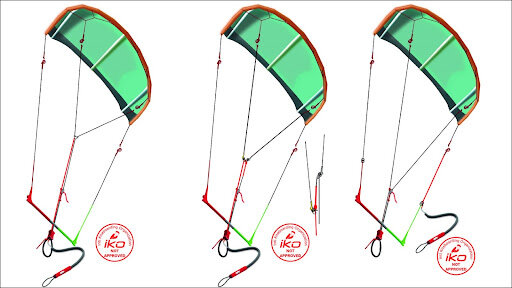
The asymmetric safety system and the mini 5th line don’t totally depower the kite because once you activate the chicken loop’s quick release, they keep both front lines in tension, not allowing the kite to lose most of its power, risking also kite loops.
In the OSR system (fortunately, few are seen on beaches), the safety line is one of two directional lines (back lines). Even in this case, the system doesn’t allow total depowering of the kite, risking uncontrolled kite loops.
So, what is the best safety system for a kitesurf bar?
The best safety system is the FRONT RE-RIDE, and it’s 100% IKO-approved.
On bars with the front re-ride safety system, you can find the stopper ball; it will be on the safety line.
Not all brands use it, but it can be very useful and is recommended for:
- self-landing;
- bar recovery in the water to relaunch the kite;
- self-rescue.
Without it, upon activation of the chicken loop’s quick release, the bar will be free to slide up to the kite, and you will have to spend more time arranging the often tangled lines.
If you use a single bar with the stopper ball for different-sized kites, we recommend adjusting the stopper ball position before entering the water.
The stopper ball must allow the bar to slide a distance ≥ the wingspan of the kite you plan to use or make your life easier by fixing it according to the wingspan of your biggest kite.
Where to place the stopper ball on the safety line correctly?
To determine the correct stopper ball position, simply lay the safety front line next to the leading edge of your kite.
The stopper ball on the front safety line should be placed at least:
- 1 kite wingspan from trim, on bars with the front re-ride system (in LEI and 4-line kites);
- 1 kite rope from the trim, in kites with the 5th line.
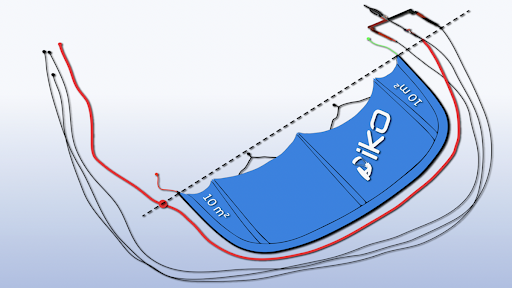
What is the other stopper ball you have on the bar between the chicken loop and the trim?
Some bars may also have a stopper ball along the center line (between the chicken loop and the trim), which is used for some old-school freestyle tricks. It can be fixed or slid and limits the upward movement of the bar.
Be careful: this stopper ball may slide down without you noticing, not allowing you to depower the kite; check it periodically.
IKO doesn't recommend that beginners use this stopper ball because, without it, the kite can be easily and completely depowered by simply letting go of the bar.
How often do you test your kitesurf bar safety systems?
Remember that a broken or malfunctioning security system is dangerous, so it is essential to check its proper functioning; otherwise, when you need it, it will not work as it should.
Try the safety systems every time you go kitesurf, it will only take a second, but once you are on the water, you will be sure you have all the safety systems you might need.
Pre-flight check before connecting to the bar:
- Activate the quick release of the leash and close it again
- Connect the kite leash to the front safety line
- Activate the quick release of the chicken loop and close it again
- Aook the chicken loop to the harness and lock it with the chicken finger
- Grab and bring up the floaters on your bar to make sure the lines are in order
In addition, we recommend that you periodically rinse your bar, kite leash, and line cutter with fresh water so that any grains of sand or salt encrustations dissolve, keeping your safety systems 100% efficient.
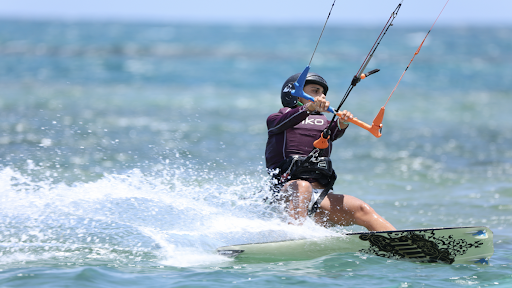
Do you know what your kitesurf bar is made of?
The kitesurf bar is composed of several elements, all made of materials that are generally very strong and suitable for high stresses.
The bridles and pigtails.
They are made of high-modulus polyethylene fiber with a unidirectional core and braided sleeve. The patent is from Spectra and Dyneema, from which the respective names are derived. This material has high abrasion resistance due to its low coefficient of friction and self-lubricating characteristics. Pulleys can be plastic or metal.
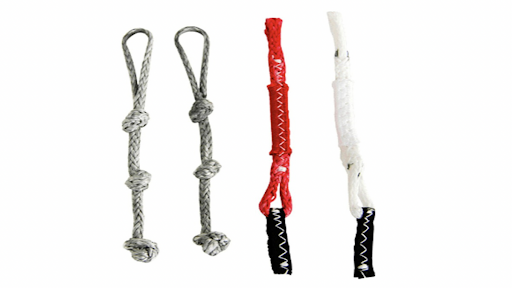
The lines.
They are made of thermoplastic material cast and drawn into fibers. The high-density polyethylene is Dyneema or Spectra, braided at optimized angles to minimize the risk of stretching lines. Heat treatment and brushing optimize the material's inherent properties, while an additional coating protects the lines from UV rays and water absorption, making them buoyant.
The diameter of the lines varies between 1.5 and 2.5 mm, and the breaking strength varies between 180 kg and 300 kg (depending on the quality, diameter, and final seam).
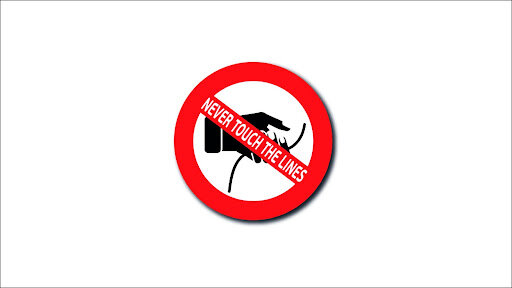
When the kite is in the air, never touch the lines for any reason, even during launch or landing.
The bar.
The bar is in aluminum with a non-slip coating.
You must consider the ratio of the size of your bar to the size of your kite. A large kite has a larger radius of curvature than a small kite. For this reason, the length of the bar, which acts as a lever, should be proportional to the kite's size:
- use a short bar (45 cm or less) with kites smaller than 8 m²;
- use a medium bar (45 to 55 cm) with kites measuring between 8 m² and 12 m²;
- use a long bar (55 cm or more) with kites measuring more than 12 m².
Thanks to a system at the end, many bars can be adjustable and be lengthened or shortened depending on the kite you use and the responsiveness you prefer.
Generally, it's not possible to interchange 2, 4, and 5-line bars and use one bar on different types of kites.
The chicken finger.
It's a rigid rubber tube that ensures the chicken loop stays connected to the hook of your harness.
The chicken loop.
It's a rigid rubber ring that connects the bar to your harness. It's also connected to your kite's front lines. Its connection to the harness allows you to ride without supporting the kite's full traction with your arms.
The chicken loop’s quick release.
The chicken loop’s quick release system allows you to quickly release yourself from the kite's pull in an emergency.
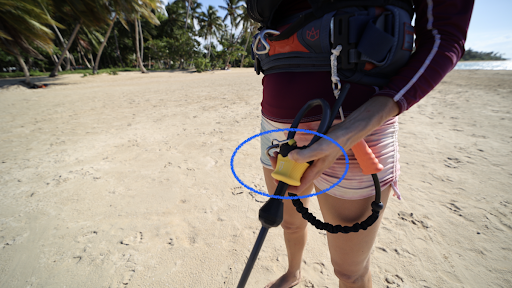
In this regard, some brands have devised a quick and effective release and reattachment system: after operating the safety system and then opening the chicken loop of the bar, to reattach it, simply push the end of the chicken loop into the appropriate slot. No need to touch the release system; the chicken loop also closes with one hand.
The stopper ball.
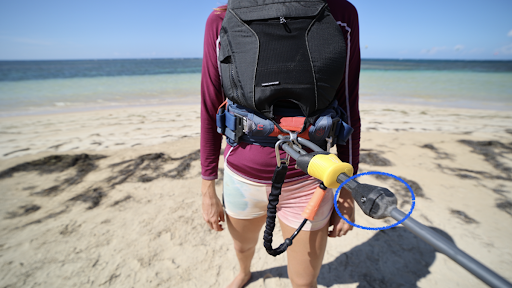
It's a hard rubber or marine aluminum ball that stops your bar when, for safety reasons, you activate the chicken loop’s quick release, and it slides on the front safety line toward the kite.
The stopper ball position is dynamically settable. It must be calculated to allow the kite to foil and hold itself in an inverted position, minimizing aerodynamic drag.
The swivel.
It's a rotatable component of your bar that keeps the lines from rolling up in the event of a trick, allowing through its rotation to put the front lines back in order, leaving the bar free to slide on the front safety line.
The floaters.
They are made of floating foam and are located on the sides of the bar and make it float.
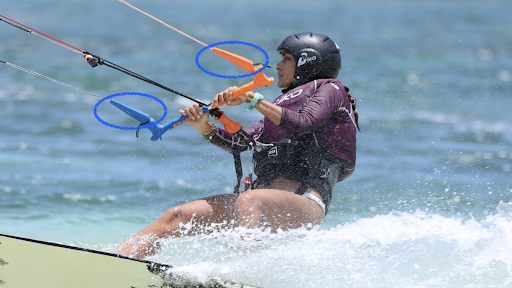
Simple golden rules.
Follow these simple IKO Standards for your safety on the water and the safety of others:
- Use a bar with a chicken loop with quick release;
- Use a bar with an IKO-approved safety system: front re-ride or 5th line;
- Use a kite leash with the quick release connected to the front of your harness;
- Always keep a line cutter in your harness (in case you need to get rid of lines it could become your first safety system).
These are a few simple rules to follow for safe fun.
Remember that all safety systems should be tested by turning them on and off before each use, so you can be sure they will work when you really need them, and always use a bar that allows your kite to lose all its power.
Have fun and enjoy the wind.
What is the wind window?
The wind window is the area in the sky where it is possible to fly a kite. We cannot fly a kite outside of the wind window as here it is not possible to create power nor keep tension in the lines. If there's no tension in the lines, the kite will stall and fall from the sky, therefore, it is important to understand how the wind window works to maximise your fun on the water and prevent any accidents or incidents from occurring.
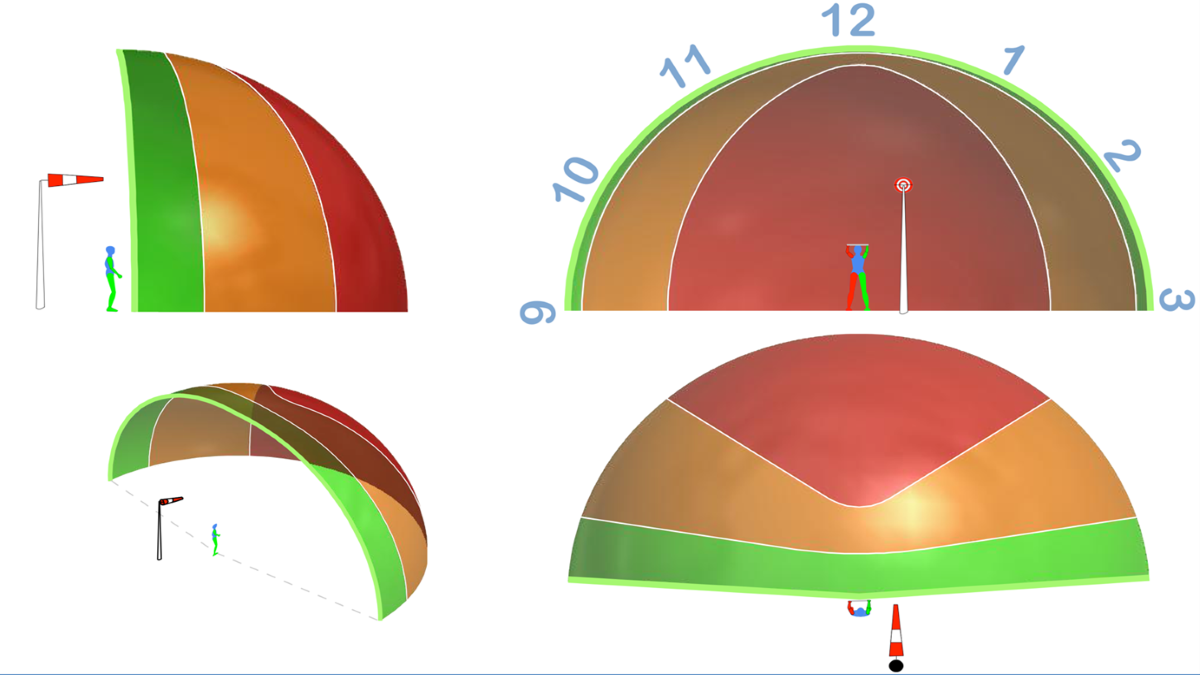
Here is a quick exercise anyone can do to help picture the wind window:
- Head down to the beach on a windy day. It helps if it's windy, it will make it more obvious to feel where the wind is coming from.
- Turn to face the wind, you should feel the wind blowing equally on either side of your face. If you feel the wind hitting one side of your face more than the other, adjust your position until the wind is blowing equally on either side of your face. You are now facing directly into the wind.
- You can also keep an eye out for nearby flags, windsocks and wind turbines. These are also great ways of spotting wind direction!
- Now that you are facing directly into the wind. Anything positioned towards the wind of your current position can be referred to as being "upwind" of you. "Upwind" means closer to the wind.
- Now turn 180 degrees so that the wind is blowing directly onto your back. Anything positioned further away from the wind of your current position can be referred to as being "downwind" of you. "Downwind" means further away from the wind.
- You should now have a basic understanding of what upwind and what downwind means.
- Continue to face directly downwind with the wind hitting your back. Raise both of your arms out either side of your body. Your arms are now aiming directly "across the wind". "Across the wind" means perpendicular to the wind direction.
- Keeping your arms straight, slowly bring them together in a clapping motion. The wind window is situated in the zone you have just moved your arms. I.E., the wind window is positioned directly across the wind, either side of your position, and anywhere downwind of this line.
- An important thing to mention is should the wind direction change, the orientation of the wind window will also change.
- Repeat the steps above to reevaluate the orientation of the wind window. Soon this will become second nature and you will no longer need to perform my wind window dance!
What does the wind window look like?
Now that you have a good understanding of where the wind window is, let me explain what it looks like.
Quite simply... It looks like a big half dome. The flat section of the half dome is across the wind on either side of your position and travels upwards towards the sky. The curved section of the half dome is downwind of your position.
Check out the diagram below for a visual reference.
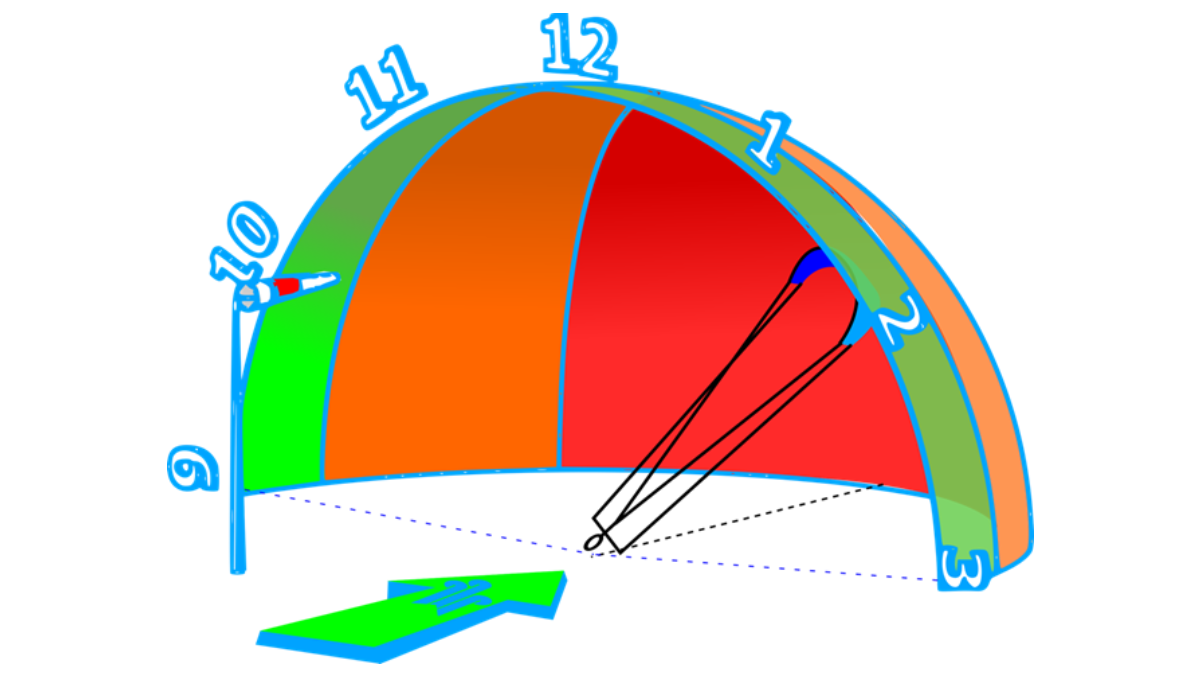
Any eagle-eyed readers may have noticed there are numbers on the wind window. We can compare the face of the wind window to the face of a clock.
- 12 O'clock is vertically above us in the sky, in the centre
- 9 O'clock is across the wind of us at ground level, to the left
- 3 O'clock is across the wind of us at ground level, to the right
These are the main three points to understand. 10 O'clock, 11 O'clock, 1 O'clock, 2 O'clock make up the other positions just like a clock face.
How big is the wind window?
The size of the wind window is dictated by the length of the lines you use.
If you were to use 10M lines, the wind window would be 10m from your position to the perimeter. If you were to use 20m lines the wind window would be 20m from your position to the perimeter.
Therefore, adjusting the length of the lines we use will directly impact the size of the wind window making it either bigger or smaller.
Why would we want to adjust the size of the wind window?
- The smaller the wind window becomes, the less space and distance there is for the kite to accelerate, thus reducing the amount of power we are capable of generating. When you learn at an IKO affiliated kite centre your very first lessons will be on short lines to reduce the power and increase safety.
- Reducing the length of lines we use will also take up less space, this can allow more kites to be flown on a small beach. A simple way to improve safety and increase the number of lessons we can teach at one spot.
- In contrast to point number one, we may want to increase the line length to increase the amount of power we can generate. Having a larger wind window will allow the kite to pick up more speed when diving across the wind window making it a great option for a light wind day on a large kite.
- Longer lines also mean that the kite will be flying higher in the sky, further away from the surface of the water. The higher the kite, the cleaner and stronger the wind will become. This again can help to improve kite stability and power in low winds.
How to fly a kite in the neutral zone (edge of the wind window)
The neutral zone can be seen on the diagram below as the green area around the perimeter of the wind window. Here there is little power created by the kite due to it being in an aerodynamic position. Air can easily flow on either side of the canopy thus creating little power. To keep a kite in the low power zone you must steer the kite gently. Slow steering will keep the kite towards the edge of the wind window.
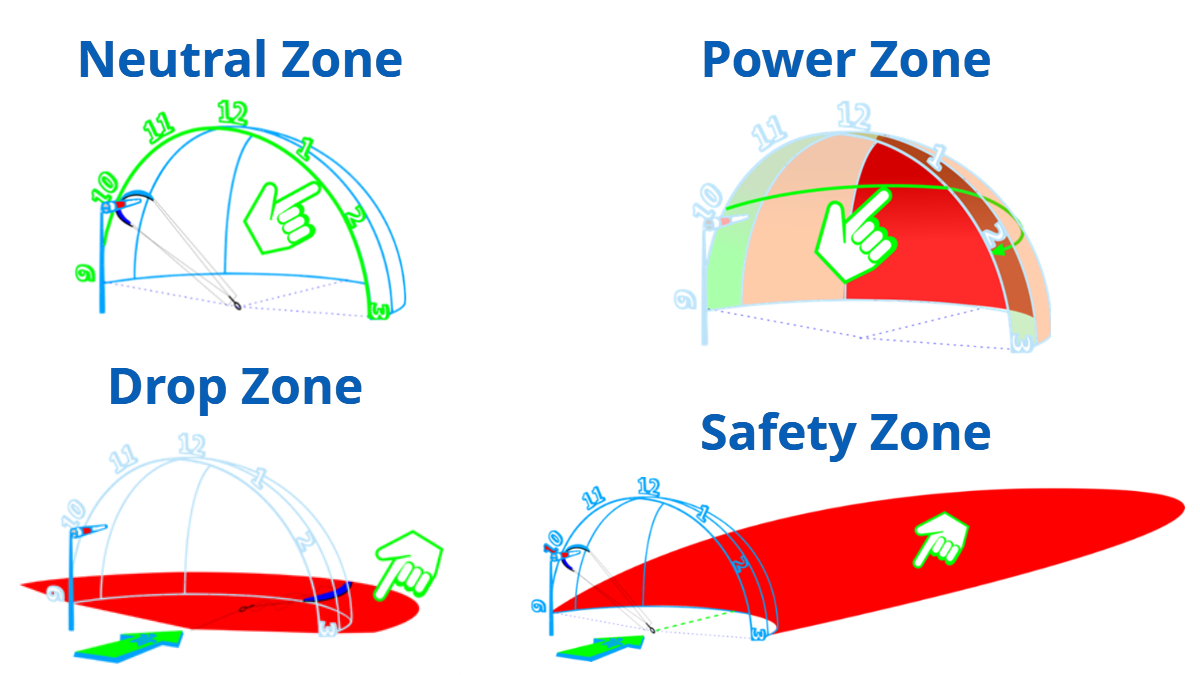
How to generate more power
Once you have mastered steering the kite slowly across the edge of the wind window you can experiment with slowly adding a bit more power. You can do this by being more aggressive with the steering to bring the kite down in front of you. Now you will be working the kite into the high power zone. Be careful not to dive the kite too hard as the faster the kite steers across this high power zone, the more power you will receive.
We can increase the power a little more each time until the kite is now steering directly through the centre of the power zone downwind of you. A figure of eight is the simplest way to keep the kite constantly within the high power zone.
How to launch and land a kite using the wind window
The main goal when launching a kite is to raise the kite from ground level towards the zenith of the wind window (12'Oclock) in a smooth and controlled manner. It is important to launch the kite from a position of low power to prevent being pulled off balance.
As explained earlier in this article, the edge of the wind window otherwise known as the low power zone stretches from 9 O'clock on one side, all the way up to 12 O'clock, and then over to 3 O'clock on the other side.
We can therefore launch a kite from either 9 O'clock ground level on one side or 3 O'clock, ground level on the other side. The side we choose can depend on the wind direction, local hazards and other beach users around us.
When landing a kite you'll start with the kite high and slowly lower it through the low power zone down towards either 9 O'clock or 3 O'clock. Again, take the local spot and hazards into consideration.
What is the drop zone?
The drop zone is the area at ground/sea level located directly underneath the wind window. It is called the drop zone because it's the area the kite would land in should it crash/stall. Therefore it must be kept clear of any obstacle for the rider’s safety and the safety of others. The size of the drop zone will depend on the length of the lines, plus the span of the kite and the kite leash length.
What is the safety zone?
The safety zone is a minimum distance we try to keep away from hazards to prevent injury or accidents from occurring. The general rule is to keep a safe distance of three times the length of your lines minimum away from any hazard. If you were to use 20m lines you should aim to keep at least 60m away from any hazards. The safety zone needs to be large enough to allow sufficient time to fix any issues with your equipment should you encounter any.
Where can I learn more?
For more on the wind window and other key kite concepts, check out the new IKO Assistant Training Course, which you can now start online from the comfort of your home.
Author: Bradley Mackelden
In this article, I'll introduce you to the intriguing and fast-growing sport of wing foiling and give some great insight into how, and why, you should take the plunge.
Basic winging terminology
- Wing: The handheld inflatable sail
- Board: The platform the rider stands on
- Foil: The underwater hydrofoil which gives the board lift
- Leash: The leash connecting the wing to the rider
Background on winging
Different forms of wing powered sports have been around since the 80's however the wings were often bulky, heavy and awkward to manoeuvre. The sport as we know it today has only taken off in the past couple of years as equipment has become increasingly lighter. The development and affordability of hydrofoils have allowed the sport to grow and is one of the main driving factors in the sudden surge of wingers on the water today.
What is winging?
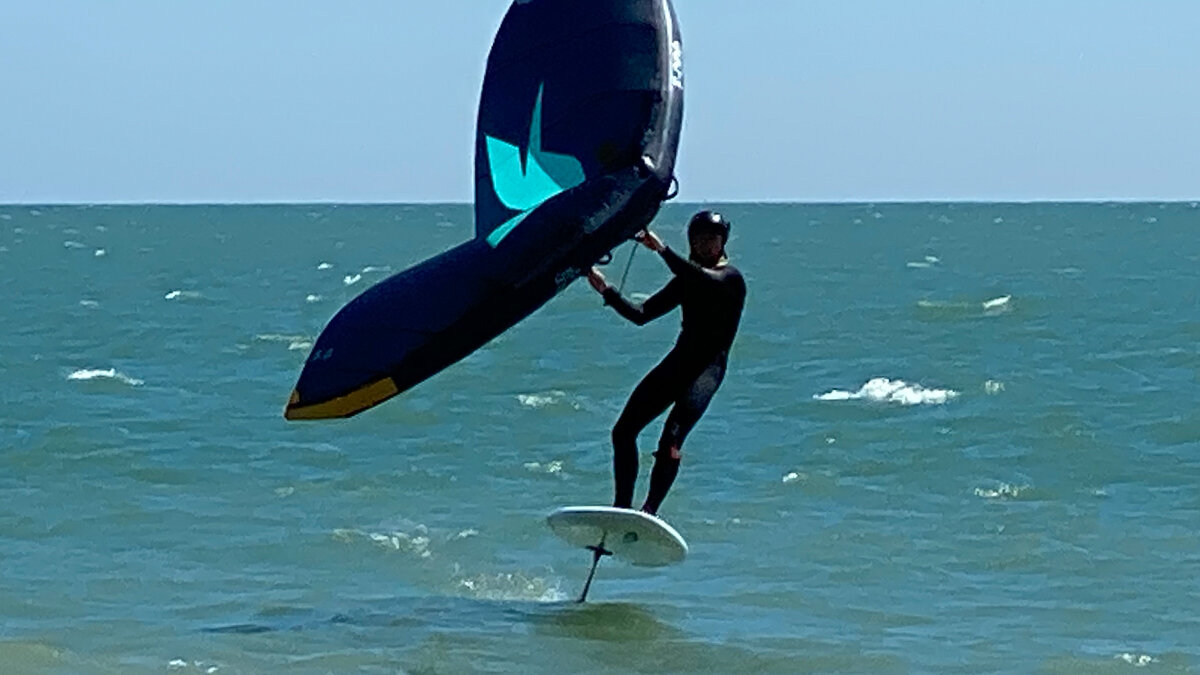
The rider holds a wing that is not too dissimilar from an inflatable kite. Most wings take their shape and rigidity once fully inflated, however, some wings have a physical boom structure to increase stiffness. The rider stands on a board and uses the wing to harness wind energy which in turn, powers them along. Where this sport differs from any other wind-powered water sport is that the wing is handheld and not attached to the rider by a harness nor the board. This makes it an extremely free-flowing sport and is part of the reason so many people love it.
What is wing foiling?
Winging can be done on a variety of different boards. The most basic form of winging can be done on a stand up paddleboard. This is a lot of fun for kids and families turning a relatively calm day down the beach into a bit of an adventure. A great way to introduce wind sports in a low-risk manner!
Wing foiling is where the rider uses the same type of handheld wing to power them along but now with the introduction of a hydrofoil. A hydrofoil can be mounted onto a variety of different sized boards. The more beginner boards being larger and higher volume whereas advanced boards will be much smaller and partially sink under the rider's weight.
Wing foiling is much more extreme and allows riders to perform increasingly more technical tricks, ride at higher speeds, surf waves, and even jump!
Why should kitesurfers learn to wing foil?
I’m a keen kitesurfer, kite foiler, outdoor sports enthusiast, and love all things watersports related! I decided to take up wing foiling last year and here are my top reasons why all you kitesurfers out there should join me!
- Simplicity: There is something sweet about simple sports. It makes it easy to travel with, reduces set up time, plus there's less equipment to buy! When I wing foil, I'll head to the beach, pump up my wing, attach my leash and I'm good to go.
- Easy to learn: Due to its simplicity, winging is surprisingly easy to learn. Less equipment means fewer things to think about!
- Cross-offshore winds: It's not great for kitesurfing at my local spot when the wind blows in a cross offshore direction. The wind tends to be very gusty on the beach making the kite unpredictable and dangerous to handle. Before winging, I would travel to other kitesurf spots. Now I can stay local and wing even in cross offshore winds. I have found this to be my favourite wind direction as it allows me to catch swell and drop a hand putting the wing into a neutral position.
- Safe: It is a very low-risk sport. The power in a wing doesn't even come close to the power a kite can generate. The boards tend to be much more buoyant too which makes it easy to self-rescue and paddle back into the beach like a regular surfboard.
- Accessible: Due to the low-risk factor, it makes winging extremely accessible to people of all ages, young and old. As I mentioned above, it's the kind of sport families can try on a low wind day down the beach.
- Busy days down the beach: During the peak of the U.K summer, beaches can often become overcrowded and many members of the public are unaware of the potential dangers kites and lines can involve. I find it's not worth taking the risk of trying to launch a kite on a busy beach. These busy summer days are the days I have turned to wingfoiling. I can simply walk down to the water's edge without needing lots of space to set up or launch and off I go!
How to learn wing foiling?
- Practice handling the wing on the beach: You need to have a relatively good understanding of wind sports before even picking up a wing. Some introductory videos on youtube can teach you the basics.
- Suss out how to carry the wing and board together: This may sound extremely simple but trying to carry a wing and a large foilboard together can be awkward especially if you have a large shore dump crashing down on top of you. It's important to master this skill before even venturing out so that when you return to shore post-session, you'll be able to escape the waves before your shiny new kit becomes victim to a good spanking.
- Practice on a SUP: This is particularly useful for anyone who hasn't tried hydrofoiling yet. Learn how to wing first, then learn how to foil!
- Use your wing foil board behind a boat: If you or your friends own a boat, it can be valuable to foil on your potential wing board behind a boat first. This will give you a chance to work out the foot positioning and riding speed required for the foil to provide lift.
- Keep an eye on the IKO website: The IKO will soon be offering wing courses for all levels. To get updates about winging and other courses, log in to your IKO account and sign up for training alerts.
Top Tip!!!
Learn in strong enough winds! My biggest mistake when learning was trying to wing foil in light winds. I soon found out that this can make the wing hard to handle and requires a lot of pumping and good technique to get the board onto the foil. Going out in a moderate wind allows you to 'park and ride' meaning you will have enough power to lean back against the wing and won't have to pump as much to get going.
Winging progression path
- Setup, secure and pack down the wing
- Handling wing on beach
- Enter/exit water with wing and hydrofoil
- Self-rescue
- ROW rules
- Ride on your knees
- Ride standing
- Pumping/getting on the foil
- Ride upwind/downwind
- Foot change
- Jibes
- Tacks
- Catching swell
- Jumping
What's the future of winging?
In only a matter of years, the sport has already seen vast improvements and new boundaries are being reached every day. Freestyle is a fast-growing discipline and the level of tricks some riders are now performing is difficult to comprehend.
In my humble opinion, where I see this sport developing is wave-riding. Being able to use the wing as a source of power to catch a wave, a bit like tow-in surfing with jet skis. The beauty of wing foiling is to drop one hand and surf freely on breaking waves or even rolling swell, this has got to be one of the coolest feelings ever!
Let's see where this sport takes us in the years to come. One thing is for sure, wingfoiling is here to stay and I highly recommend anyone contemplating whether or not to take it up to just do it already!
Want to turn your passion for wingfoiling into a career?
Become an IWO Instructor.
The International Wingfoil Organization (IWO) is IKO's sister organization and was founded by professional wingfoil instructors with more than 20 years of experience in watersports education.
The IWO Instructor certification is recognized worldwide, allows you to have your professional skills recognized when you apply for jobs at wingfoil schools and sets you apart from the competition with non-certified instructors.
You can start the IWO Instructor Training Course (ITC) online today.
Author: Bradley Mackelden
Author: Bradley Mackelden
How do kitesurfers predict the weather with clouds?
Firstly let's cover why you'd want to predict the weather solely by looking at the clouds around you? This is as close as you'll ever get to a superhero power!
Kitesurfing is a wind dependent sport and one thing which can have a huge impact on the wind around us are clouds. Clouds can do all sorts of funny things to the wind... they can make the wind stronger, weaker, change the direction, or completely kill it off and finish your kitesurfing session prematurely. Therefore as kitesurfers, we need to understand what certain clouds mean and how we should react to them. This knowledge will aid you in choosing the correct size kite, deciding if it's safe to even venture onto the water, or perhaps sneak an unexpected session in which wasn't forecast.
How are clouds formed?
It starts when heat from the sun warms the surface of the earth. Warm air is less dense than cold air thus causing the hot air at ground level to rise. As the hot air rises, water vapour within these air particles starts to cool. For a cloud to form, the water vapour needs something to condense onto. Tiny particles in the air such as dust, salt, smoke provide the perfect surface. When enough vapour condenses around one of these particles a single cloud droplet is formed. The droplets are so small that a cubic meter of air contains 100 million of them. Droplets can combine and once heavy enough will fall from the sky as rain, sleet or snow.
What are low and high pressure systems?
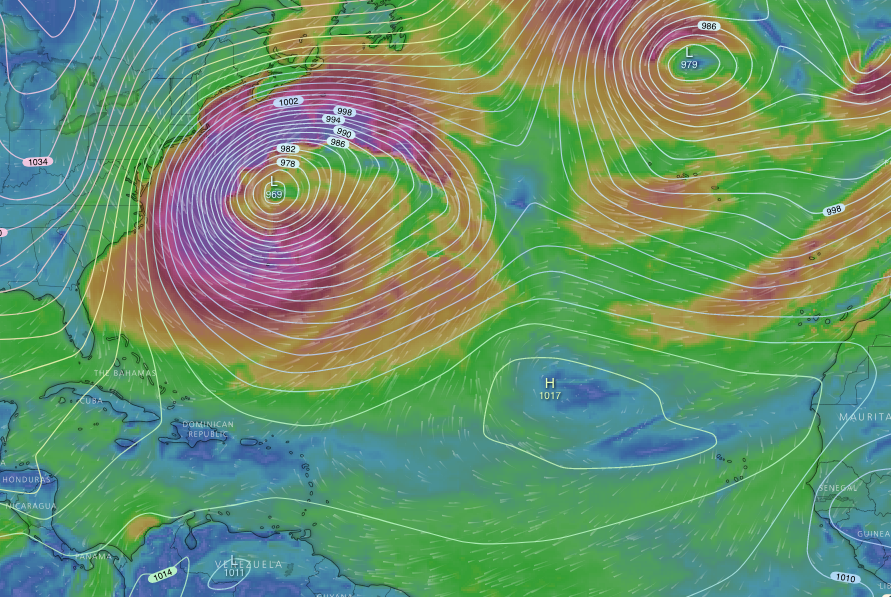
All winds originate from heat generated by the sun. Hot air rises from warmer regions of the earth and then cools as it reaches colder climates. Extremes of this happen at the Equator and the North/South poles.
Standard atmospheric pressure at sea level is 1013, 25 millibars. Anything above this figure is classed as “High pressure” and anything below is classed as “Low pressure”.
Low pressure: An area of low pressure is formed when hot air rises away from sea level into the upper atmosphere thus leaving an area of less dense air near the surface.
High pressure: An area of high pressure is formed when air descends from the cool upper atmosphere towards sea level thus creating an area of dense heavy air near the surface. Hence the name “High Pressure”
Air naturally wants to travel from areas of high pressure towards areas of low pressure. Think of it like an inflated balloon, the pressure inside the balloon is ‘high’ as there are lots of air particles squashed into a small space. When we release the balloon, air flows from the balloon into the surrounding air which is of ‘lower’ pressure. The same is true with the air around our planet. It is the movement of air from one type of pressure system to the other which generates the winds around our planet.
Low pressure tends to bring strong wind and rain, while high pressure tends to bring calm, clear and sunny conditions. I know what I’d choose, even if it does mean a little drizzle! :)
Different types of clouds, what they look like, what weather to expect!
Fairweather Cumulus: These are low-level clouds which look like fluffy pillows of rolling mounds appearing during warm sunny days.

What to expect: When they appear in a high-pressure, this is a sign of a potential sea breeze. Ideal for sneaking in that unexpected session, time to call your mates and hit the beach for a kitesurfing session! For anyone that's not familiar with the term ‘sea breeze', this is a microclimate effect that can increase the wind speed providing the originating wind is blowing in an onshore direction.
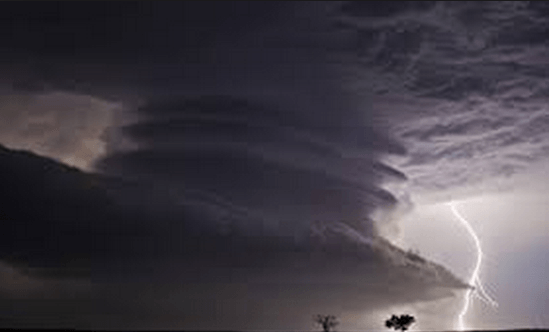
Cumulonimbus: These start as cumulus clouds but continue to grow larger and larger. In extreme cases, they can develop into a shape not dissimilar from a huge peeling wave. Cumulonimbus clouds start at a low level but can grow until 10-12km in height.

What to expect: You can expect heavy rain and strong squally winds. These clouds can move in any direction, even against the wind. Therefore making them the most concerning to kitesurfers. Read on to see my top tips if you spot a Cumulonimbus cloud while kitesurfing.
Altocumulus: Layered rippled elements. They look like several cumulus clouds attached together.

What to expect: These clouds are also known as pre-storm clouds. They are often followed by thunderstorms and turbulent weather
Nimbostratus: These are the largest cloud type, often very thick and can completely block the sun from penetrating through to ground level.

What to expect: Get your rain jackets out because you can expect heavy rainfall or snow for days to come!
Cirrus: High-level clouds which are very thin and wispy. Due to being formed at high altitudes, the water droplets will have crystalised into ice. Looks similar to my hair on a 40knot day down the beach.

What to expect: An early sign of a low-pressure system approaching. Get your 7m ready it's time to send it! yeeew!!!
Cirrostratus: Another high-level cloud appearing in layers often making the sky appear whiter in colour.

What to expect: These clouds are a good indicator of low-pressure systems coming your way.
Top Tips
Ask your instructor for advice
When taking your first kitesurfing lessons, ask your instructor to point out different cloud types during the lessons. The best way of being able to differentiate between them is to see first hand. Every cloud is different and they will not always look the same, but it’s a great place to start.
Keep checking your surroundings especially upwind!
When kitesurfing it is important to have an eye on your surroundings. More often than not, most squalls and bad weather coming your way will be approaching from upwind. Therefore keep looking over your shoulder now and again to ensure it's safe to keep kitesurfing. However this is not always the case as explained above, a Cumulonimbus clouds can approach from any direction even against the wind. If you see a cumulonimbus cloud approaching mid session your safest bet is to head back to the beach, land your kite and wait for it to pass.
If ever in doubt, get out!
This is important, if you are ever unsure of what the weather is going to do. Again the main one here is the Cumulonimbus cloud. If you arrive at the kite beach and spot one of these approaching, wait until the wind has settled before venturing into the water. Trust me, you don't want to chance having a kite up in strong squally winds, it can be extremely dangerous.
Don't let a strike turn off your light!
If you ever hear or see thunder and lightning approach, return to the beach and safely land your kite away from the water's edge.
Develop your knowledge of this subject and many more
The IKO recently revamped the Assistant Training Course (ATC) by dividing the course into two modules - Module 1 eLearning and Module 2 In-Person Training. Module 1 covers concepts and theory, this can be taken online from anywhere in the world. Module 2 is hands-on training which must be completed at an IKO Center.
The ATC is not just for people who want to become IKO Assistants or teach kitesurfing, it’s also for kiters who simply want to increase their knowledge.
For more on predicting the weather with clouds and other key kite concepts, check out the new IKO Assistant Training Course, which you can now start online from the comfort of your home.
Wow, what a hectic time we've all had the past few months! Covid-19 has taken over the world and ground everything to a halt. I'm so pleased to say that most countries are now on the declining side of this gnarly wave and that lockdown restrictions are starting to ease in the majority of countries around the world. And so with it, kitesurfing has made a miraculous reemergence!!!
Here in the U.K., I have never seen so many kites in the sky! I'm sure it's the same for all you kitesurfers out there wherever you may be? If we can take one positive from all of this, it's shown just how fortunate we all are to call ourselves kitesurfers, shredders of the seas!
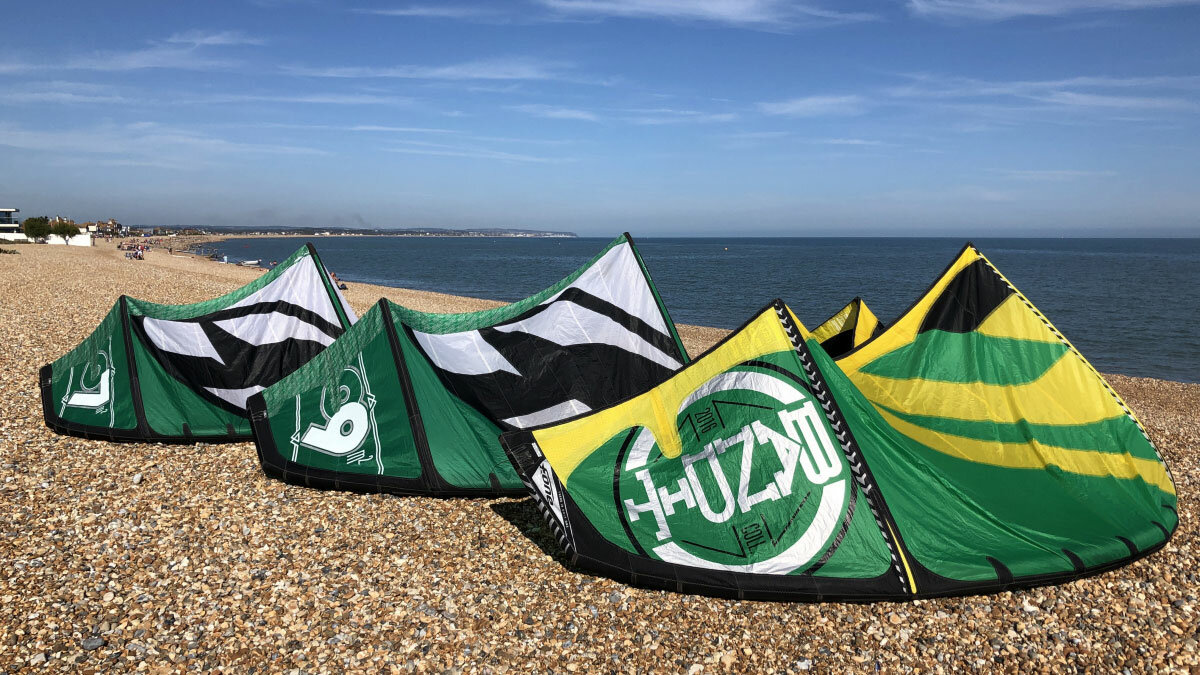
A busy return to the sport can also bring inherent dangers. With more crowded spots than ever before, it is important to be safety cautious and take care of one another. In this article, I'm going to refresh your memory on some important kitesurf safety procedures and checks to ensure we all have a fun, but ultimately safe time on the water.
What to do before you arrive at the beach?
Check over all your kitesurf equipment for wear & tear. You don't even need to be at the beach to do this!
-
Find an open space large enough to run out the full length of your lines. Next, you're going to walk through your lines untangling them as if you were heading out for a session. I like to attach a leash to a fixed object and hook the end of all my lines through the carabiner on my leash. Walk back down the lines towards the bar (checking for knots and worn out fraying lines). Top tip for removing stubborn knots: leave the line to soak in hot water for a few minutes first before working the knot out. If the lines are severely damaged, you should replace them.
-
Check the line length! Grab your harness and hook into the chicken loop. As long as you've secured the lines onto a fixed object, you should be able to lean back into the harness putting light pressure on the lines. Use the trim strap to take all trim out of the bar (max power setting). Now sheet the bar all the way in. Where does the bar come to? It should be touching the top of the safety system. If it isn't, this is a sign that your front lines have stretched and your kite will be prone to back-stalling. If you have extra knots under the floats on the bar, move the steering lines down one knot, therefore making the steering lines longer. Pull the bar in again and see if it now touches the top of the safety system. Repeat this process until all lines are equal length. If you have used all the knots down by the bar, you may have the option to trim the lines on the kite. The final possibility is to physically stretch out the lines, just double-check that the bar is level and not steering to one side.
-
Look over the kite for any repairs such as pinholes, patch as necessary. I highly recommend inflating the kite and leaving it for a few hours to ensure there are no valve/bladder leaks. The last thing you want is a jellyfish kite on your first session back!
-
Check the bridles on the kite as these can often become worn-out from the pulleys travelling along the line constantly.
Refresh your memory on the kitesurf R.O.W. rules
Have a quick look over the R.O.W rules and test yourself on them. The most important rule is to avoid collisions at all costs. However, here are my top five rules to help avoid any near misses in the first place.
-
Upwind kite Up, Downwind kite down (The golden rule).
-
Starboard tack has the right of way over port tack. Starboard tack means you are going to the right with your right hand and right foot first.
-
Give way to kitesurfers entering the water and trying to get away from the beach.
-
The rider surfing a wave has priority, give way to them.
-
No priority on land, please use common sense.
Know how to perform a self-rescue
This is an essential skill which you will have learned if you had lessons at an IKO affiliated kite centre. Have you forgotten how to perform a self-rescue? If so, you can visit your nearest IKO affiliated school and book a lesson to cover this. Alternatively, the IKO has a great step by step video tutorial explaining the process. To gain access to these tutorials, sign up for IKO kiter premium today!
It is essential to have practised this especially at a time like this! We don't want to put unnecessary pressure on our emergency services as they are already overwhelmed.

Keep a distance when on the beach
This is super easy to forget as we are all so stoked to be back at the beach and excited to see our kitesurf buddies! Please respect your country's social distancing rules to help shed a good light on the kitesurfing community.
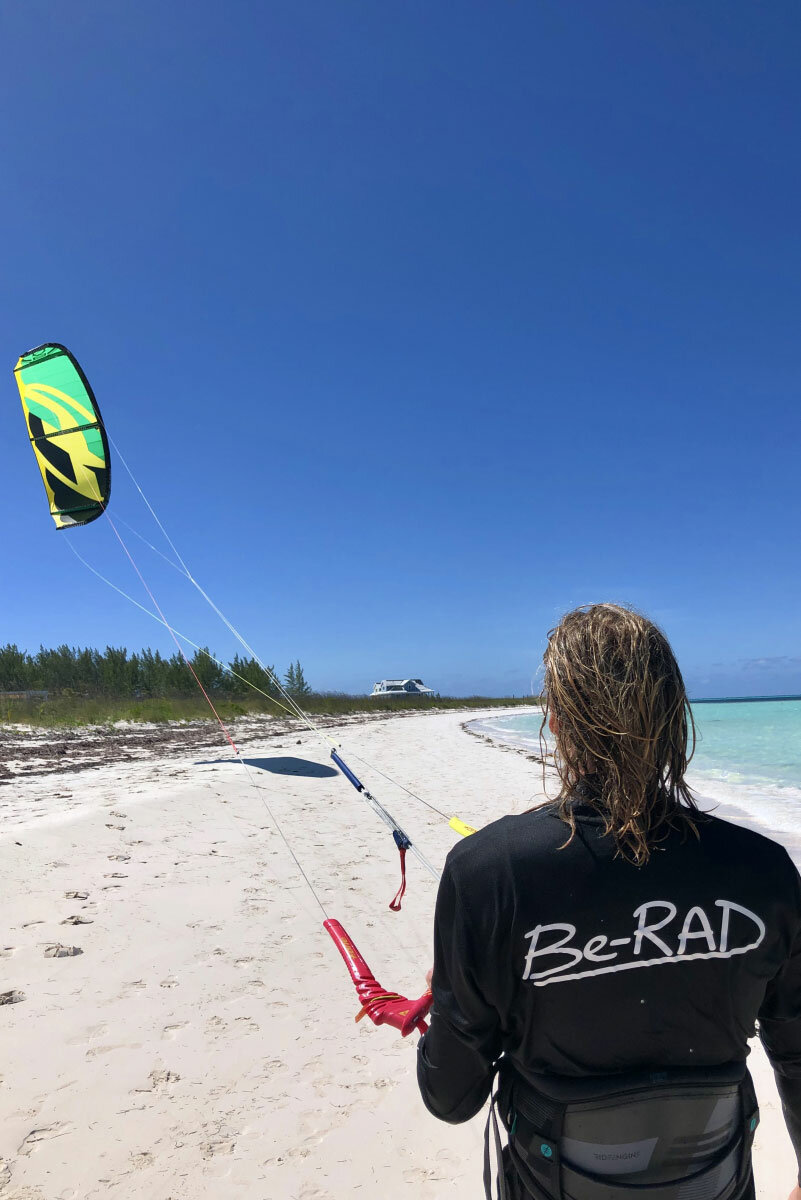
Launching a kite safely
It is important to launch a kite with as little power as possible. Unfortunately, the majority of kitesurfing accidents actually happen on land when launching the kite. It is always best to launch with an assistant rather than a self-launch. Here is my simplified launching procedure:
-
Ask your assistant to pick up the kite by the leading edge and flip it so the leading edge is in a vertical position (you should be hooked into the kite at this point).
-
Keeping CONSTANT tension on the front lines, slowly walk upwind. You can let go of the bar while walking upwind.
-
Keep watching the kite, once the canopy of the kite stops flapping, you are almost in the correct position to launch.
-
Take a couple of small steps upwind to ensure the kite won't stall when launching.
-
Give the thumbs-up signal once you have done your pre-flight checks and you are sure the kite is set-up correctly.
-
Slowly launch the kite upwards with one hand. My top tip here is to have the spare hand ready to fire off the safety, should anything go wrong.
Landing/Self-landing
Again it is always best to land with an assistant. Simply ask a fellow kiter or tap your head (universal landing sign) signalling you want to be landed, slowly lower the kite down.
You may find that you have such a rad session, happily unaware that you are the last kitesurfer on the water. This has certainly happened to me numerous times!
In this case, you will need to self land the kite. The safest way to self land your kite is to pull the safety release.
-
Pull the safety and wait for the kite to flag out.
-
Once the bar has travelled all the way away from you, work hand over hand along the safety line.
-
Follow this line through the bar making sure to only keep tension on the single safety line preventing the kite from relaunching.
-
Walk all the way towards the kite grabbing the bridle connected to the safety line.
-
Now you can hold the kite by the leading edge and pack away as normal.
I hope you've found this article worthwhile, please share the article across social media and spread my knowledge for safe kiting! Enjoy that first session back on the water if you haven't already done so. I can tell you now, it’s unimaginably fun!
Sign up for a Kiter Membership to get worldwide insurance coverage along with access to 25+ hours of eLearning. Your kiting has never been safer!
Written By: Be-Rad Watersports
How Kiters Can Get Fit for the Upcoming Kite Season
As some locations begin to lift lockdowns put in place due to COVID-19, everyone is frothing to get out on the water! To get ready to get back on the board, you’ll want to prepare your body for the upcoming kite season. I’m a kitesurf instructor and last winter, I started training as a CrossFit coach, because kiting and fitness go hand in hand. As beaches are reopening in some locations, my recommendation is to get in good kiting shape to help prevent injuries and improve your performance while on the water! In this article, I’ll share some of the best at-home exercises you can do to improve your kitesurfing.
No gym? No problem! Learn to Train at Home.
Gyms are still closed in some areas so this blog will focus on bodyweight exercises that you can do at home. One great thing about bodyweight training is that you only need is an area the size of a beach towel. Bodyweight exercises do not require any equipment; however, you can also get creative and use household items for this purpose. A one-gallon water jug equals eight pounds, a brick is five, a can of soup is one; all work in lieu of free weights. I also highly recommend taking a kite bag, filling it with weights, and wearing it while doing bodyweight work. Wrap your items in a towel and add some pillows inside so the bag they don’t bounce around.
Core Exercises for Kiters
If you only have 5 minutes a day to work on kiteboarding fitness, then do some core work. Core strength is the foundation for balance and style in all disciplines of the sport! You can get started with these five exercises, and all you need is a towel or yoga mat.
-
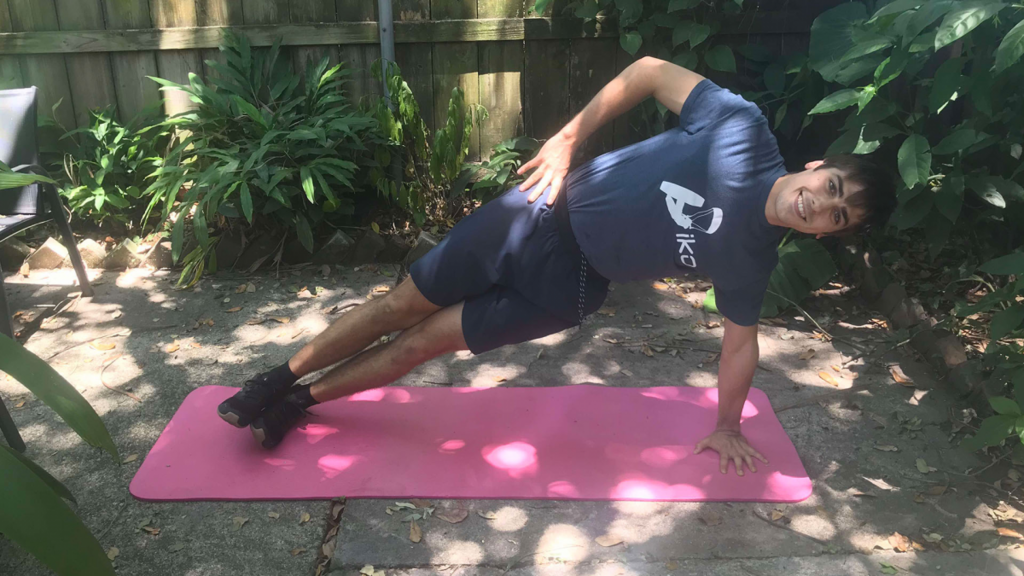
Side Plank: 3-5 sets of 30 seconds per side.
Face sideways, and put one elbow on the ground, with that forearm perpendicular to the body. Stack your feet and rest your top hand on your hip. Hold the body strong by engaging the hips up to the sky. This one is great for the obliques, your side abdominal muscles, which helps to reduce harness soreness.
-
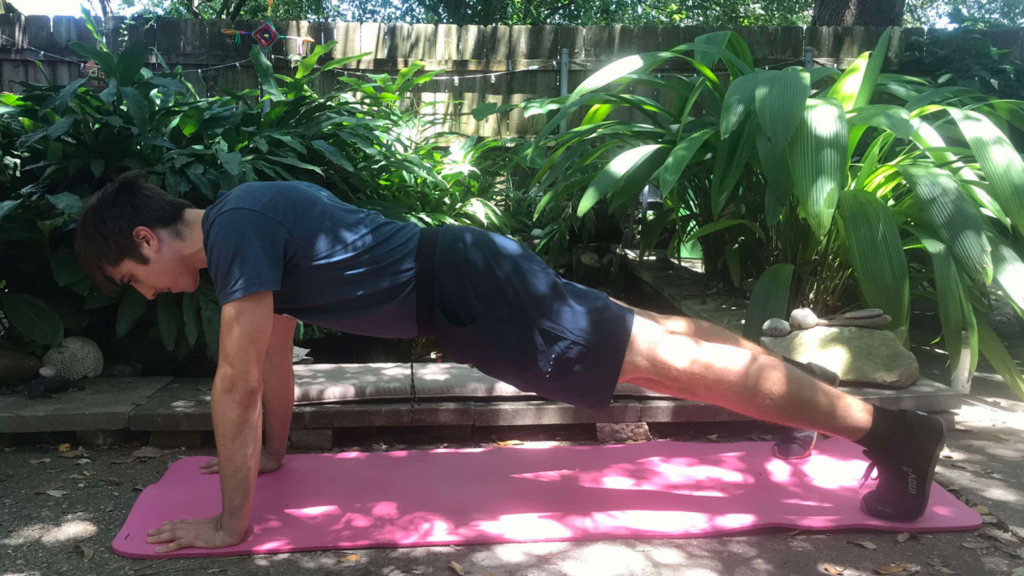
Plank: 3-5 sets of 30 seconds.
Index fingers pointed forward, thumbs pointed at each other, hands underneath shoulders, push actively into the ground. Engage the lower body: tuck the butt down, keep glutes, quads, and calves tight. You can do it from the knees as an easier variant, or increase the time as you build strength. This works the multifidus, a small muscle that stabilizes your back and spine.
-
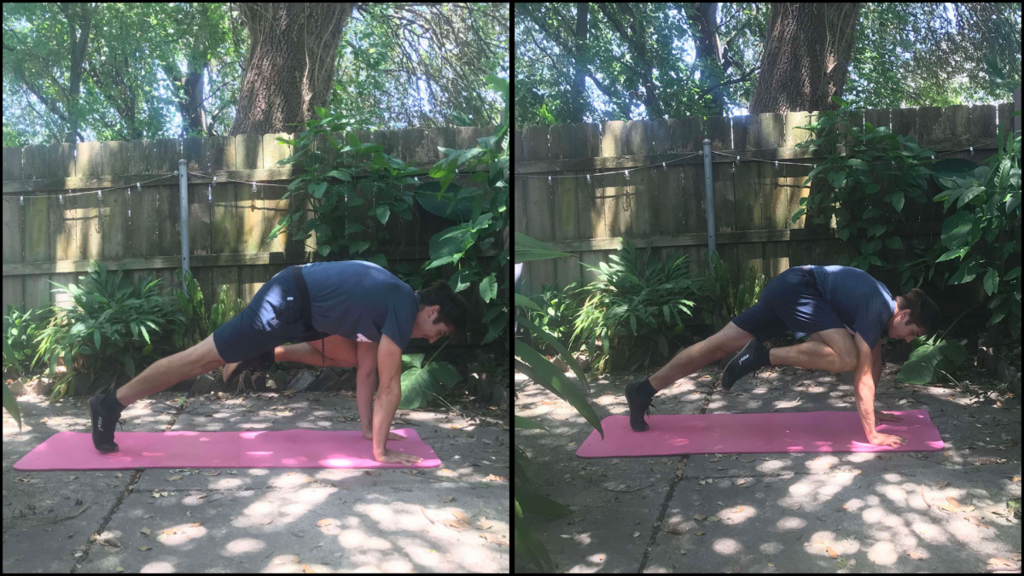
Mountain Climbers: 3-5 sets of 20 reps (1 rep= L+R).
From a plank position, alternate bringing each knee to the same side elbow, and repeat for the desired amount of reps. This hits your oblique muscles and will get your heart rate up quickly if done with higher intensity. Exercises like this are good for building strength in a quick workout.
-
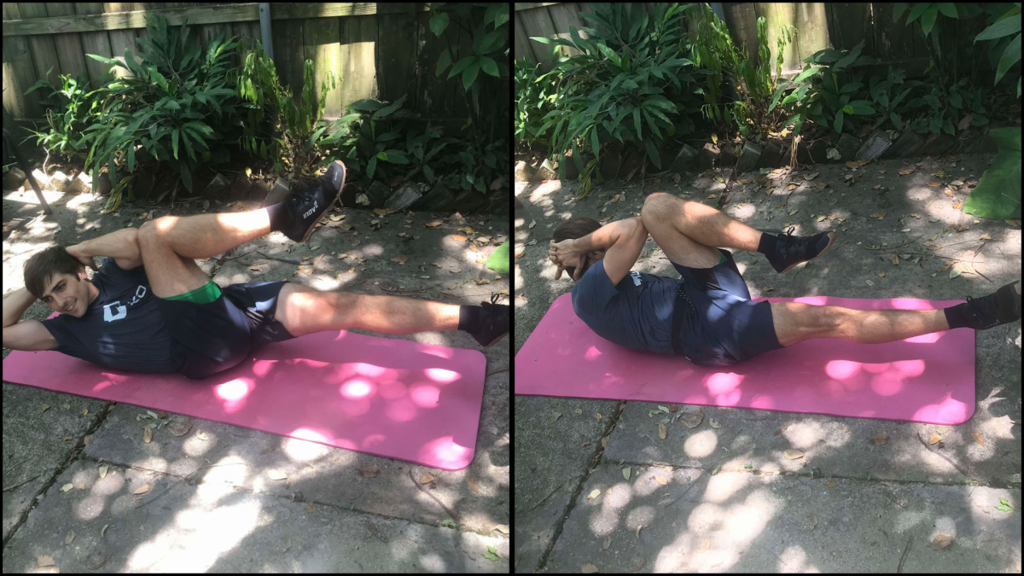
Bicycle Crunches: 3-5 sets of 20 reps. (1 rep= L+R)
Lie on your back with your hands touching the back of your head, legs held out straight and alternate touching each elbow to opposite knee. Increase or decrease reps as needed. This will work your side abs as well as your Transversus Abdominis, one of your deep core muscles which assist with balance and stability.
Lower Body Exercises for Kiters
Leg strength is great for extending your sessions and not feeling so sore the next day. You use your legs at all times during riding, even if you aren’t always thinking about it. These muscles are also critical for protecting your knee joints from long-term overuse injuries. Also, remember you can add the weighted kite bag to any of these to increase the intensity.
-
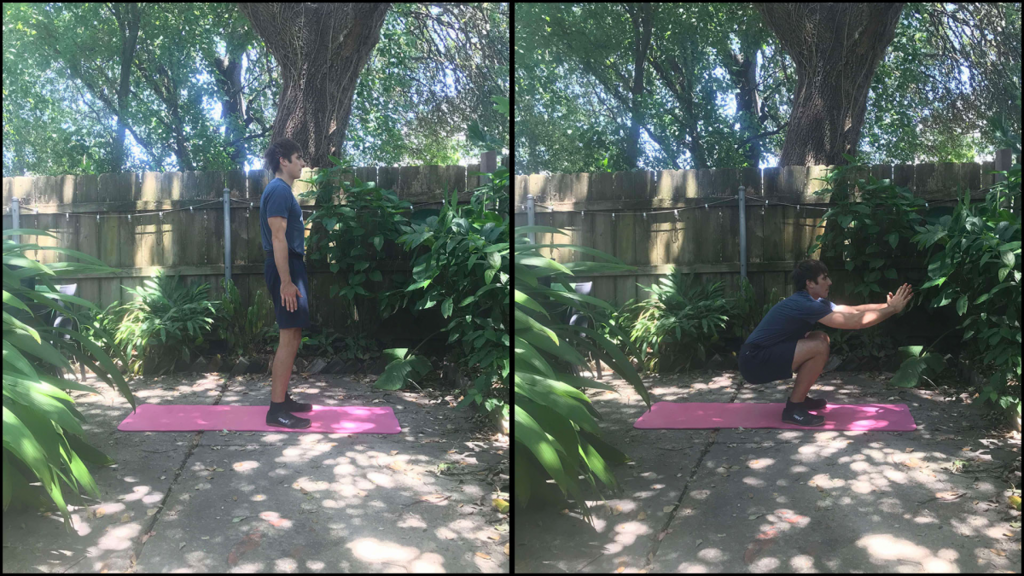
Air squats: 3-5 sets of 20 reps.
With feet hip-width apart, sit your butt down, keeping your core engaged, and without letting your knees go too far forward beyond your toes. Dip to a squatting position with hands up near the shoulders, and then stand up completely, locking out the hips at the top. This one hits your glutes, quads, and even core muscles which helps you build explosiveness and pop.
-
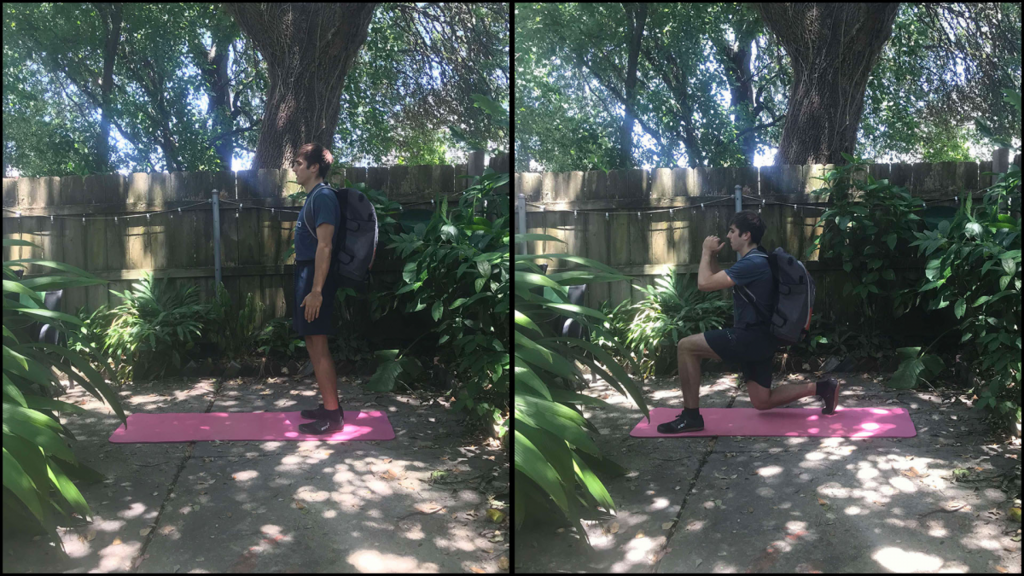
Alternating Lunges: 3-5 sets of 20 reps.
Start with feet hip-width apart and take a big step forward (or backward) with one leg. Lower down until the back knee is almost touching the ground, while keeping your forward knee behind the front foot. This is a great exercise for your quad and calf muscles, which you use when absorbing chop on the water.
-
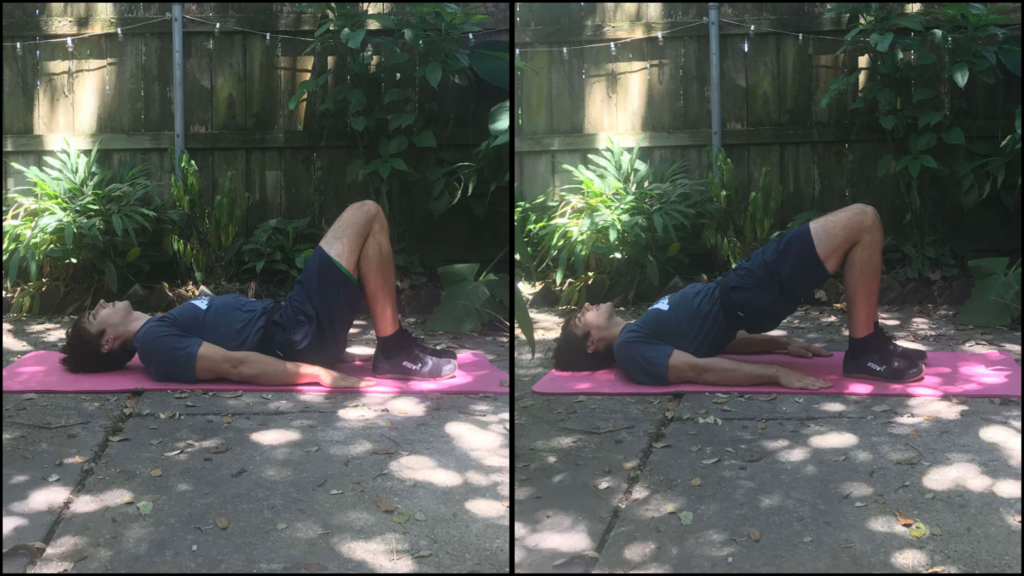
Glute bridges: 3-5 sets of 12 reps.
Lie on your back with your feet tucked close to your butt. Push your hips up to the sky while keeping your shoulder blades grounded, hold for 2-3 seconds at the top, and then return to the starting position. Keep the hips even for the whole range of motion. This one is good for the hamstrings, which help you edge upwind. Move on to single-leg glute bridges for an added challenge.
Upper Body Exercises for Kiters
Upper body strength is important for controlling the kite, as you need to have good forearm and upper back muscles. As an added bonus, most of these upper body exercises also hit the core, so you get the benefits of working both at once. Scale the recommended number of reps to your current fitness level as needed.
-
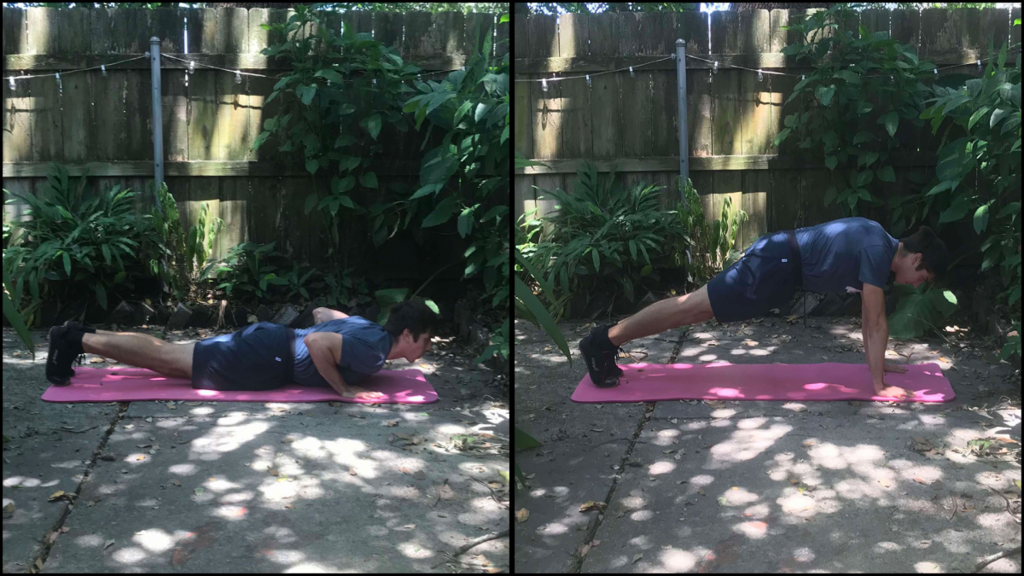
Push-Ups: 5 sets of 6-10 reps.
From a plank position, lower your body to the ground keeping the elbows close to the side of the chest, and then return to full extension. Keep your core tight with the butt tucked down. Increase or decrease volume as needed. For an easier variation, you also start with knee pushups or incline pushups (with your hands on a bench, for example). Pushups are great for the chest and bicep muscles, used for steering the control bar.
-
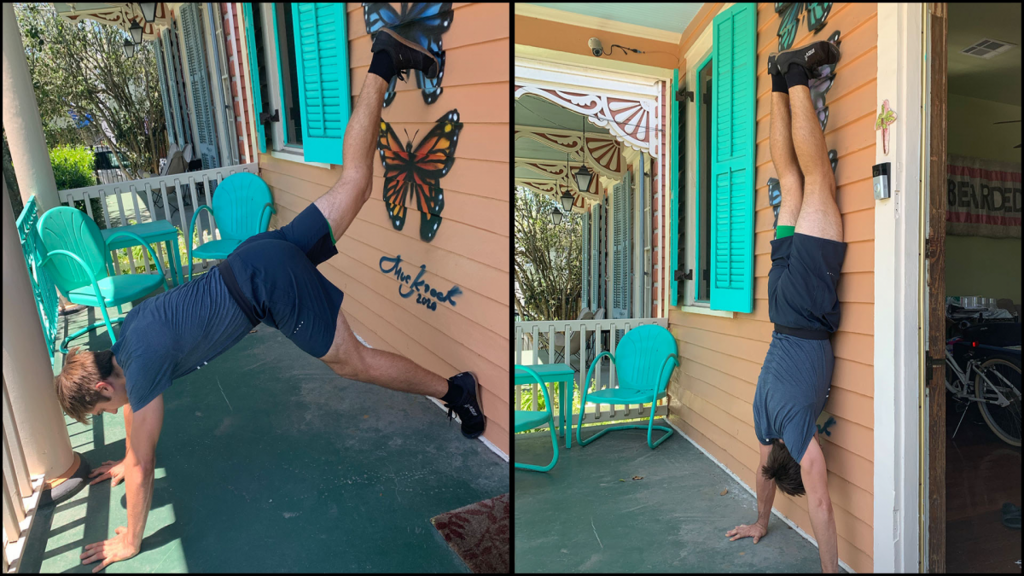
Handstand Walks: 3 sets of 1 rep.
Start in a plank position with your feet against a wall. Walk your feet up the wall, keeping the hollow body position, and while pushing out with your shoulders, until your face is near the wall, or until you are at your max for your current level. This will work your core and shoulder muscles, which helps you to ride in a relaxed position even when powered up.
-
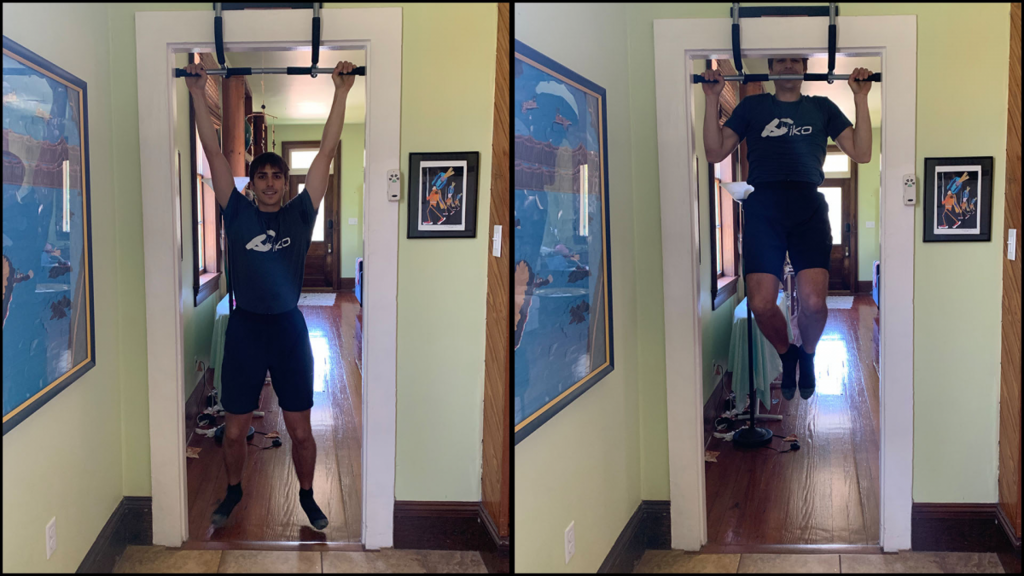
Pull-ups: 3-5 sets at 75% effort (reps vary for each person).
In my opinion, that $30 pull up bar on amazon qualifies as an essential piece of kite gear. Start hanging with full extension, and pull your chin above the bar level. Keep the core engaged and avoid kicking your legs. Pull-ups work your biceps and back muscles, as well as your grip strength, and core. They will especially help you if you are riding for unhooked.
I hope these exercises help you get fit as you get back on the water. And for more information on kite-related fitness, check out IKO’s Kiter Premium Membership for access to exclusive content!
Author & Pictures: Daniel Plautz
Improve your riding, adjust your lines
Why is it that in 99% of the cases we always use the same line length? A majority of the bars that come out of the factory are equipped with lines between 20m and 24m. This article will show you in which scenarios you could use shorter or longer lines. You will discover ways to improve your riding and adapt your equipment depending on your weight, your level and the discipline you choose. We will also touch on why it is mandatory for IKO instructors to use short lines during lessons and why it is highly beneficial for the student.
Impact of the wind window on your kite
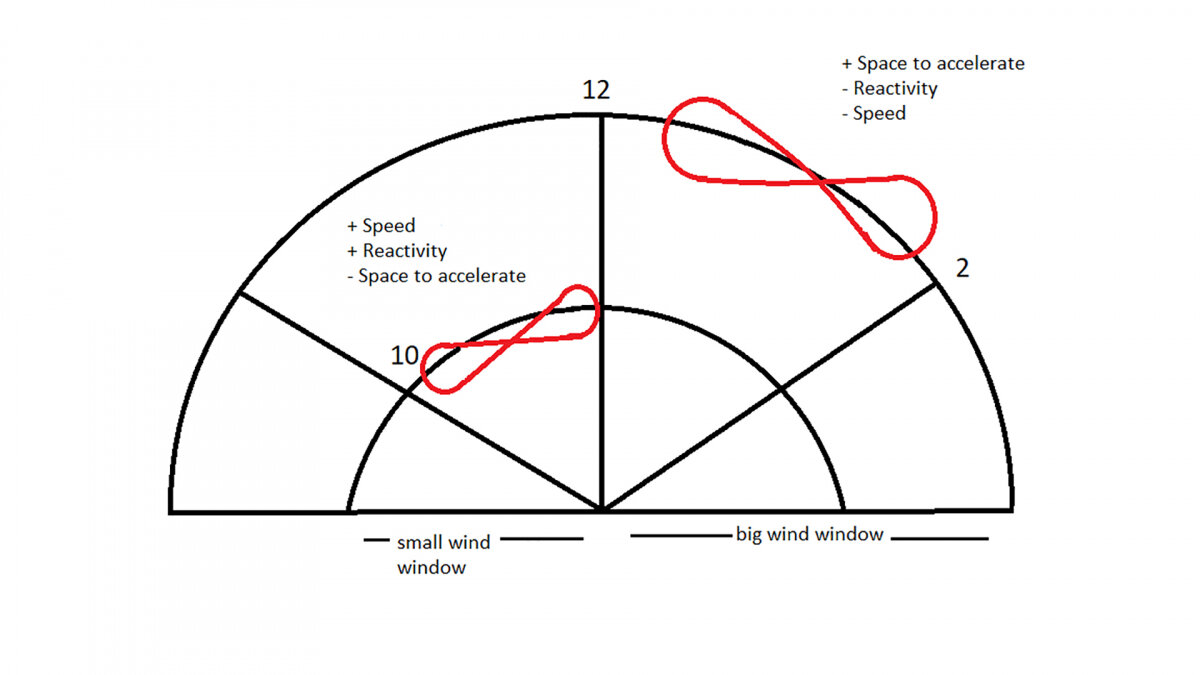
The wind window is the area where the kite can fly. It is also where we use the kite clock as a reference for teaching. In the neutral zone, the kite generates minimal power, because it only receives the true wind. In the power zone, the kite will be able to accelerate as fast as it can and create an “induced wind” which when associated with the “true wind” will be called “apparent wind”. This is where the kite can generate maximum power. By using shorter lines, we can move the kite faster up and down the wind window, this increases the power of the induced wind and increases the power of the overall apparent wind even further.
By changing the length of your lines you are actually changing the size of your wind window. The bigger your wind window is, the more power you will generate because the distance from a point A to a point B is bigger which gives your kite more space to accelerate.
Wind gradient
This is a wind effect that explains how the wind changes, the higher up we go. It has been discovered that the wind is 35% stronger at 20m than right above the water level. In other words, the longer your lines, the higher your kite is, and the stronger the wind that is captured by the kite resulting in more power.
.
So why aren’t we using 70m lines?
The additional power captured when using long lines comes at a cost. Longer lines will create more drag which will reduce the reactivity of your kite and will make your kite sit deeper inside the wind window. The longest lines we use are around 30m, longer lines than that would create too much drag to be effective, the kite would become too hard to steer and loose its upwind abilities.
What about line lengths for lessons?
Trainer kites
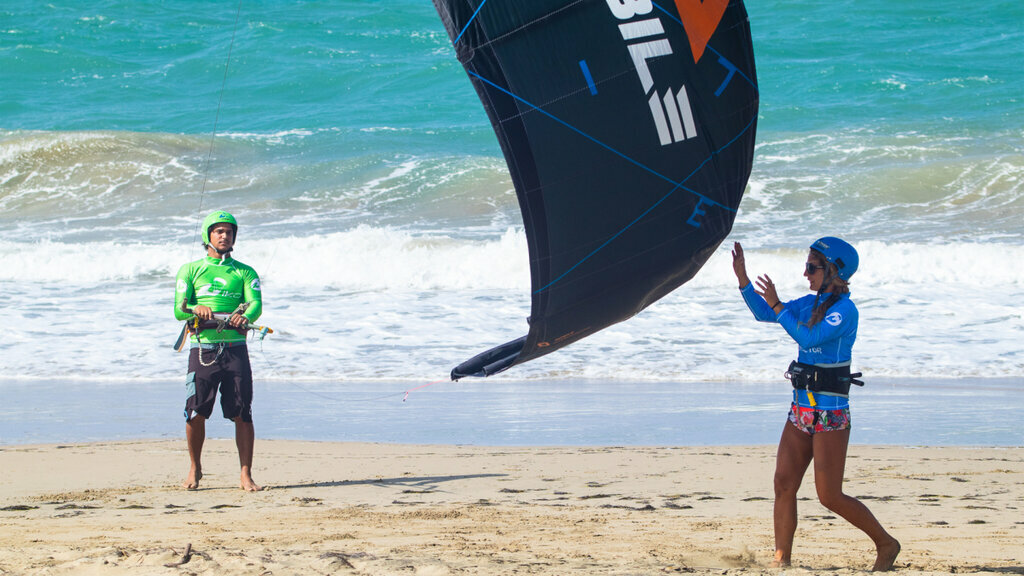
A trainer kite is a kite that does not generate enough power to make you lose balance, in certain situations a 2 line foil kite is used but in most of the cases, a small LEI kite with short lines ( 2 to 18 meters ) will be a better option. This is very useful for many reasons:
-
reducing the space needed for a lesson,
-
reducing the stress for the student,
-
having less impact on other beach users,
-
reducing the kite’s power,
-
softer crash for the kite,
-
much safer in strong/gusty conditions etc…
Increase your line length as you progress
At IKO we strongly believe that changing the length of your lines throughout your progression is a key factor in your learning process.
Once the student starts gaining confidence and is able to handle more power, we gradually increase the length of the lines. This method allows us to precisely adjust the power delivered by the kite to the student while keeping the rhythm of the lesson fluid.
Adjust your line length to your riding style
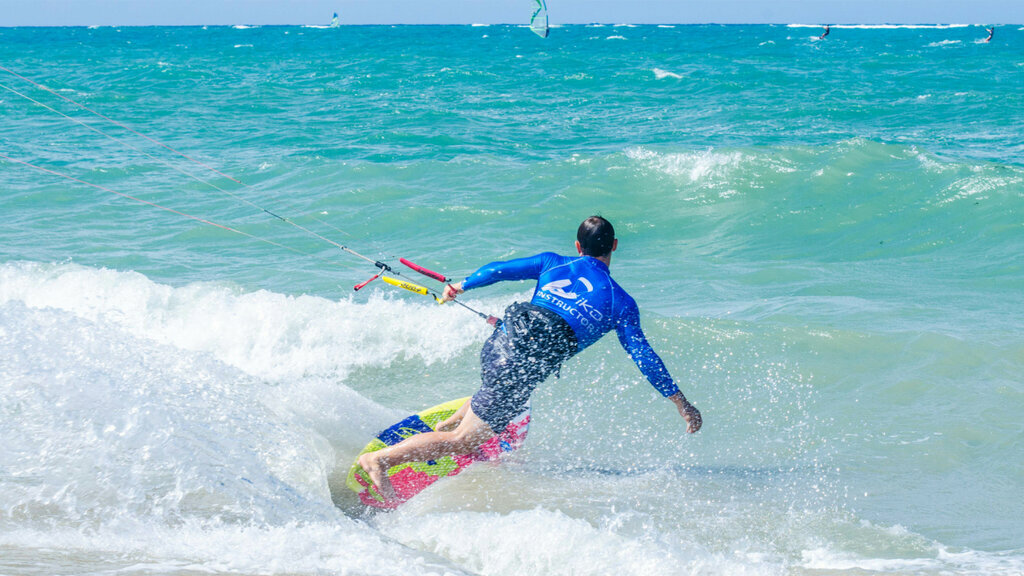
Using short lines (20m or less ) gives you an advantage if you’re looking to have a quick and reactive kite for your style.this length of lines can be very effective for the following riding styles:
-Big air when learning kite loops: Learning how to kiteloop can be an intimidating step because of the power the kite generates during this move, shortening your lines is a great way to make your learning process faster and safer, even pro riders like to use lines as short as 10m in certain situations.
- Wave riding: whether you are using a directional board, a hydrofoil, or even a twin tip. If your goal is to shred some waves then shortening your lines is a very good idea, the added reactivity will allow you to turn quicker improve and maneuverability on the waves.
Long lines ( 24m or more ) will be particularly useful in situations where you will need more power and a stable kite :
- Freeride: In other words, riding while performing tricks and jumps that don’t require you to unhook. Freeriding is a hard subject to approach as it covers a very wide aspect of our sport but in a majority of the cases, it does not require fast steering of the kite, on the contrary, slightly longer lines will “slow down” your kite allowing you to focus more on your body position. I would recommend a length between 22m and 24m for this discipline depending on your wind conditions, skills, and the tricks you are trying to perform.
- Old school: Old school is a discipline that consists of jumping high and doing grabs or taking one or more feet out of the foot straps on your board To perform these tricks well you will need to have a powerful setup to lift you high and give hangtime as well as a slow setup that will allow you to focus on your board without having to worry about your kite moving everywhere.
How can I change the length of my lines?
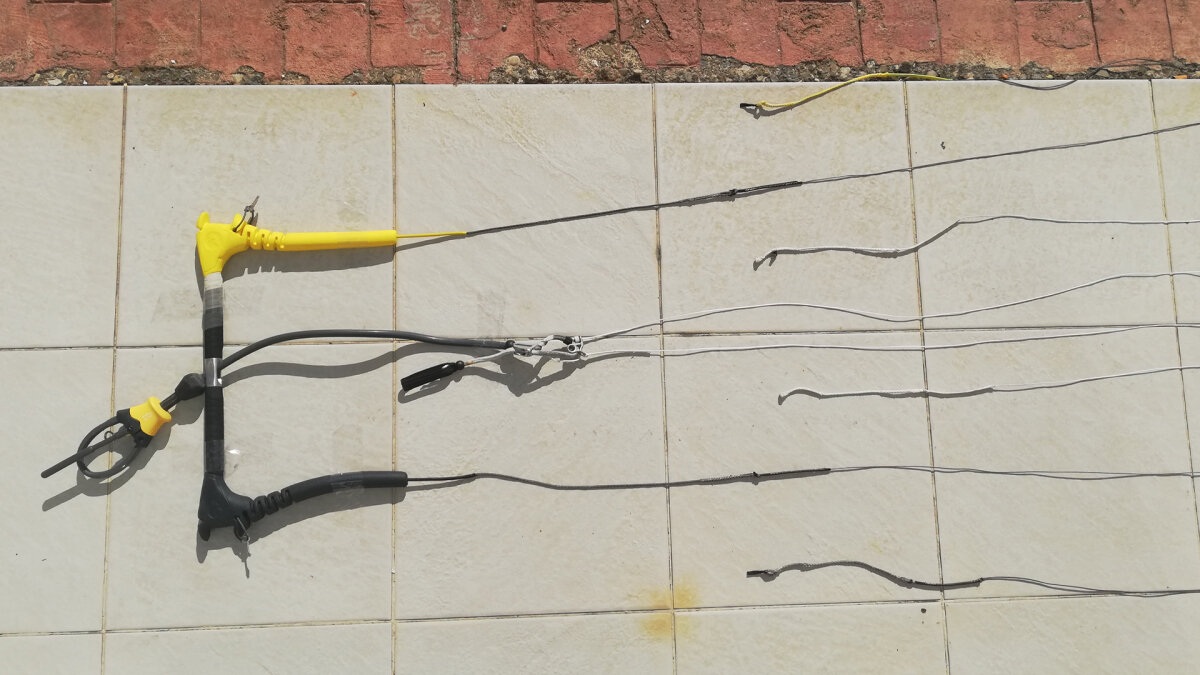
Some bars come with sets of extensions
A few brands will give you the option to buy a set of lines that come with extensions, allowing you to adjust the length of your lines every session, those extensions are usually between 2m and 5m.
Folding
It is possible to fold your lines in two in order to use only half the length, to do so simply grab connection knot/loop at the end of your lines and bring them back to the bar, you will then connect the back lines to the knot of the leader lines and the front lines to a pigtail attached to the point where the center lines split, you will then attach a set of pigtails at the end of your lines. Make your quick release still work after folding your lines! You can double back your lines several times and use ½, ¼, or ⅛ of your line length with this method.
Splicing your lines yourself
A very good way to be prepared for every situation and have several line lengths on one bar is simply to cut your lines and create line extensions that you simply have to add or remove depending on the discipline you will be riding. To do so, you can either ask your local kite doctor or do it yourself by splicing your lines.
Click Here to watch a video made by one of our examiners that will guide you throughout that process.
Conclusion
As you can see, the length of the lines play an important role in kiteboarding. If you're not sure about which length to use, contact your nearest IKO Center or learn more about the subject during one of our pro courses!
What about you? what length of lines do you use?
Author: Charly Roche
Whether you are a snowboarder that has already taken the plunge and started your kitesurfing journey or you have seen kites flying in the sky and wondered what the big fuss is all about. In this article, I will help to explain what kitesurfing is, how to get started in the sport and other requirements of kitesurfing all whilst explaining the similarities between the two sports and how kitesurfing can benefit your snowboarding skills.
To give you a bit of background information on me, I am the proud owner and head instructor of an IKO kitesurf center called “Be-Rad Watersports” based in the U.K. I run my kite centre in the summer months and during the winter I travel abroad working as a snowboard instructor. I have been fortunate enough to travel the world with both of these sports! Some of my favourite resorts for snowboarding include Nozawa Onsen (Japan), Whistler (Canada), Tignes (France).
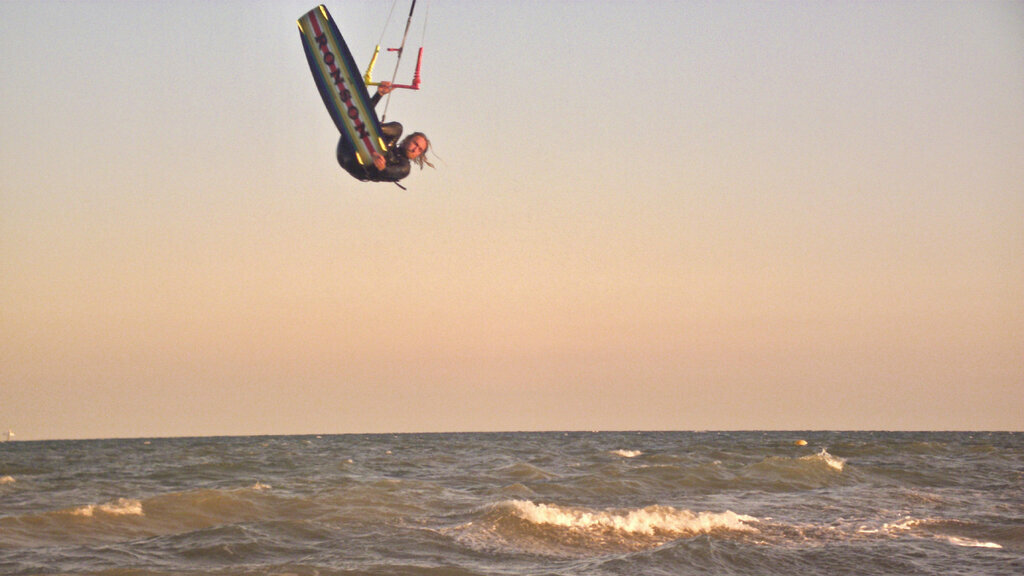
So what is Kitesurfing?
Think of wakeboarding… However, instead of being towed through the water with a powerboat and burning fuel, we use natural wind energy to power up the kite which allows us to surf the seas!
Some disciplines within kitesurfing include:
Freeride; Freeride is the traditional and most popular way to kitesurf. It involves anything from cruising along to performing jumps, grabs, tricks and old school moves. A couple of my favourites include the inverted front roll and the dark slide.
Freestyle; This discipline is heavily trick based and requires a strong dedication to learning new tricks and pushing your limits. Riders perform high powered jumps and can "unhook" from the harness allowing them to complete tricks, spins, and handle-passes.
Wave Riding; Wave riding requires a very responsive, fast turning kite which allows the rider to surf on the wave and perform sharp snappy turns and aerial tricks.
Hydrofoil; Hydrofoiling is the fastest-growing style of kitesurfing right now. A hydrofoil consists of a wing that is mounted onto a tall mast, which connects to the board. The wing provides lift which in turn makes the board lift completely out of the water for maximum efficiency, sometimes with the board floating up to one Meter above the surface!
I love snowboarding because it is so versatile, we can shred the park, sink some euro carves on the piste, or slash pow in the backcountry. Finding different terrain features combined with ever-changing snow conditions means that the sport never gets old. This is exactly like kitesurfing, we can travel to different locations which provide a variety of conditions to enjoy whatever discipline tickles your fancy. In snowboarding it's now common to have a quiver of different boards each aimed at a specific type of riding, this is also true to kitesurfing.
I now embrace all kite disciplines but when learning I started with a twintip which is just like your regular symmetrical all-mountain snowboard. Once I had progressed to a sufficient level I started wave riding and bought my first surfboard followed by the foil board in recent years. You see where I am going with this, you can start with one board and gradually add to your board quiver as you try each style which keeps the sport fun, challenging and addictive.
Sign me up!!! Where can I learn?
It is definitely a sport which requires professional instruction and coaching from an experienced instructor. Kitesurfing is a dangerous sport which can result in serious injury without professional instruction from a licensed instructor. To aid a fast progression and the safest learning experience, check out your nearest IKO affiliated kite center using the IKO school finder.
What equipment do I need?
Whilst you are taking lessons there is no need to buy personal equipment, however, once you have reached an independent level you should start looking to buy kitesurf equipment. You will need at least one kite (possibly more to use in a wider range of wind strengths), board, bar/lines, harness. You will get a massive buzz from buying new gear and spend countless hours researching what to buy. To save you time check out this article I wrote: How much does it cost to start kitesurfing?
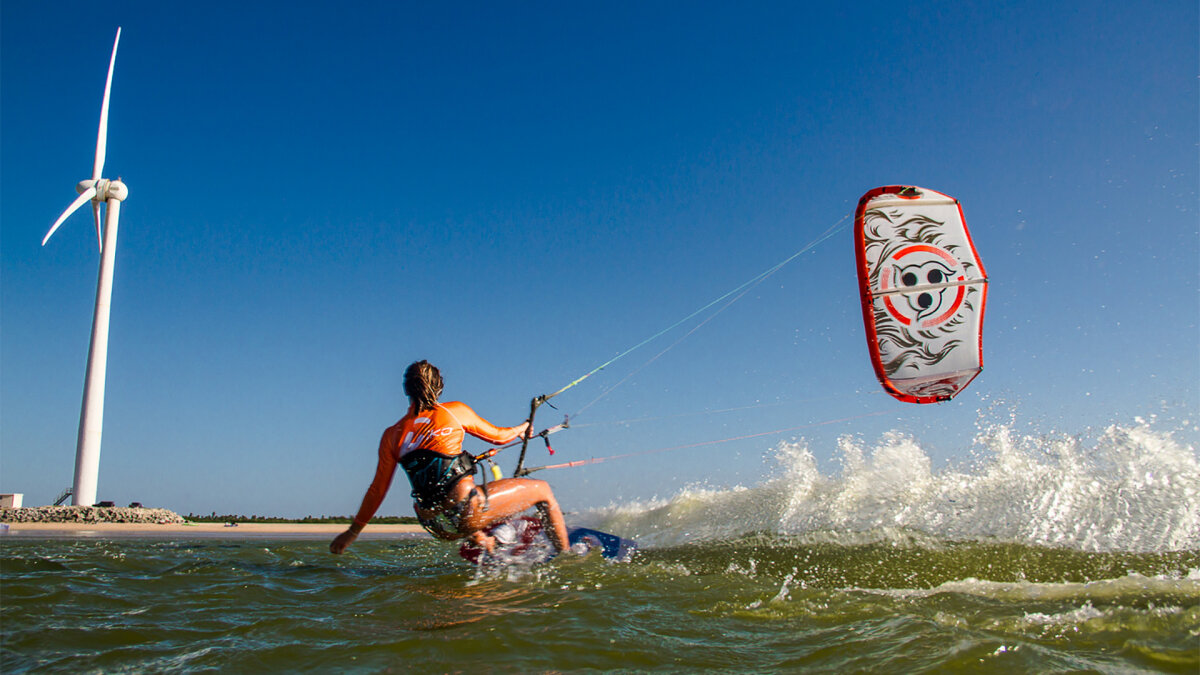
Where can I kitesurf and what conditions do I need?
As with any extreme sport, there are world-class destinations and not such good ones. Within the snowboard community, Japan, for example, is known as a powder paradise. Other resorts such as Whistler boast some big terrain and some of the best snowparks. From my own experience, the best country I have been kitesurfing in is Brazil. Brazil has the most consistent wind stats of anywhere on the planet with July through to December being the windiest months.
To kitesurf you need consistent and fairly strong wind hence why Brazil is so good! I can kitesurf in light winds of about ten knots up to strong winds of sixty knots. The way I do this is by changing my kite size, in light winds I’ll use a bigger kite something like a 17M and in really strong winds I will use a kite as small as 5M. The water conditions will also play a big part in where we can kitesurf but essentially anywhere with open water and consistent wind can be a good kitesurf spot.
It is safest to find a beach where the wind is blowing diagonally onto the land (cross-onshore wind), across the land (cross-shore wind. The reason why these wind directions are the safest is that the wind will always blow you back to the land should you take a bad crash or have a kit malfunction. It is possible to kitesurf in wind which blows away from the land out to sea (offshore wind) however, this direction can be risky so I would advise not to kite with this wind direction unless you are certain that there is a rescue boat ready to come rescue you if necessary.
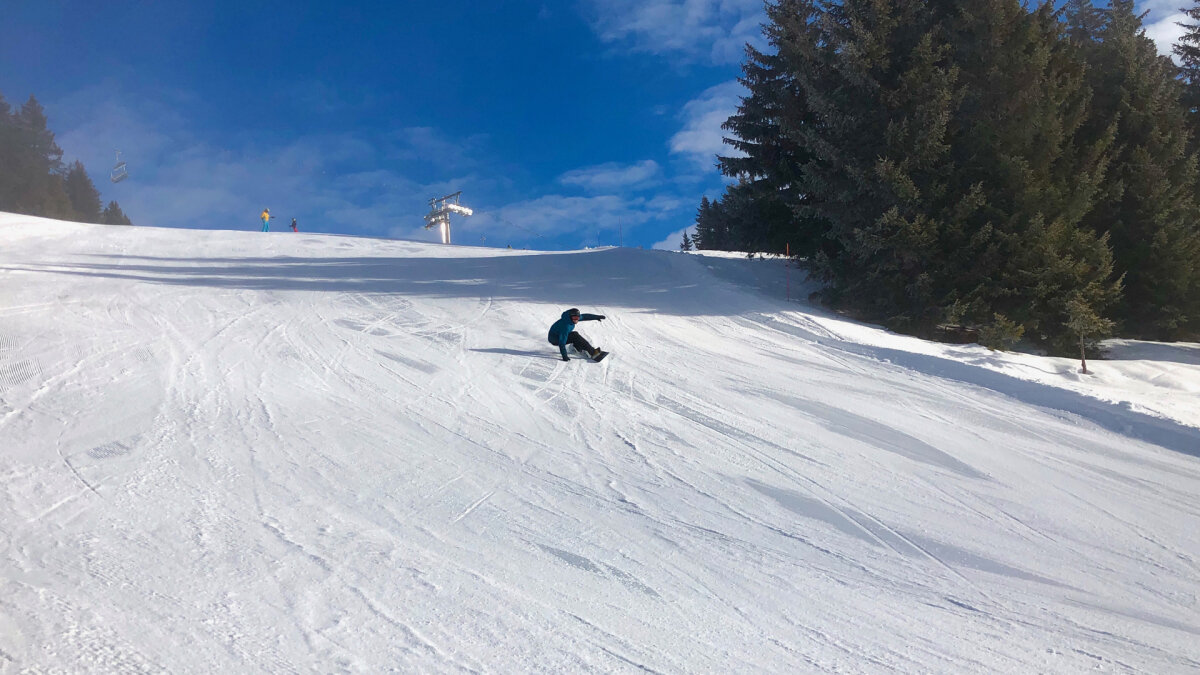
Can Kitesurfing benefit my snowboard skills?
Most definitely yes! I found kitesurfing massively improved my switch riding as we spend half the time riding switch stance while kiting. Not only will it improve your switch riding but it will dramatically increase your confidence while airborne. In kitesurfing, it is not uncommon to spend anywhere from five seconds up to twenty seconds airborne while jumping. This requires ultimate control and aerial awareness, when going back to snowboard kickers you will think nothing of sending it off the large or x-large jumps in the park.
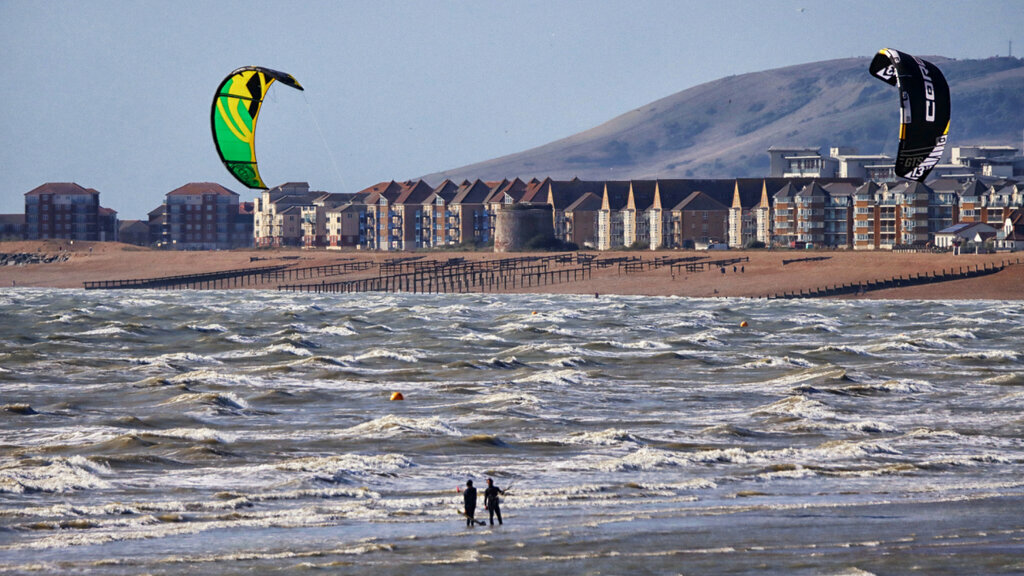
Adventure, travel, friendship
My passion for both snowboarding and kitesurfing never gets old no matter how much time I spend on the slopes or the seas. If you are at all like me, a big part of these sports is having the opportunity to travel to amazing countries and embrace different cultures. I get to engage with so many incredible people who all have the same mindset and make friends all across the globe. Kitesurfing can give you a whole new group of friends, new experiences, and unlimited amounts of fun! This is why snowboarders should learn to kitesurf.
Start your journey in the right direction! Sign up for Kiter Premium membership and get access to our ebooks, videos and other kitesurf training materials!
Written by: Be-Rad Watersports
Your lesson or one of your first kite sessions is almost over which means it is time to land your kite. Launching and landing the kite usually takes place on land, the obstacles and activities happening there can make it challenging to feel comfortable doing this for the first time.
Therefore we made a video that explains and shows you the most common mistakes that are encountered when landing your kite with an assistant.
This video will help you to anticipate any mistakes you may encounter when landing your kite. It will also make you feel more confident knowing how to handle such situations.
Have a look at the video tutorial now if you’re a Kiter Premium or Pro member. Otherwise, upgrade your membership to gain access to this video and more than 25 hours of online learning!
To be able to kite you need wind. Wind can sometimes be predictable and or unpredictable. Learning to read the sky and understand a weather forecast will help you better plan your day and kite trips.
Knowing the difference between a high or low pressure system is one example… Do you know what the difference is?
Can you tell what is going on simply by looking out and up into the sky?
Knowing and applying weather reading skills are essential to becoming a more avid kiteboarder; which is why, in our AITC-Plus course we help you develop this skill in-depth.
Let us know in the comments below what the difference is between a high or low pressure system and which one is best for kiteboarding practice!
What is a GoJoe? Have you ever heard of it? What about seen one or let alone used one? The GoJoe is a leash board recovery tool. It is an inflatable body that is designed to sit unobtrusively between your feet on the board. If you ever lose your board the GoJoe will make your board easily visible by flipping your board over for you and catching the wind sailing the board down the wind so that it is never far from you after a crash or hard landing.
Some schools and instructors around the world are using them; now the question is… should you? The truth is that it is not always necessary but it can be useful. It is an awesome tool for students with difficulties to get the board back or places with strong currents that make the board harder to rescue.
GoJoe is the perfect solution for people who are afraid to stop using their board leash because of the difficulties they have body dragging or the conditions at their spot. Many people who are still using a board leash believe they are not dangerous as they have yet to have an accident with one.
If the GoJoe is an idea and concept you like though you do not want to invest the money, another alternative is buying an arm buoy for kids and inflating it around your board handle. This won’t be as effective though it will still help with board recovery and save you money.
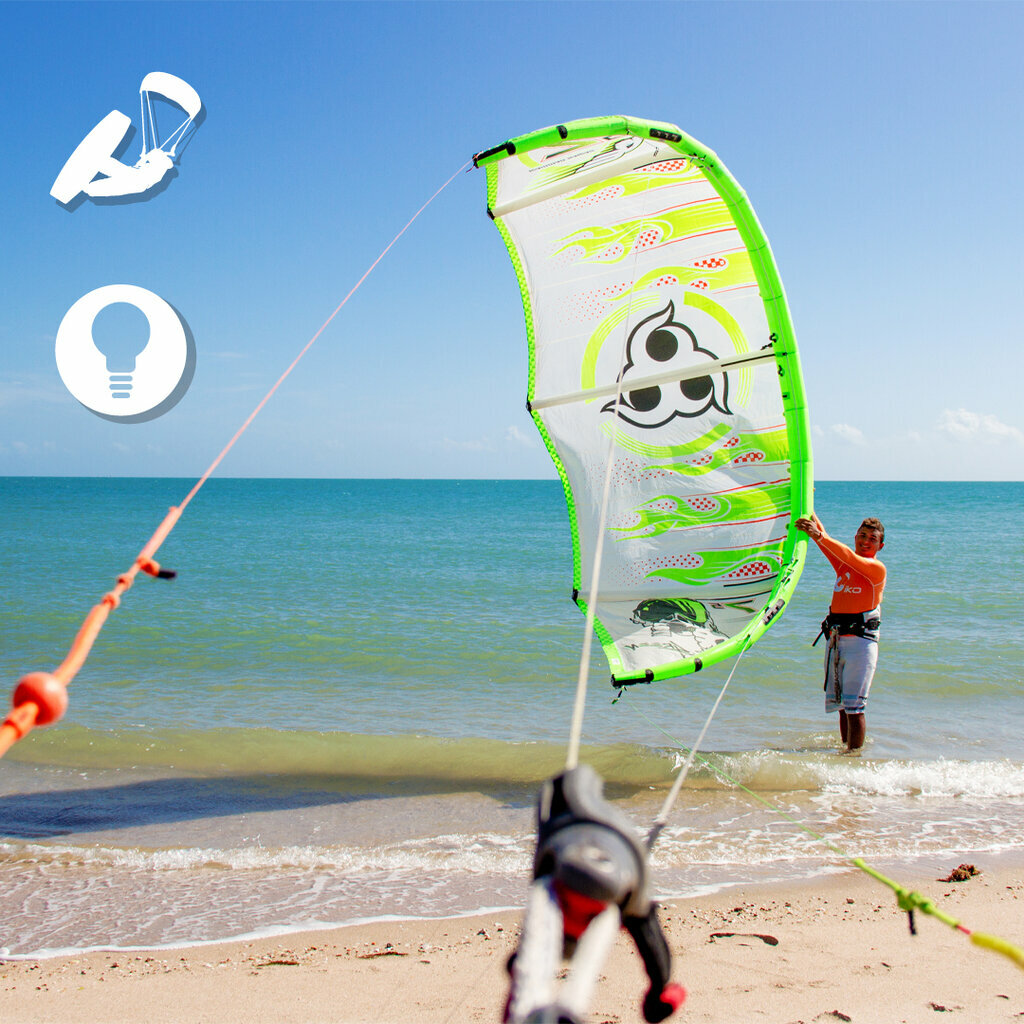
The main keys for kite producers are twofold: light and durable. Different materials have been tried out over the years, but polyester remains the most commonly used fabrics as it is resistant to all the harsh treatments your kite will be exposed. Every time you go kiting, it will be parked in the sand where the sun and the wind will damage it, then it will hit the water while performing a new trick.
The leading edge is usually made of Dacron which is actually a trademark of polyester. Years ago, most types of polyester used would tear easily until a lighter and high-tenacity polyester known as T9600 was invented. Most kite producers now use it. Only a few companies use a different material called Dacron weave 4-directional laminate. It is as light and durable as T9600 but less popular among kite makers as it is harder to weave.
No matter the material, what counts is to take care of your kite. Don’t leave it in the sun for too long, don’t brush the sand off the leading edge while your kite is still wet, and dry it completely before you put it away.
These simple tips will extend the ‘lifespan’ of your kite!
There is no question that hydrofoiling is growing extremely rapidly across the world. More companies are making boards at different price ranges, new hydrofoil competitions are emerging, schools are beginning to offer lessons and hydrofoil board rentals; these all signs of a growing industry.
When learning to hydrofoil at an IKO center you will be receiving an impact vest, helmet, and proper instruction. As the trend has risen we hear more and more horror story of pirate instructors who do not have proper progression or safety measures “teaching” others how to hydrofoil only to have them get injured.
It is important that no matter your level when you are learning and throughout your progression to continue using an impact vest and most importantly a helmet. We have unfortunately witnessed far too many hydrofoil board accidents. Hydrofoil accidents are worse than most other forms of accidents as with a hydrofoil it usually ends up being deep flesh wounds.
What we have seen is that whether or not someone who is hydrofoiling agrees with wearing safety protective equipment or not, eventually they convert after a close call or accident.
So what do you say? Should you always wear a helmet and impact vest when hydrofoiling or no point?
This is one of the main safety improvements from the last years. IKO has set this new standard for both students and Instructors. The kite leash must always be connected in the front part of the pilot’s harness. However most of the kiters, Instructors and students still have it connected on the harness handle with no special reason, just because ‘everybody does it this way’. There is a huge difference in terms of safety, whilst in the front, the quick release of the kite leash will always be easily accessible for the pilot; when connected to the back, in a serious situation (kite still looping), the pilot cannot access it and is in danger. Many accidents have happened this way, do not let it happen to you. If you do not unhook it is strongly recommended to use a short leash.
How curious is the fact that despite science and logic, sometimes us humans behave against what we instinctively know is beneficial for us; like eating clean and healthy, wearing a helmet while doing extreme sports and investing in pair of polarized sunglasses when out in the sun near water or snow to name a few!
Just like with helmets, wearing sunglasses while kiteboarding seems unfashionable and excuses like “I will lose them”, “They are annoying”, “They are expensive”, “Water droplets on the lens bother me” and so on, seem to always come up.
Truth is companies have filled all these gaps offering a range of options with different styles, price points, fits and a wide variety of options. So what is holding all us kiters back from wearing sunglasses while kiteboarding?
We believe that it is the social norms of the majority overriding the logic. If all the professionals, instructors and kiteboarding promotions wore sunglasses while riding, competing, teaching it would make people think twice… “If these people are wearing them…. maybe I should too.” Although it is not the case, just like with helmets. Only a few wear it and so it’s not really popular.
The use of polarized sunglasses, in general, will help reduce the chances of cataracts, macular degeneration, sunburn on the cornea and the risk of experiencing vision issues like “snow blindness” which can and have happened to kiters before.
After taking time to research we found many companies that offer sunglasses specifically for kiteboarding. We have found these top-rated companies offering a variety of different styles, prices, and features that are excellent for kite use: Kurtis Eye Wear, Ocean Glasses, Sea Specs, and Lip Sunglasses! We know there might be many more companies out there and if you are currently using one of them let the community know which you use and recommend!
So the question is do you already wear sunglasses and if not when will you start? Don't see the point of wearing sunglasses? Tell us why in the comments below!
This is always ‘the’ question every kiter asks several times a day and will probably get different answers each time as there is no truth here. It depends on many factors; obviously, the wind strength and your weight matters but not only! Wind density will also be a key factor even if not many people are aware of it. A colder wind will be stronger than a warmer wind of the same speed. The size of the kite will also depend on your riding style. Are you more a strapless rider (smaller kite) or a freestyler on boots (average kite) or an old school rider who wants a bigger kite to stay more time in the air? The length of your lines also has a great impact on the power developed by your kite. All these aspects are discussed in an IKO Evolution Clinic and/or an Assistant Instructor Course.
Check out the IKO Training Calendar and join this training.
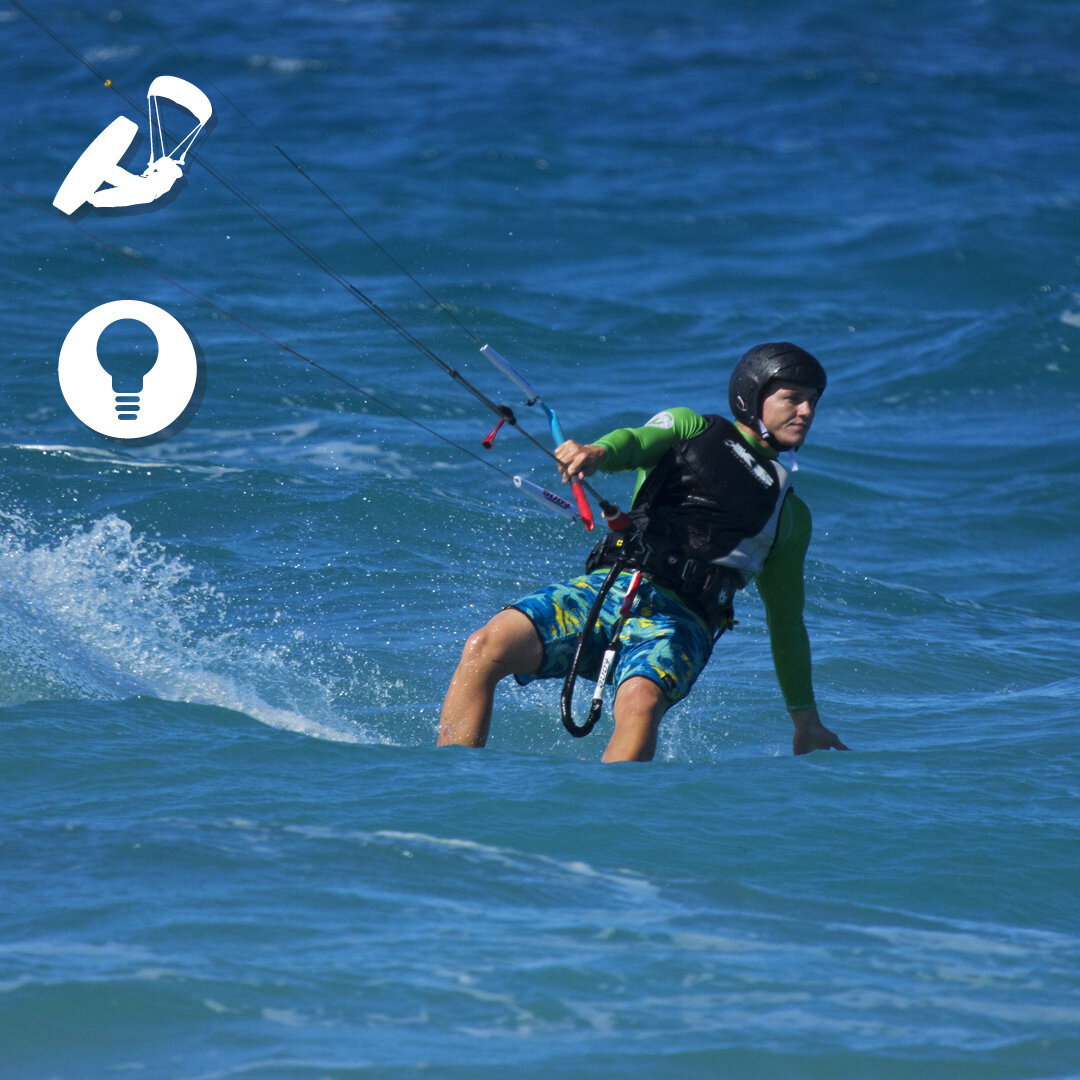
The most common thought for those who are thinking to get into kiteboarding is the strength and fitness aspect. Most imagine that to kiteboard you must be incredibly fit and healthy. Unfortunately/fortunately this is not true; virtually anyone can kiteboard!
We have seen it all from the ultra-fit hardcore athletes to the weekend warriors making it happen and having fun out in the water. That is the beauty about kiteboarding, anyone can get into it. Kiteboarding can become as challenging as one makes it. If someone wants to push the boundaries and go to the extreme or simply cruise around - the individual can choose as one wishes.
Overall, when you are kiteboarding you are putting in an effort, though, with the technology and equipment today it is way less demanding than it used to be in the very beginning. Essentially your core stability, upper body strength, and aerobic fitness are what are being taxed when kiteboarding. These three areas will be used when kiteboarding so if you are thinking to train any area of your body for kiteboarding consider those three.
Your upper body strength will help you carry your equipment in and out of the water as well as steer your kite efficiently. Having core strength will help reduce the chances of bodily injuries and maintain comfort during those long sessions. The only way to have long sessions though is having a healthy heart and good lungs especially once you begin trying to push your limits with tricks or stronger conditions.
An active warm up before and deep stretching after your kiteboarding sessions will help maintain your aerobic fitness and prepare the body for repeated sessions day after day on and off the water!
Which preconceptions did you have before you started kiteboarding? Comment them below
At one point or another in your kiteboarding career, you will consider buying equipment; it is pretty much inevitable. Once you begin thinking about buying gear, it might get overwhelming and confusing (this is common).
When considering to get your own equipment we have a few recommendations that are mentioned in other tips (browse our website and social media feeds to read them). Basically, though you will have four alternatives when buying equipment. Either you will be buying second hand, new of the year equipment, new closeout sales from previous years and/or the fourth option which is bought through the IKO Member deals.
Member deals are exclusive deals for the IKO Community which allows access to the latest and greatest equipment from some of the most known kiteboarding brands on the market around the world at a special price.
Buying second hand or close out equipment is a great way to score a deal though just make sure in both instances - that the kites are fully functional and ready to go in the water. When buying new equipment whether through a dealer or seizing an IKO member deal special rate- you are in safe hands.
We generally recommend kiteboarders to get the latest equipment on the market new though… sometimes getting something that is one to three years behind is also a great way to expand one's quiver and or beginning ones kiteboarding quiver on a budget.
If you have not yet bought equipment which way are you thinking to get your first quiver? If you have been kiteboarding for a while - what is your preferred way of getting kiteboarding gear?
Let us know how you go about your kiteboarding purchases in the comments below-
Bonus for the IKO Community: Have you checked out the member deals available to you in your profile?
Most of us after watching extreme mega loop videos, king of the air replays or clips of wave riders going down huge barreling waves might become tempted to search for those extreme conditions and ride in them. These pro athletes featured in these videos make it appear relatively safe and easy. We do occasionally witness those brutal, close call, crash videos that we tend to forget about relatively fast.
Those 40 knots storm conditions or 8m tall swells might excite you though when those once in a lifetime “opportunities” cross your path you must take time to think twice. Going out in the wrong conditions can prove fatal. Becoming number one on the WOO Global Leaderboard must be done in as extremely controlled situations as possible and not simply “winged”. Same goes for larger swells and or a combination of strong wind and huge waves.
Kiteboarding is extreme enough - don’t enter extreme conditions because you might enter a situation that is extremely dangerous.
Examples of conditions to double think:
- If the wind is offshore
- 35+ knots
- -5m+ Tall Waves
- Waves with very shallow reef
- Gusty and Unstable Stormy winds
Comment below other conditions someone should double think before going out.
Bonus: Let us know what are some ways someone can minimize the risk in kiteboarding more extreme conditions?.
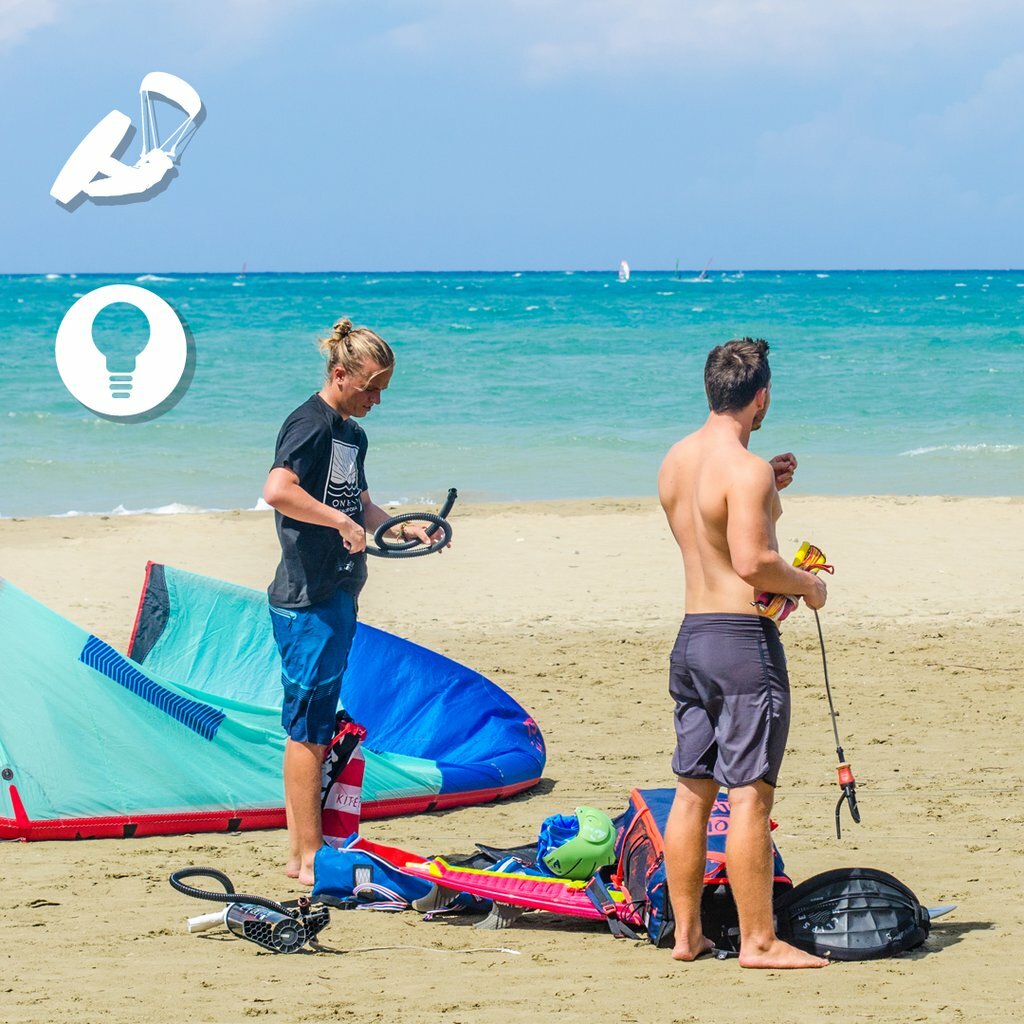
Nowadays it is easy and accessible to gain knowledge with just a few clicks and quick browsing, yet from theory to practice is quite the long run. We generally believe we can go from zero to hero just by watching videos and that we don’t need professional expertise. The general belief that we are smarter, better and faster than others and if someone else can do it then we can do it, is more common that we would like to think. Having a positive self-success-prophecy is important though it must be done rationally and logically.
If you have been kiteboarding long enough you have seen or heard about someone who see’s kitesurfing for the first time and believe it is an awesome sport that is easy to learn; they comment something along the lines of: “Give me the gear and I will be riding by nightfall.”. To some this might be funny and also sound crazy; which it is.
Since kiteboarding incepted, we have vocalized the importance of taking lessons from a trained Instructor. The pros of learning with a professional outweigh the cons 100 to 1. There is absolutely no point in winging the learning process of kiteboarding. It is not only super dangerous for the individual trying to learn alone, it is also dangerous to those people around them. This is just the short term down-sides, long term, the individual will most likely be frustrated, lengthen the learning process 100 fold and if they even managed to pull it off, they would be a safety hazard on and off the water.
No matter if it is yoga, kiteboarding, skydiving, cricket and or playing a guitar; watching videos is not enough. It is always recommended to get a professional coach, instructor or trainer to help guide and teach you.
-The short term savings will cost you more in the long run.
Where is your leash positioned on your harness right now? If you have yet to move your leash to the front of your harness, go do that now before continuing to read any further. Over the last months we have been pushing and reminding Instructors as well as kiteboarders about this easy and important safety change.
Instead of using a leash on your back or sides it is best to attach it directly in the front. This makes your leash accessible to both hands at all times whether to hook in or release during an emergency.
If you are one of the kiteboarders with a long leash, you can now consider changing your leash for comfort and accessibility. Having a long leash does not make sense for anyone other than those practicing unhook wakestyle. If you are a beginner, wave rider or cruiser there is no need to have a long leash. Nowadays most brands will have a short leash option available.
What is great about this safety improvement is that many brands and companies have realized the safety benefits and altered their designs according to this. Creating simple ways to attach one's leash to the front and supplying short leashes with bars instead of long ones.
If you have yet to change your leash position on your harness or its length - do not wait any longer or until an accident. Do it now, you won’t regret it!
Safety is the number one rule when kiteboarding. This extreme water sport requires that when kiting on a remote spot you shouldn’t be alone, regardless of the level you currently are at. Even though it might come as an obvious thing to do, this fact is easily overlooked when we get carried away by the heat of the moment and mistakenly step on the board and start riding alone.
What do we mean by kiteboarding alone? Kiteboarding alone would mean going up to a remote spot where you have no eyeballs on you whether from family, friends, a kite center and or other kiteboarders.
Kiting is always great and a lot of fun when you guide yourself by the safety rules, so next time you are planning to go kiteboarding at a remote spot, bring a family member or trusty friend to keep an eye out. If you are riding on a more populated area, ask a local kiteboarder, an IKO center or an individual to keep an eye on you while you are in the water.
Remember this simple yet super important tip that could save your life one day.
Have your lines ever crossed or been crossed by another kiter? The moment this happens can be quite nerve wracking as just the thought of it happening to you can be.
The truth is that a line tangle situation it is a bit hard to answer as there are plenty of situations… For example, lines are only over the other lines and you know the rider (he is not gonna do something crazy) in this case it would be advises to pilot the kite away, and no big deal.
In a more complicated situation it would be advised that both kiters release their quick release at the same time (so they need to communicate) as if only one does it, it can be very dangerous. Plus they need to be ready to release the kite leash too as when 2 kites are tangled it may block the safety system effectiveness.
Generally if lines are tangled, it is also because at least one of the riders have not respected one or several ROWs. This is why the IKO insist on the importance of knowing and applying the Right Of Way rules!
It is important that you understand your safety release system and know how to perform a self rescue. If you do not know and have yet to practice a controlled self rescue- we recommend you find an IKO Instructor to help you become familiar and practice this very important skill to becoming a truly independent kiteboarder.
Have you ever been in a tangle? Share your story with us-
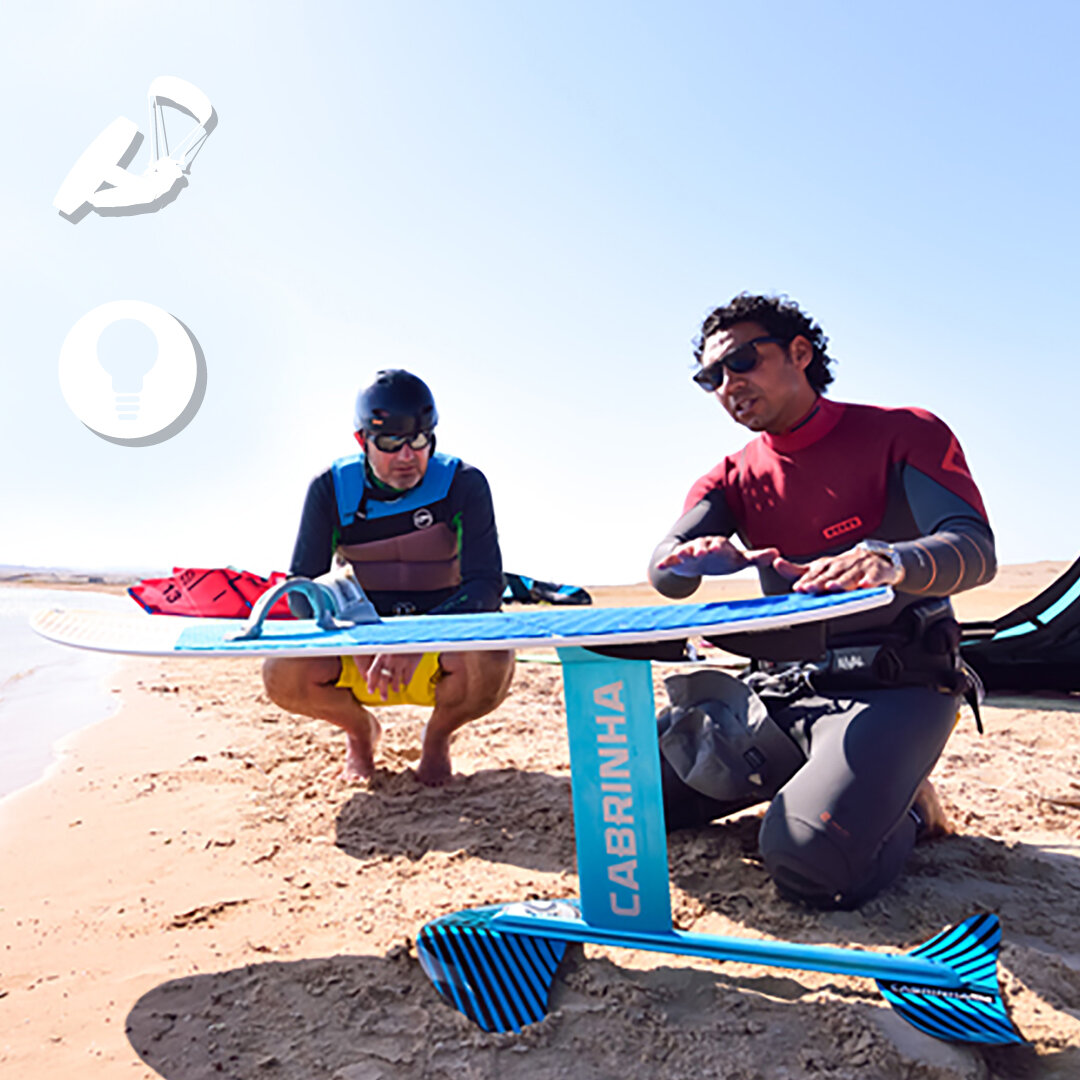
If you have learned to ride a hydrofoil board you are probably hooked to it whether or not you want to be. If you love being on the water - the hydrofoil offers you many more days on the water, it is just a fact we cannot deny.
As technology improves and new ideas are materialized; new opportunities arise. In the foiling world you have many different foil boards from recreation to race though now we are finding convertible foil boards.
Wether its win tipt to foiling or surfboard to foiling. Is getting one of these convertible boards worth it? You can never have the best of both worlds because most likely you always end up compromising. Is it worth the hype?
The biggest perk of having a convertible board is saving money initially on not needing two boards, and when traveling, you get to save space, weight and money from baggage fees. If you are a budget traveler who wants for example a foil and surfboard -this could be an ideal compromise.
The biggest downfall is what you might lose in “true” performance and feeling of whatever it is. A surfboard for example that is convertible will be heavier and lose its true surfboard feeling. This difference might be “unnoticeable” for some though for others it can be unbearable. If you are kiteboarding where you live, having a dedicated board is optimal-
If you are someone who wants the “true” performance and feeling of the discipline you are practicing and are traveling a lot the only downfall you will have is extra baggage and costs which can be easily overcome if you have the financial resources.
The idea of having something that can do two things is great and attractive -though sometimes and for some, what it’s sacrificed is not worth it. In the end it comes down to the rider.
What do you think as the rider? Are convertible boards worth it? Do you own one? Tell us your opinion and experience below-
We have spoken about health and wellness before though it is something to be spoken about again especially as the new year comes around.
Before we being, we want to note that health and wellness are quite popular yet broad terms being used nowadays. Health and wellness has different meanings depending to whom you speak to. We will not dive to deep though to give context, we are referring to health both physical and mental and wellness on a spiritual, physical and mental level as well.
Kiteboarding is a sport that trains individuals to be focused, strong, creative, adaptive and well rounded amongst other positive traits. You must not only connect and observe your physical and natural surroundings but also become a master board rider and kite pilot over time.
Cross training as a kiteboarder can go many ways - some feel more inclined to something like Yoga that requires strength, tranquility and focus or something like high-interval training requires energy focus and stamina. Whether one is better than the other is debatable though what is important is that YOU feel drawn to it and the after results are rewarding. We cannot base something on if we like it because the truth is many people do not “like” training every day or multiple times a week.
No matter what you are doing on the side of kiteboarding it is good to be doing something consistently on the side that can be done by yourself. It is best if what you are doing doesn’t rely on other people or Mother Nature.
Whatever your cross training activity is, you can always try to tweak it towards relating to kiteboarding. Whether doing exercises, poses or activities try to find ways to incorporate an aspect from kiteboarding to help better overlap.
So this year what are your plans not only for kiteboarding but for training? What is your favorite activity and or training to do aside from kiteboarding?
As the sport continues to develop we begin realizing an interesting phenomenon of people plateauing in their kiteboarding. When we begin kiteboarding the learning curve is exponential - within a matter of days we go from zero to hero though after time goes on, the curve flattens out and stays that way with little spikes here and there...Why is this?
Setting kiteboarding goals is one of the greatest ways to continue one's progression, challenge and excitement in the sport. What goals someone is setting will vary from kiteboarder to kiteboarder, though anything that forces one to push above and beyond their current limits even if it’s a little, is worthy to be a goal.
Before setting goals; assess your current level and interests. Goals should be set in accordance to this so that you can be challenged accordingly. Goals are best set in advance and executed on your next session.
Some ideas for goals:
-Learning to Jump
-Learning to Foilboard
-Learning to do a 360 Jumping
-Learning to ride a Surfboard
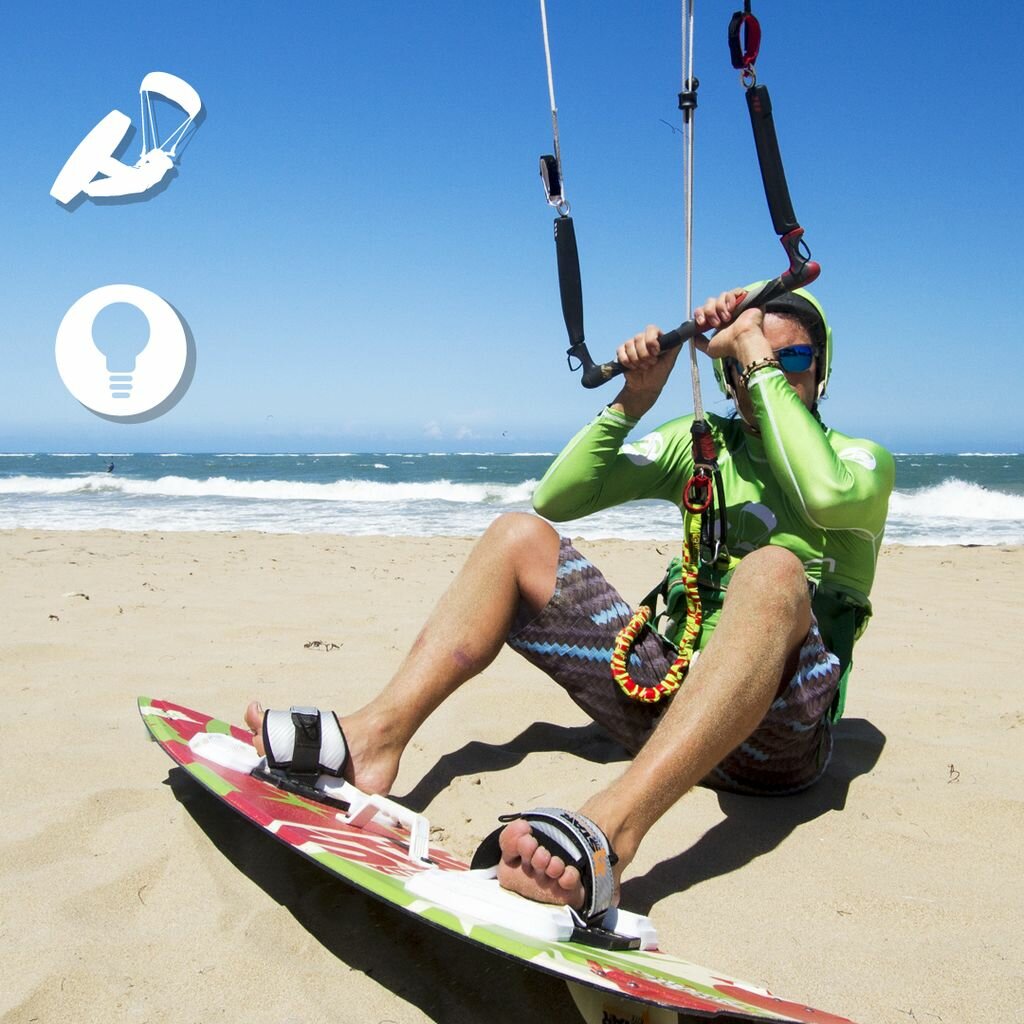
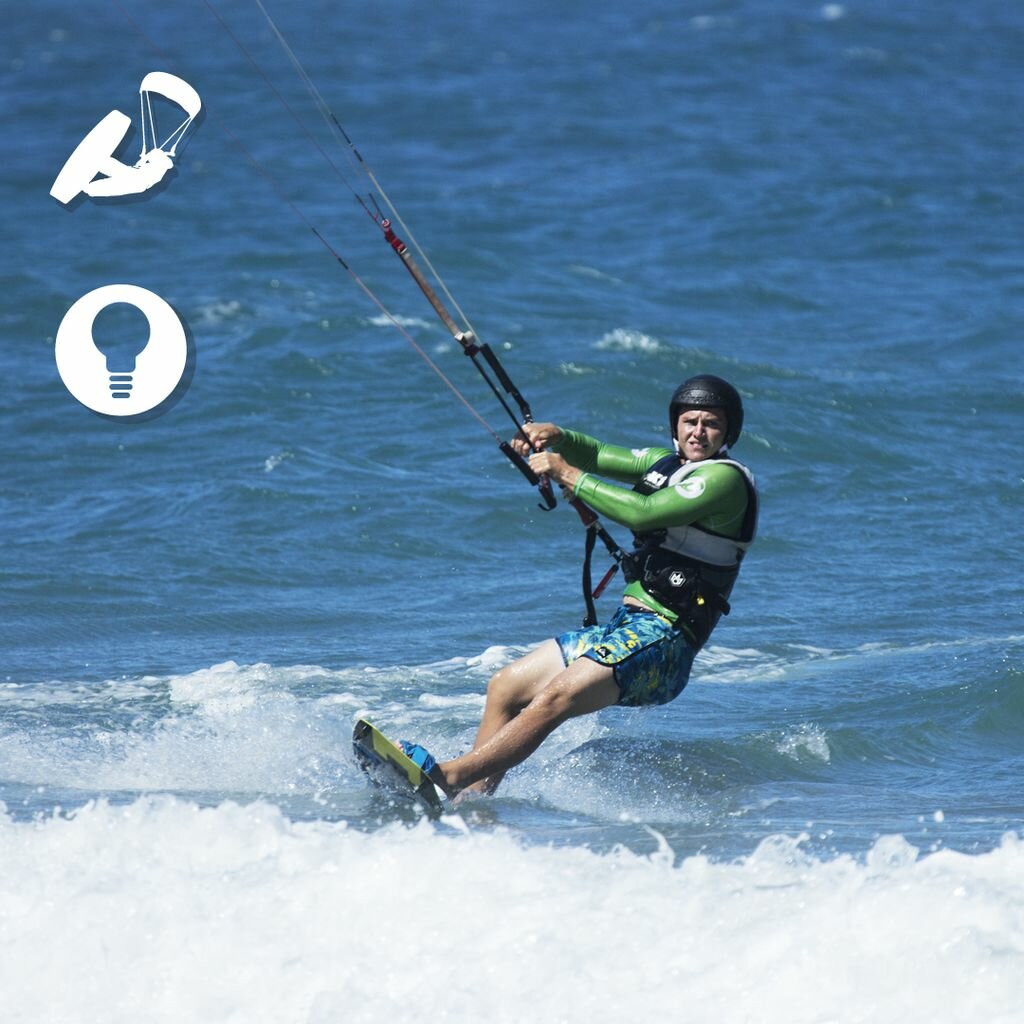
What stance are you, regular, right, wrong or goofy? Trick question… as there are no right or wrong stances, though you can definitely be regular or goofy! Either way, each and everyone’s body is different so there is not only one truth to this question.
Even though there is not a one answer fix all we do have some tips and tricks to make sure you have the best possible stance for yourself. It is important to note first that a good stance and duck is crucial as without a good one it is hard to ride well, can be uncomfortable and even painful.
Generally, your stance should be a bit wider than your shoulders. To do a quick stance test; jump on the beach and look at your landing position of your feet. In this landing position try to bend your knees, it must feel easy and natural. Usually a bit of an outward angle will help with comfort; like a duck. This is where the term “duck stance” originates from. How much of a duck stance one has depends on your body composition and riding style.
Now the golden rule with trying out any new stance is that it should not be hurting in the hips, knees or ankles. If it does hurt or you feel major discomfort- stop your session and modify the angle of your duck and/or stance. A wider stance will give you better stability but will also reduce maneuverability. Kiteboarding stances differ from similar board sports like snowboarding. This is because in snowboarding the angle of your front foot is usually more open than the back foot because people tend to ride more on their good leg. In kiteboarding, it is usually the very same angle in both feet as we are pretty much riding 50/50 with each foot in front. So when setting up your stance consider this difference especially if you have influence from other similar board sports. Also consider for comfort that more angle in the feet will be better for freestyle but less comfortable to ride in choppy waters.
In the end, everybody is different. We cannot recommend one stance for everyone as everyone will have their own preference. If you feel your stance is not right because you are not comfortable, we recommend you run tests off and on the water with different stances; always applying the golden rule.
Have you found your golden stance yet? What have you done to do so? Let us know in the comment section below-
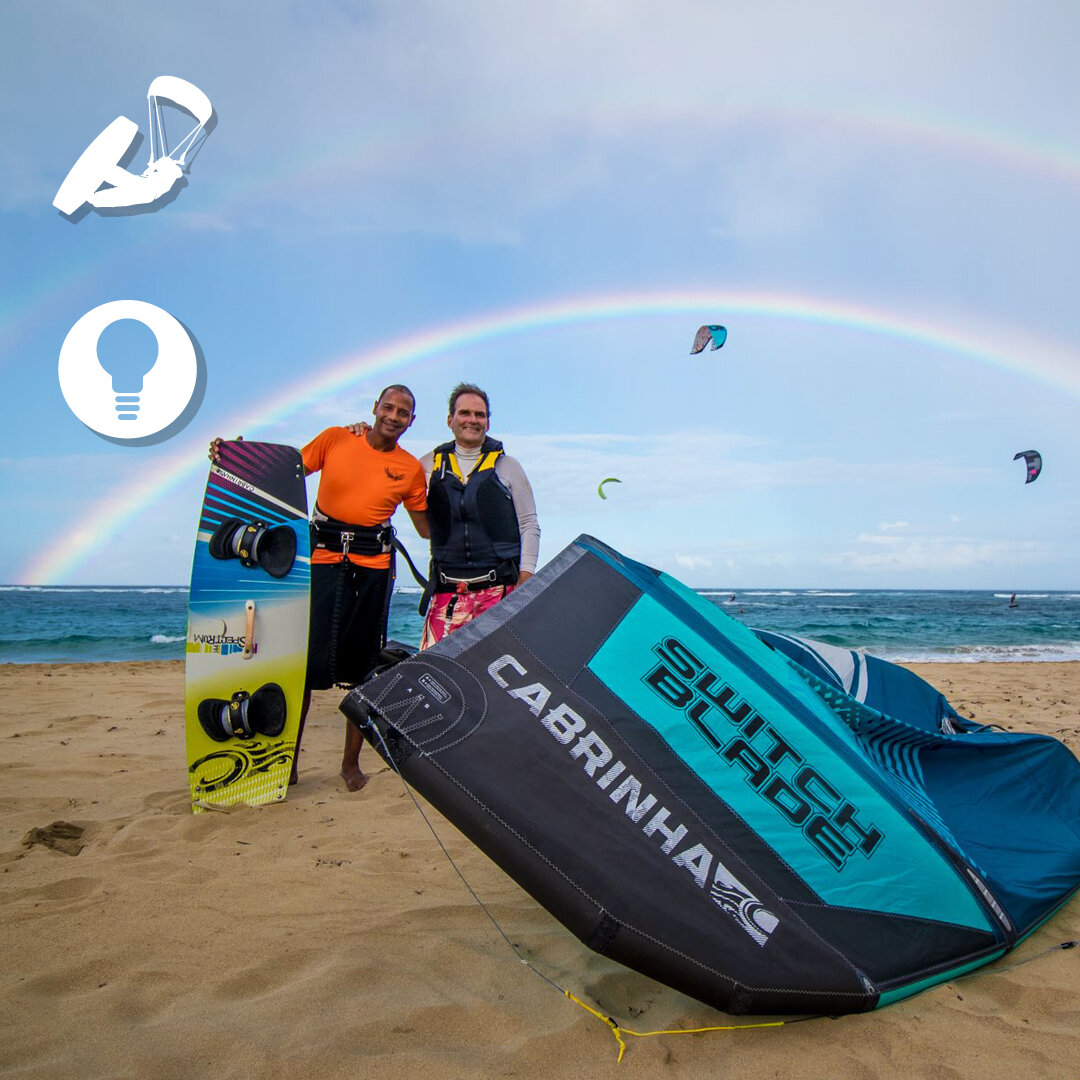
No matter how fast or slow we progressed in our kitesurfing, at some point we will eventually slow down. We get to a point where we are not progressing as fast as we used to and this is exactly the moment where we plateau.
Most people when they learn to kiteboard, use an Instructor up until they become independent. They take the initial course package and once they can ride upwind and/or manage themselves they go off all on their own. At this point, those that are ambitious start testing and pushing their limits to begin developing their skills whilst some others take their time and just enjoy the beauty in the basics.
It was rare before though now it is becoming more common for an intermediate kiter to get 1 on 1 coaching or join a clinic to improve their level. As kiters we often forget the power of getting coached. All the greats of any sport has a coach by their side and mentor to help. A coach will be especially useful for when you have slowed down or plateaued as they will help invigorate and guide you once again to improve in any direction you wish.
To answer the question of if one should seek out coaching even if they are at an intermediate kitesurfing level? The answer is a definite yes! We all have room for improvement and/or plateau at some point which is why it is good to get some coaching to challenge and push ourselves to stay excited about the sport we love.
What is your level and have you ever considered getting coached? Would you prefer getting coached one on one or within a group clinic environment?
A common question amongst kiteboarders who are trying to improve their riding and want to jump higher is… HOW? How does someone jump higher? What does it take? Bigger kite? Smaller board? Bigger kicker? Stronger wind? More speed? A Red Bull Energy Drink?
Let's say you had perfect board and kite technique the only way you will get to jump higher is by going faster. Speed is directly correlated with height and more speed you get - more lift you will have. Of course, you can add a “kicker” to help you boost higher though this is conditional. Whether you want to jump higher on flatter or wavier water- speed is the variable that must increase to increase height.
Now you might think if you use the biggest kite and ride in the strongest wind you will go the highest - this is first of all not a good idea as it is not safe and dangerous - secondly there is another element which is control. If you are not in control you won't be able to maintain and use proper technique to jump.
Riding in strong winds with equipment that allows you to be powered and be in control to get lots of speed will be your best bet to jumping higher. Using a kicker additionally to this will help you get even higher-
Currently, the highest jump ever recorded is by Nick Jacobsen at 28.6m with the WOO Sports device. Do you believe we will ever get higher than 30m or even 50m jumping?
As the world of kiteboarding exponentially grows we will have more and more kiteboarders wanting to jump. The sensation of jumping is one similar to flying especially in strong winds. This feeling is not only super fun and addictive though can be dangerous if not performed and learned properly. When thinking of learning to jump consider these following points-
Dos:
-Learn in stable winds 15-25 knots.
-Learn in unobstructed 2m+ deep water.
-Learn in an open space far from other kiteboarders.
-Watch videos for advice before jumping.
-Ask your IKO Instructor for advice before jumping.
-Have someone keep an eye on you when trying.
Don’ts:
-Do not attempt in super strong gusty winds.
-Do not attempt in shallow waters especially with obstructions like reef.
-Do not attempt in crowded areas with limited space.
-Do not attempt if you are alone with no one around to help.
-Do not be afraid to ask questions or consult other kiteboarders for help.
These are some points we believe someone should consider when thinking about learning to jump. What do you think are some “Dos and Don’ts” someone should consider?
Let us know in the comment section below-
Picking a harness is never easy especially with so many different brands, fits and features. When you look at all the harnesses there are common themes that arise. You have some harnesses described as soft, medium and hard shell. Additionally we now have hook and slider spreader bar options as well sitting and bathing suit options. For now though we will focus on soft, medium and hard shell options.
Depending on your body shape, gender and needs you will have one harness that works better for you than another. In the end when choosing a harness it comes down to your needs, what kind of support and comfort you want. Here are some tips when considering which rigidity in a harness to choose.
Soft: Soft harnesses are quite comfortable though are not ideal for people who are less muscular or need back support. The softness in harness increases comfort though decreases support.
Hard Shell: Hard shell harnesses offer the most support and are ideal for individuals that are less muscular or in need of back support. For some, hard shell harnesses are not as comfortable as soft or medium. These harnesses are usually the most expensive harnesses in a companies line up.
Medium: Medium harnesses are the balance between soft and hard shell harnesses. Normally they have some frame that gives support though leaves freedom of movement to the wearer. These are the most common harnesses sold as they are comfortable, supportive and work for the masses.
When choosing a harness it is important to make sure you find a harness that fits your body shape and fits perfectly. Having a harness that is to small or big will not only annoy you though can potentially hurt you and in the long run make your kiteboarding sessions shorter and less enjoyable. Finding the right harness for yourself is one of the most important things you can do for your kiteboarding career.
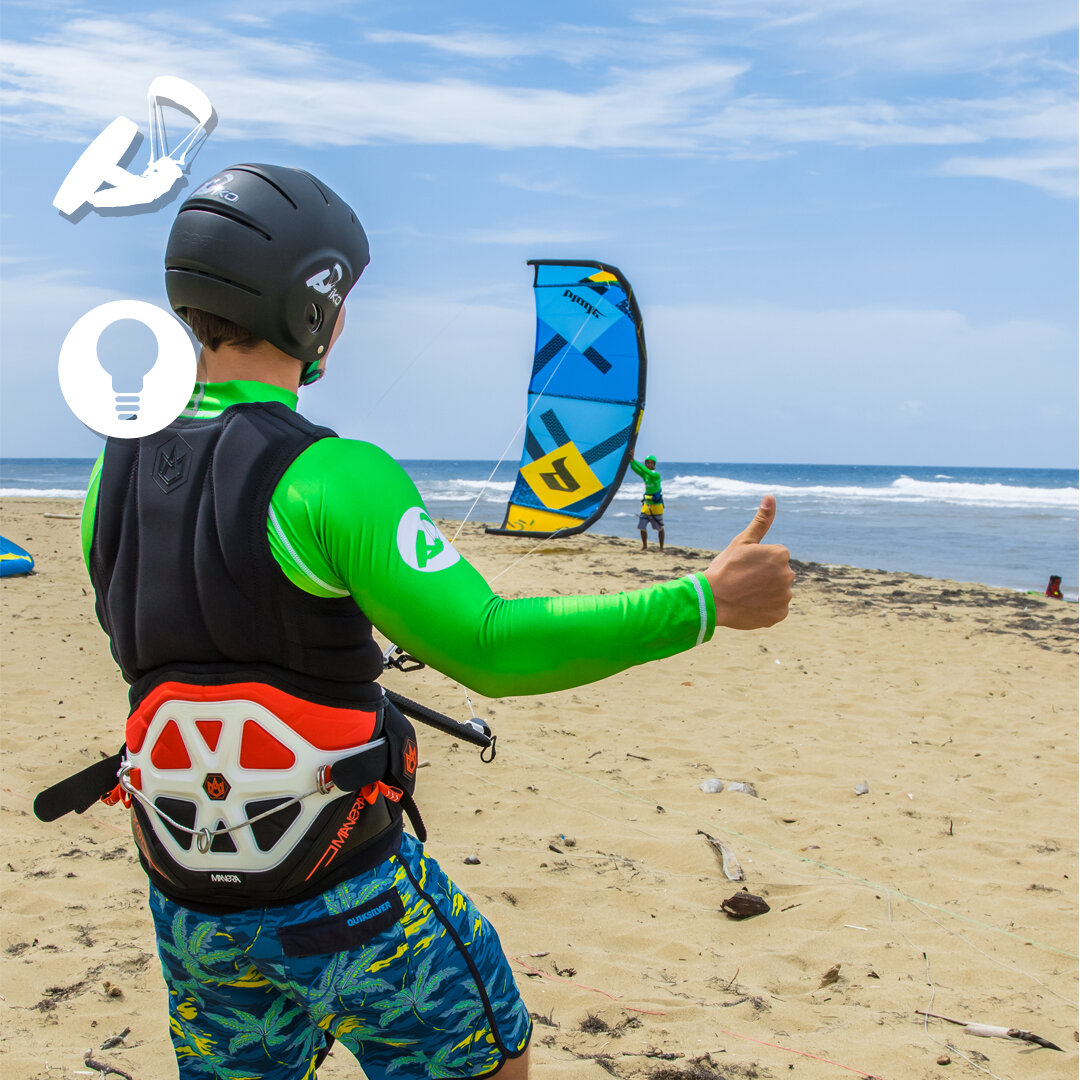
Now you might be wondering what we mean by “blind”… We are not talking about riding blind, the trick. We are referring to those of us kiters that have less than perfect vision and wear prescription glasses regularly. Many people who wear glasses don’t wear contacts - so what then? What do you do for kiteboarding? Ride Blind?..
This topic has arisen within the kite community and we have two ideas.
1.Use contact lenses! Using contact lenses kiteboarding makes everything easier. As long as you don't have major crashes then you are all good. You will have full vision comfortably and less worries of losing glasses.
2.Custom Kiteboarding Prescription Glasses. If you contact your local optician they can most likely create you custom glass for your kiteboarding glasses. This option is more dangerous as the glass can break on heavy impacts and potentially cause you harm compared to contact lenses.
If you are someone who wears glasses regularly - what is your solution for when you go kiting? We have spoken with various individuals and it is usually one of three things; contact lenses, custom prescription glasses and/or ride blind!
In the comment section below tell us your vision and solution when kiteboarding-
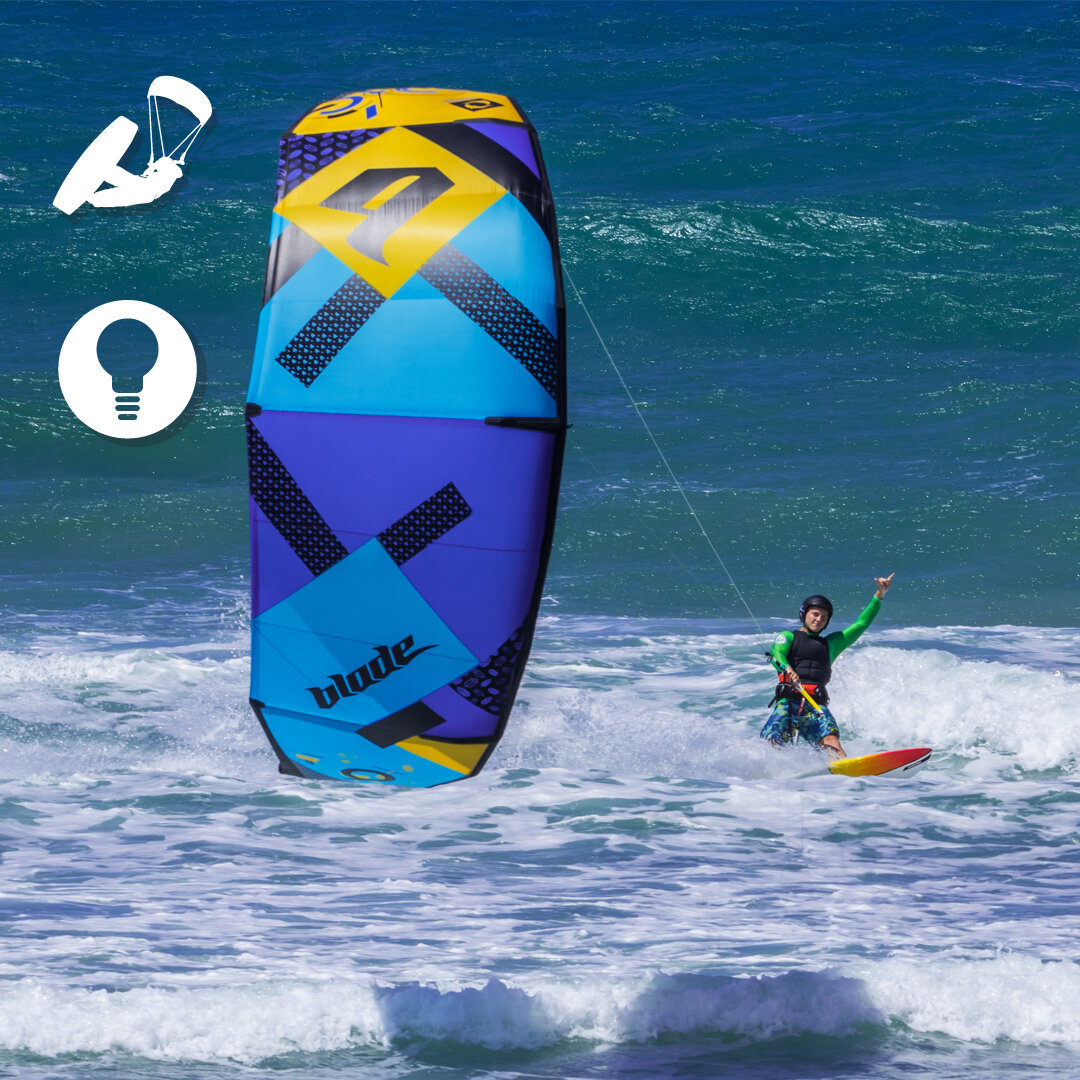
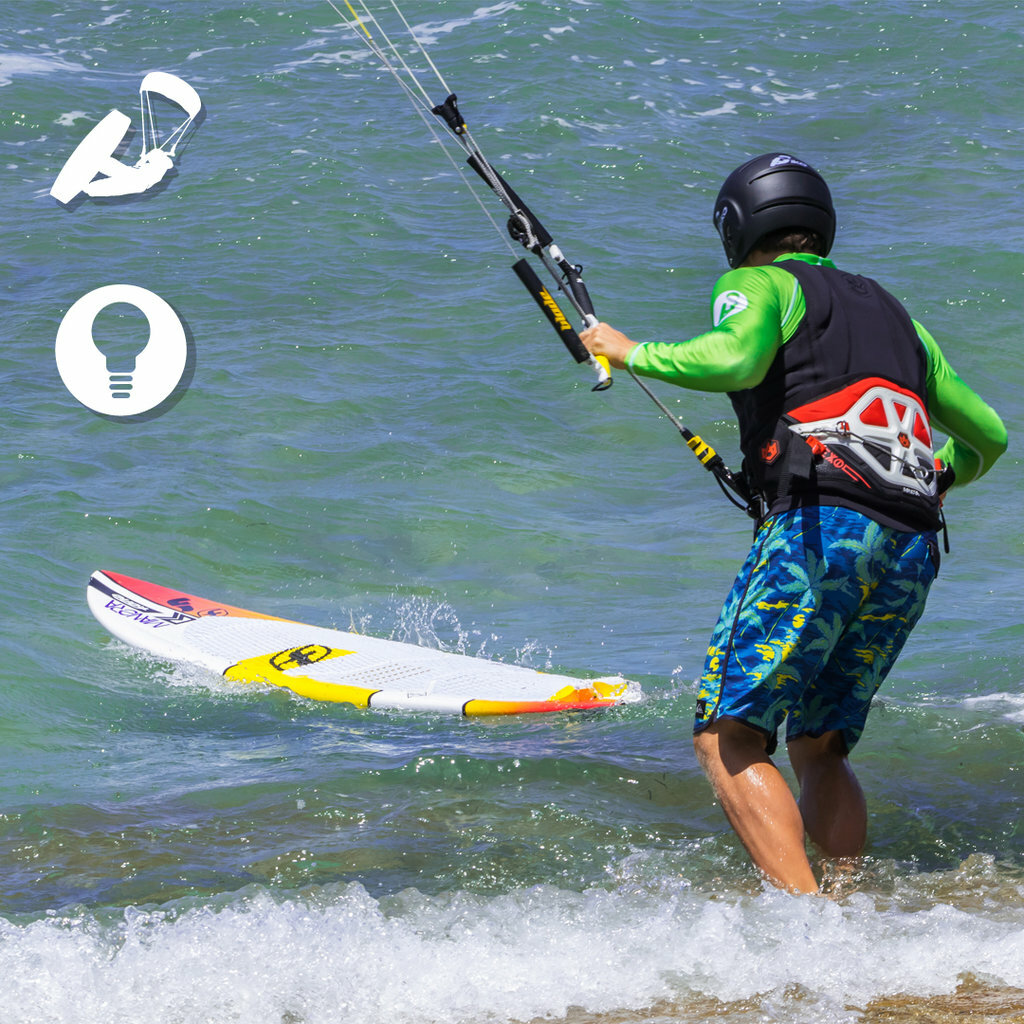
Expanding your repertoire of knowledge and skills is always a positive thing. If you are new or even a seasoned kite boarder and yet to try a strapless surfboard you are missing out! Learning to ride a strapless surfboard is easier than one might image and can introduce you to a whole new world.
Riding a strapless surfboard is the feeling of ultimate freedom as you can find your true natural stance and enjoy the liberty of cruising without being bound and tied down. When riding strapless you have 100% control over your board whether it is for wave riding, cruising or strapless tricks.
The challenge of learning something new is revitalizing and fun. Once you get the hang of riding both directions on a strapless you have a whole new set of challenges ahead from jibing, transitions and wave riding. Getting on a strapless surfboard is a way to mix it up from time to time.
If you are a surfer or someone interested in riding waves then strapless is the way to go. Once you begin mastering a strapless surfboard, you might never go back to anything else. Kiteboarding with a strapless surfboard is the ultimate way to take advantage of the waves. Instead of take 5-20 waves in one traditional surfing session - you will take hundreds and have a blast on every single one.
Riding a strapless surfboard has many more benefits and perks though we would like to hear from you! What do you think about riding a strapless surfboard? Have you tried it?
Let us know in the comment section below-
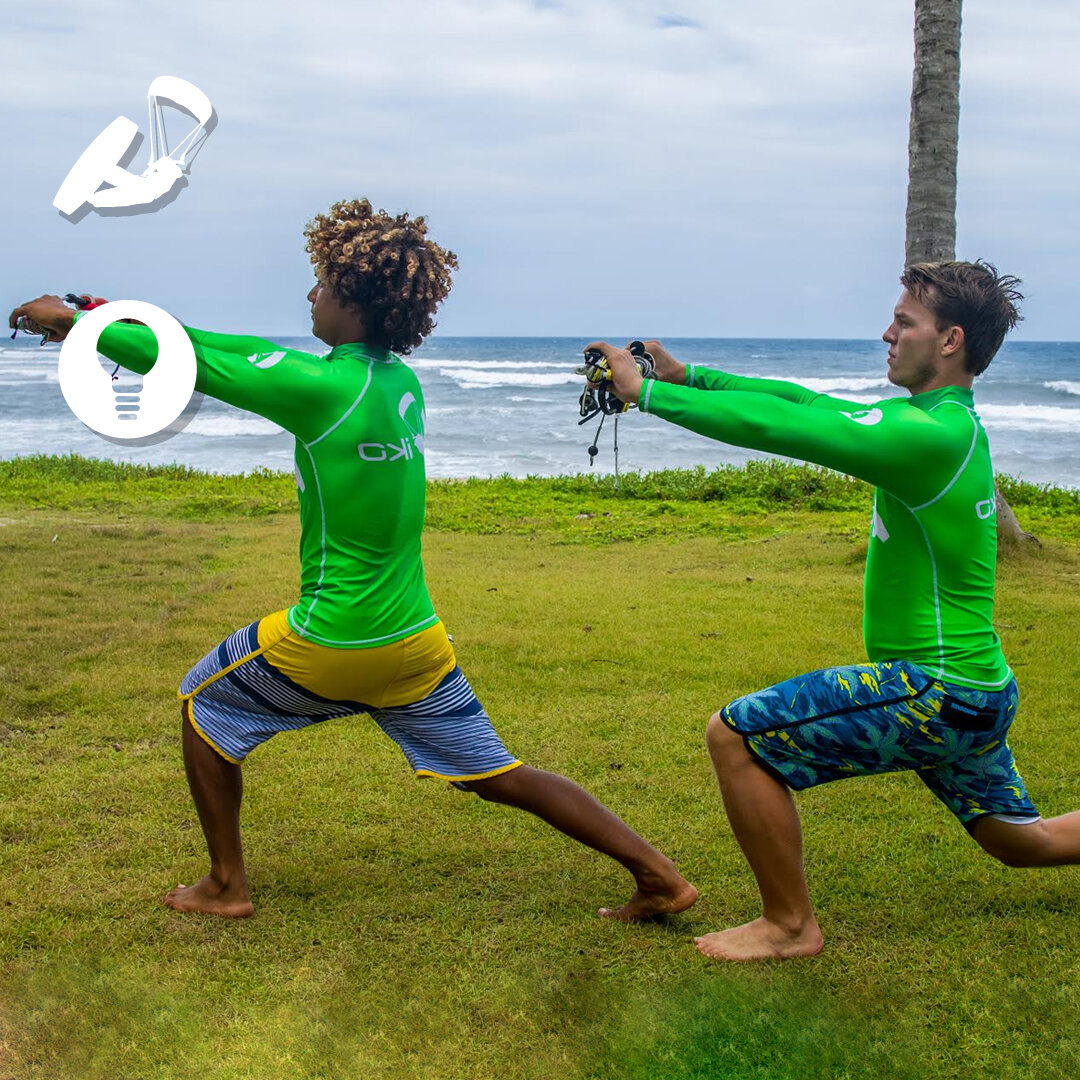
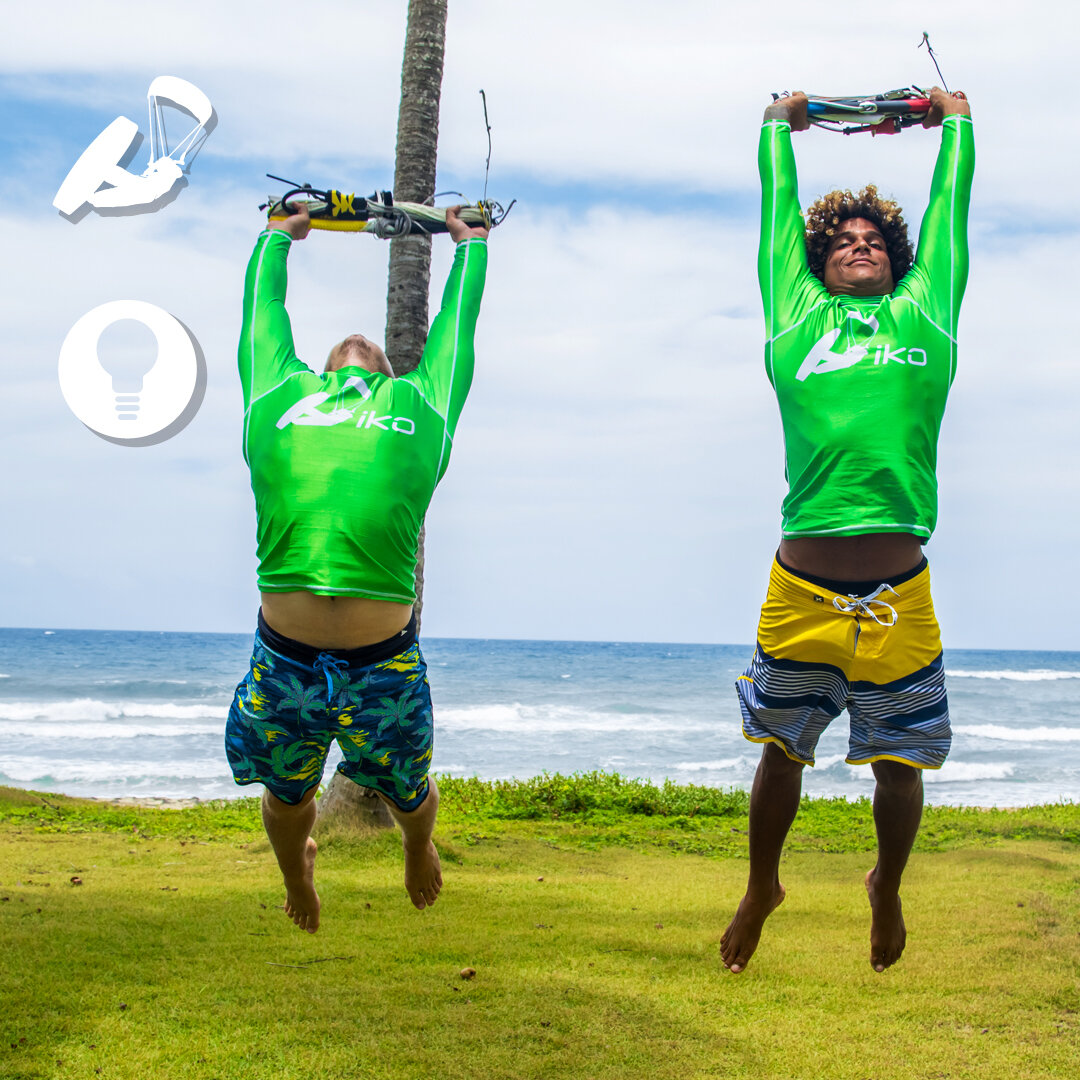
Last year we gave a few tips regarding stretching. Stretching helps people of all ages and is recommended for everyone whether a kite surfer or not.
Actively stretching before an activity helps warm up the body and decreases the risk of injury during the activity. Stretching after your activity will help relieve muscle soreness and aid in recovery. The benefits of stretching are abundant and the debate of whether to stretch is off the table as the science proves the benefits of proper stretching.
This week we want to share three easy stretches that can easily be done after a kite session!
“Cobra” This stretch is done lying down on a flat surface. It is a great stretch to open up the chest and really elongate the abdominal muscles.
“Downward Facing Dog” This stretch will not only stretch you though also help strengthen you. It is done on your hands and feet and will help stretch your arms, shoulders and calf muscles.
“Low Lunge” This stretch is one of the most important as it stretches all the psoas muscle group. This muscle group is basically what connects and holds up your body. If you have knee pain, lower back pain and or postural problems - this could be because of a tightness in your psoas muscle group.
We have included a photo of "Low Lunge" and recommend if any further questions to consult a professional locally near you.
There is not one right way to stretch as everybody's body is different. If you are performing a stretch and feel intense pain-stop doing that stretch and find other alternatives that can work for you.
We are interested to read in the comments below your favorite exercises and stretches for before and after a kite session!
Windy Regards,
IKO
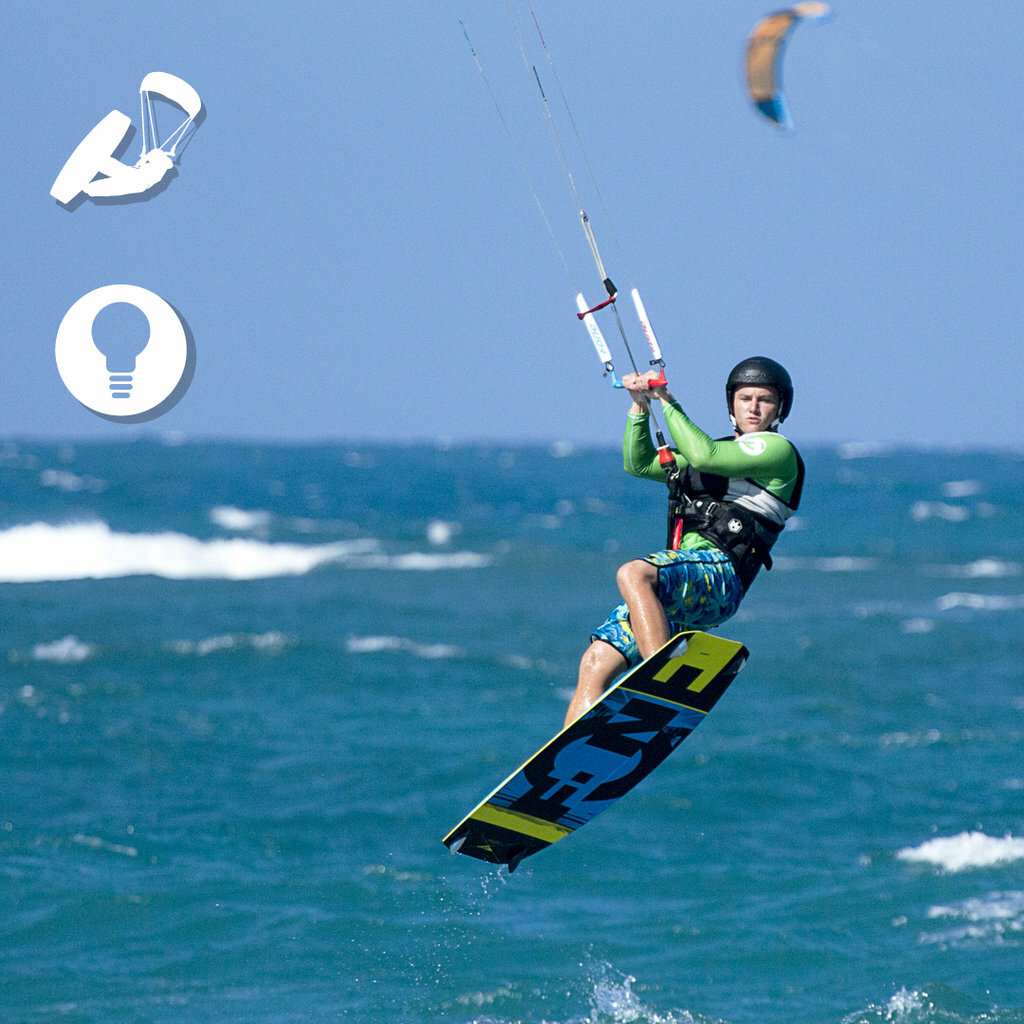
The best time to start learning tricks in kiteboarding is once you have learned the theoretical, practical and safety side of the sport. At this stage, you will be considered an independent kiteboarder. You will have the right mindset and confidence to begin pushing yourself to new heights, literally!
Some of the first tricks to learn in kiteboarding is how to control your speed by edging, riding toe-side, and changing direction without stopping. Once you’ve mastered the independent and intermediate stages of kiteboarding you can move into the advanced side of the sport.
The advanced side of the sport will take you deeper into the art of kiteboarding. Mastering riding in all directions, how to help your friends with board recovery, jibing and basic jumping techniques!
Apart from learning how to stay upwind most kiteboarders strive to learn how to jump and/or ride waves with a surfboard! This is one of the many beautiful things about kiteboarding; the freedom of expression. The best time to start learning tricks is once you successfully passed the independent kiteboarder stages as you will have a greater understanding of the sport which will keep your progression safe and fun!
Question to all the independent kiteboarders - what is currently your favorite kiteboarding discipline and trick? Tell us in the comment section below-
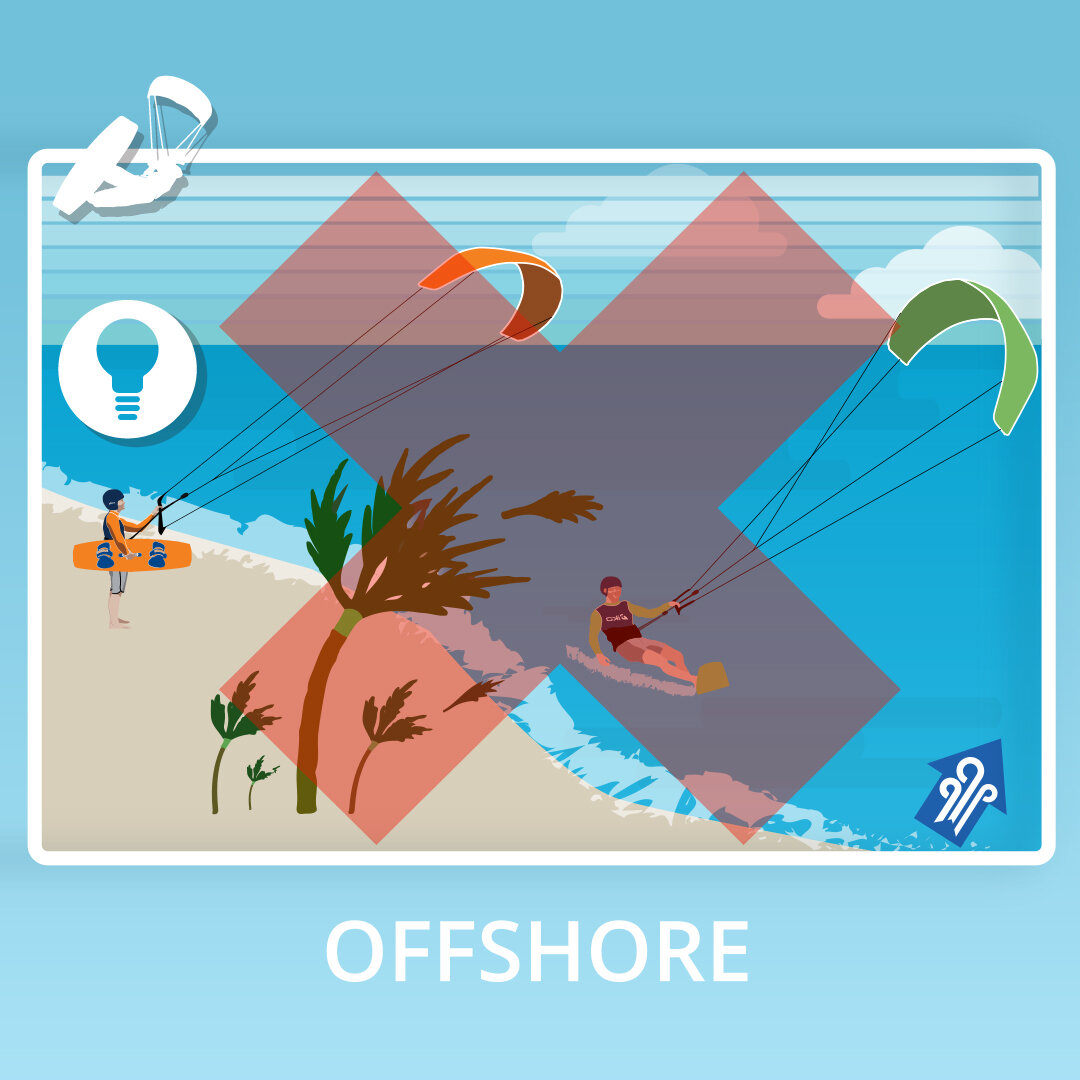
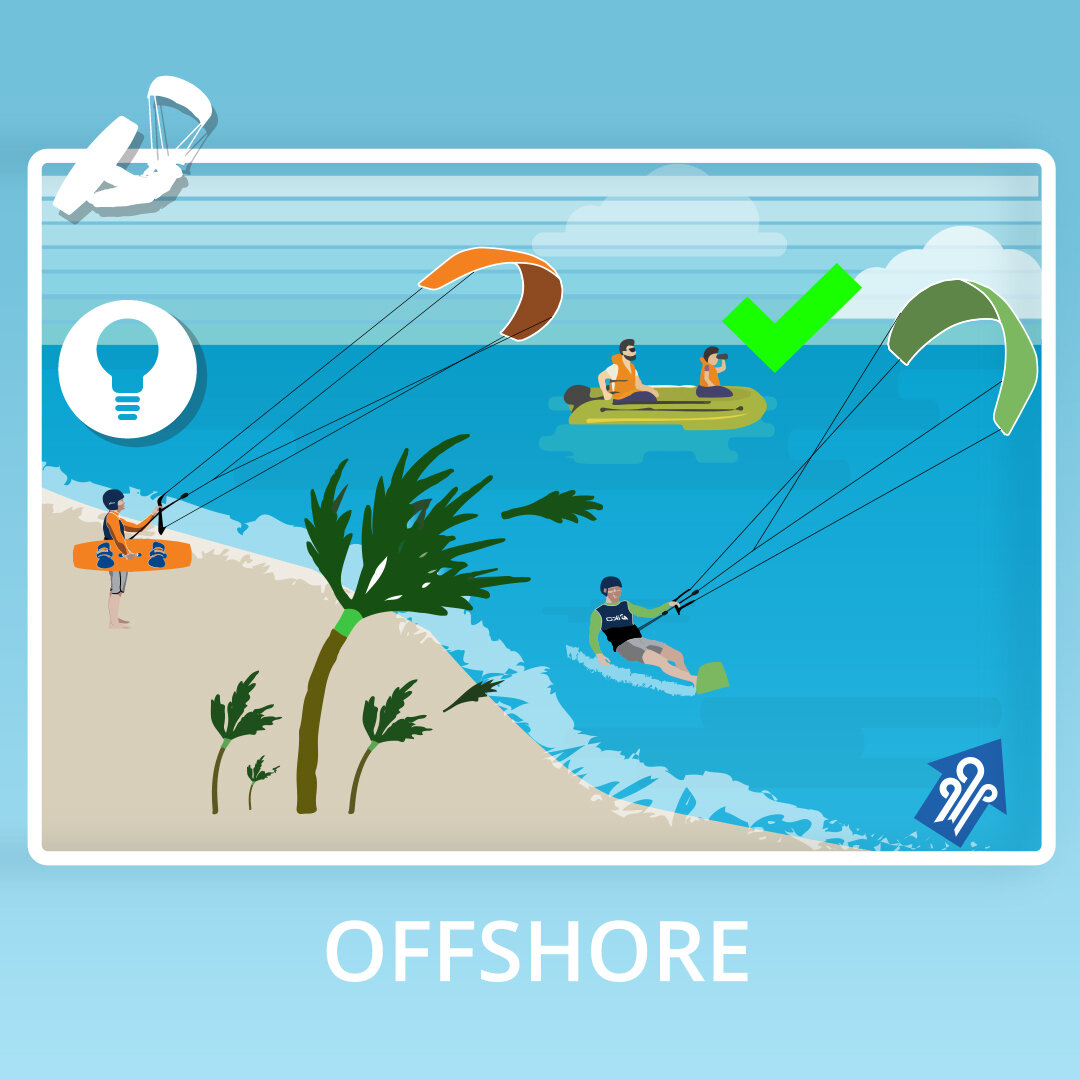
When in doubt, it is usually safer to not go out! Certain wind and wave conditions are best to avoid. Super gusty winds, huge waves, storms or offshore conditions to list a few.
We get asked questions all the time and one frequently asked question that must be publicly addressed is the one about offshore wind conditions!
Offshore wind conditions should ALWAYS be avoided unless you have a safe method to return to shore like an active rescue support boat or are in a bay with a land mass in near distance downwind from you. If you are at the open sea, do not go out in offshore winds unless you have a rescue method.
Offshore winds are deceptive and usually gusty making it hard to launch as well inaccurate of the conditions at sea.
Overall it is best to avoid offshore wind conditions.
If you have any specific questions you would like answered - send us a message or post it in the comments below and we will do our best to answer them.
Remember to ride safe and have fun,
IKO
As you progress in kiteboarding it is inevitable that the urge to learn tricks like jumping, wave riding, foiling or aerial maneuvers will arise.
Before beginning to learn new tricks consider these 3 things.
1- Make sure your kite is under control. If you are uncomfortable flying your kite, we would suggest practicing more before planning to learn tricks. Once your kite flying skills are good you can begin learning tricks.
2- Once you decide what tricks or discipline you want to learn do some research. Watch people riding in person, talk to people who are doing what you want to do and lastly watch lots of videos. Doing proper research will help mentally prepare you for when you go out and try what you want.
3- When you feel ready to try your tricks pick an optimal spot and day. If you are trying freestyle tricks finding a place with average steady winds, flat water and open space with no obstructions would be your optimal place. If you are riding in a crowded spot with super choppy waters and 40 knots of wind this would not be the ideal place to try your new tricks.
When planning to do and learn something new some will say “just do it” though this advice is flawed. We have seen and heard of many unfortunate accidents that could have been easily avoided with better preparation.
If you are unsure about your progression and want to safely learn new skills consult an IKO Center,an IKO Instructor or even better an IKO Coach for advice and advance training.
Have fun and stay safe out there while training,
IKO
As you learn to kiteboard, you will be taught the few right of way rules that help keep kiters organized and safe out on the water. The golden rule for when one rider is upwind and the other rider is downwind is that, if you are passing upwind, keep your kite high. If you are passing downwind, keep your kite low.
This will ensure maximum distance between the kites when crossing to prevent any possible entanglement.
There are 8 priority rules in total, do you know all of them? List them in the comment section below-
Note: In the photo you will realize the rider on the right lowers his kite as much as possible as he passes downwind, while the upwind rider (on the left) flies her kite as high as possible.
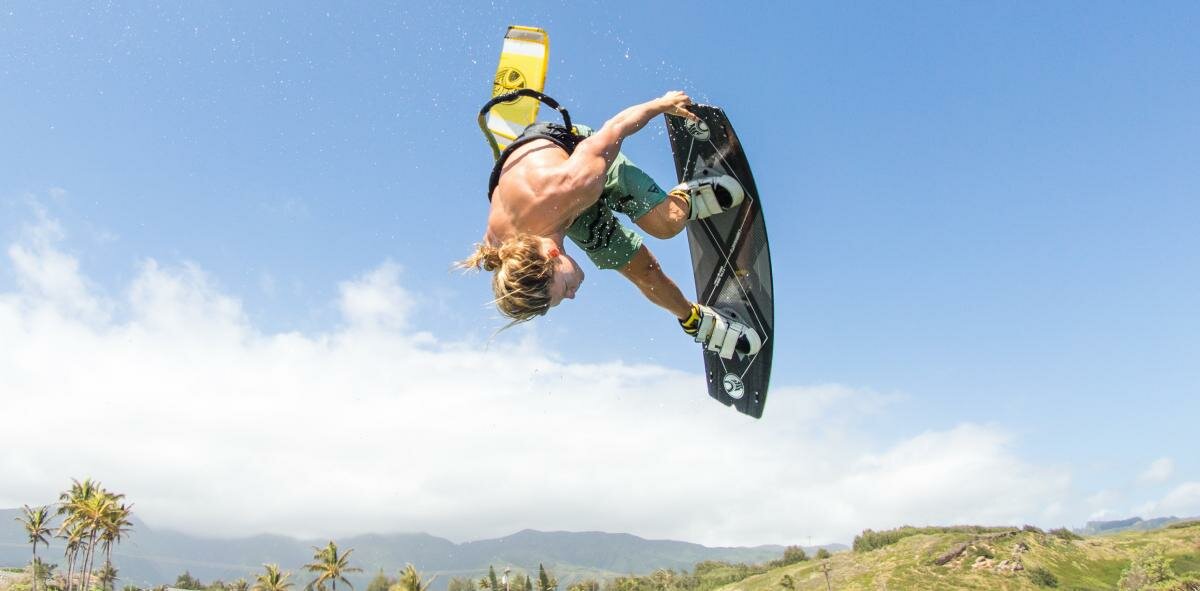
When kiteboarders progress and begin building up their kite quiver, one of the many common questions that arises is if they should get a carbon or non-carbon board? Truth is, there is no right or wrong answer really. Some can benefit from carbon more than others.
The biggest difference people associate with carbon vs non carbon is price. Carbon boards are usually more expensive than non-carbon boards whether twin tip, foil board or surfboard though do not let this fool you thinking that a carbon board will be better for you just because it cost more.
One of the main advantages with carbon boards is the weight reduction. Carbon boards are significantly lighter which has advantages. A lighter board helps maneuverability; whether it is handling the board on land or in the water. Many surfboard freestyle and wave kiters have began using carbon surfboards due to the weight reduction over standard surfboards.
Another pro that also happens to be a con for some is the stiffness of carbon. Carbon boards are generally stiffer than non carbon boards. This stiffness can help riders have an engaged and predictable feeling with the board though this stiffness can also hurt the rider. If a kiter suffers from knee or back problems riding a carbon board will make you feel the choppiness of the water and have harder impacts when jumping or doing tricks. This will lead to injuries or hotter sessions due to discomfort.
The two main factors when deciding whether to choose carbon vs non carbon is weight reduction and stiffness. If you are someone who is not particularly strong and want to easily move the board around whether on land or water or are trying to improve on your freestyle surfboard tricks, riding light winds with twin tip or foil racing then you might want to consider carbon equipment. If you are someone who has knee and or back problems or discomfort - stay away from carbon. Do not be confused; just because it is more expensive does not mean it will be better for you.
We could list more pros and cons of carbon vs non-carbon though we want to hear about your thoughts and personal experience. What do you ride and why would you recommend someone a carbon board over a non-carbon board (and vice versa)? Looking forward to hearing what you have to say in the comments section below!
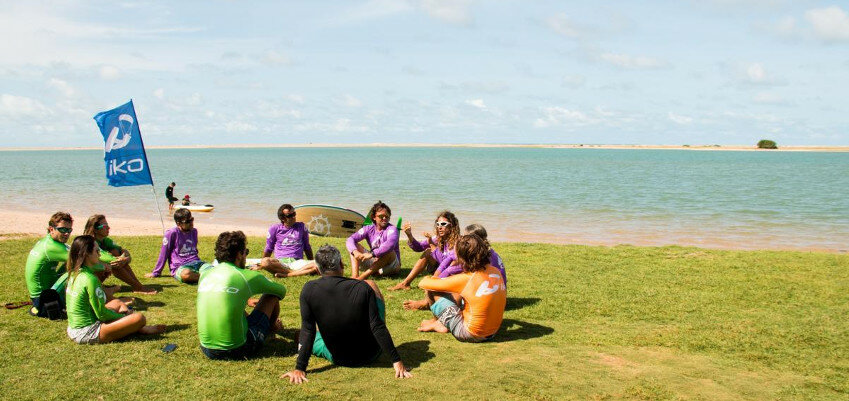
New Organizer Guide now available!
The AITC, ITC, and Coach Organizer Guides are now combined into one guide. All charts with the incomes and expenses are clearly visible, as well as the organizer task list before, during and after the training. This will help Centers to stay organized.
Quality is everything. To ensure the Assistant and Instructor candidates are trained properly, it is important they receive the course content in color (exception are made only where it is costly or not possible). IKO will verify that the guides are printed in color by the feedback sent from the candidates at the end of the course.
To control and improve the quality of the Assistant Trainer course, only ONE Assistant Trainer can be trained during an Assistant Trainer course, given there is at least 2 Assistant candidates. The Assistant Trainer course is no longer the responsibility of the school. Assistant Trainers need to contact the IKO to schedule their course. It is highly recommended to follow an AITC as an observer before doing the real ATTC. Expect this procedure to become mandatory before the end of 2018.
Assistant Course
The AITC-Plus will be renamed and simplified to AITC. We will push that all websites will be updated accordingly. This course has been a major success of the IKO in 2017. Many candidates have provided positives feedback about it. We are now working to update the manual with the feedback we have received from both Candidates and the Examiner team. We plan to release an updated version in Spring 2018.
Note that now Assistant candidates are required to be a kiteboarder Level 4 or equivalent instead of being level 3N. This will help candidates be better prepared for the course.
Instructor Course
Printed copies of the kiteboarder handbooks are no longer included in the ITC pack. The handbook are now available free for all Instructors with a valid membership as eBook on the IKO app. ITC candidates will now receive IKO merchandise and 5 certification credits after their course. Certification cards will disappear as Virtual Card (Vcard) on the IKO App will become more popular. Instructor Level 1 can now teach up to the kiteboarder Level 4 and certify their students online.
Final update and reminder
During pro courses, every candidates must wear a helmet during beach exercises/workshops/teaching practices as well as a buoyancy aid when in the water. Additionally, remember that every Assistant Instructor, Instructor, Assistant Trainer and Examiner must also connect their leash to the front/side part of their harness at all times. This is a global effort to give the proper image and example to current and future students.
Thank you for reading and understanding,
If any questions please do not hesitate to contact us,
Windy Regards,
IKO
You probably have seen them and occasionally wonder - what is that flying in the air? As foil kites are becoming more and more popular due to the foil movement it is a good thing to know what they are and if you should be using one.
Foil kites resemble parafoils as they are multi-celled, air inflated, light, efficient and powerful kites. With all these perks you might be wondering why we are not all using them? This is primarily because they are fragile, more technical and expensive compared to inflatable kites.
Foil kites are popular amongst avid racers and light wind riders across kiteboarding, snow kiting, land kiting; people have managed to get around in winds as low as 3 knots with foil kites! If you are not planning to race or do not live somewhere that requires a light wind machine you don’t really have a reason to ever buy one. Foil kites will cost you more money, require tedious maintenance, not offer you the wide crossover possibilities that inflatable kites offer you and don’t forget the nightmare it can be relaunching the kite once it touches the water…
If you do ever have a chance to learn more about foil kites or the opportunity to test one out by all means; learn and expand your knowledge. If you are ever considering to buy one, we generally believe majority of kiters across the world have all their needs met by inflatable kites. If you are still debating to cross over make sure to assess your needs and do your research before purchasing one.
Now the question is… do you have a foil or inflatable kite? If you have tried both- which do you prefer?
Let us know in the comment section below!
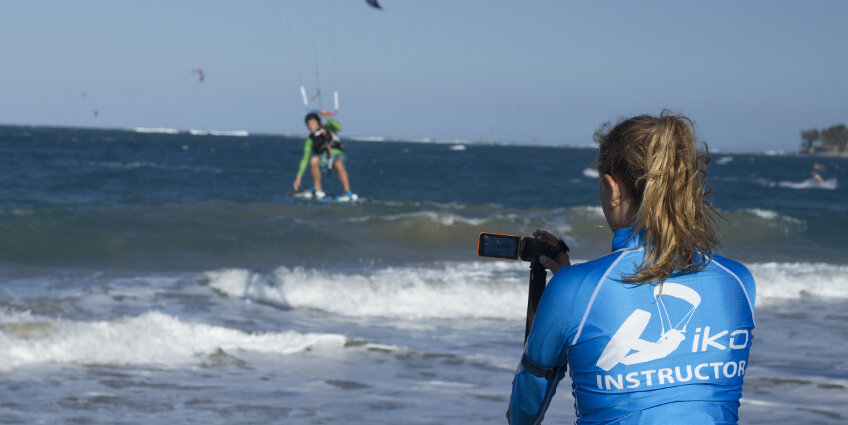
This year we hope you decide to push your kiteboarding skills to a whole new level! We have a few tips to share which can help you get where you want!
Before reading on, you must first decide what you would like to accomplish while kiteboarding. Try to narrow your focus to whether it is learning to foil - jumping high - properly riding upwind - wave riding backside; whatever it is, you must envision what you want to achieve.
Now that you have done that we have few recommendations:
Watch online videos (IKO website, Youtube)- Once you are an independant rider this is probably one of the best ways to begin doing research in learning how to do something. Wether its kite related or anything. Watch three to four different videos about the same point to get a better idea on how to do.
Book Lessons- If you are located near an IKO Center you can consult an Instructor about what skills you want to obtain and book lessons accordingly.
Ask a fellow kiter- If you are not near an IKO Center you can always ask a fellow kiter nearby for some pointers and real life demonstration of the jumping you want to learn or technique.
Utilize Social Media- Something you might not have considered in 2017 is now something to consider in 2018. Reach out to a rider you look up to or us by message asking for some pointers!
Record yourself - Ask a friend to take pictures and film you while riding to understand what you are doing right and wrong. If you do not have a friend or camera to film you, consider booking an IKO evolution clinic. Your coach will teach you, film you and do a video debrief after the kite session to help you understand and progress faster.
Workout Regularly- Working out won't teach you a trick per se though it will greatly help you on and off the water overall! Maintaining a healthy, flexible, strong body will keep you nimble and ready to master any new skill you want.
Which is your preferred method of progressing? What are your 2018 goals?
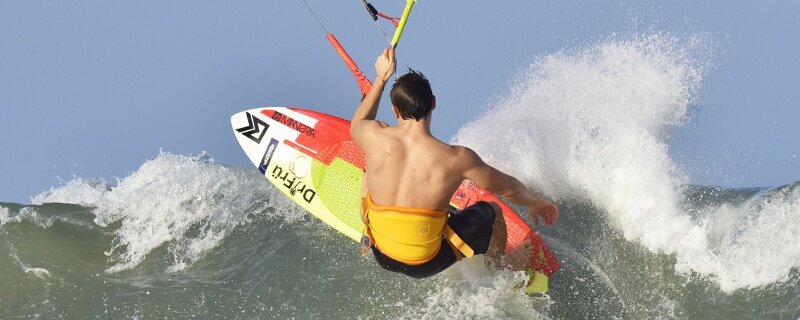
As the sport continues to grow we begin seeing more and more cases of active kiters which range from average-intermediate up to professionals with knee braces, or mentioning back problems. Unfortunately, in most cases they are injuries that occur while kiteboarding.
This raises the question- why are these injuries becoming more common, and can we do anything to help prevent them?
Once an individual learns to kiteboard they seem to forget that they are still doing an extreme sport. Kiteboarding has so many variables and it really takes a toll on your body. Sure… many believe that accidents are only happening to those who are competing professionally and doing freestyle. This is not necessarily true; professionals are probably on the smaller percentile of those injured. Most injuries are from the grand majority of kiteboarder which do not push high levels of freestyle and kiteboard recreationally.
In previous tips, we mentioned the importance of incorporating some sort of exercise into your life to maintain your overall health. As kiteboarders we must remember to keep our lower backs, core, shoulders and quadriceps not only strong though flexible to help prevent injuries. How you go about training these parts is up to you. Doing dynamic exercises at home or in the gym will be the easiest way to train.
Just because you are kiteboarding everyday does not excuse you from training, and preparing your body for future sessions. Incorporating regular exercises into your routine will pay you huge dividends in the long run!
Let us know what you think: should we be training off the water in addition to kiteboarding regularly to help prevent injuries? Write in the comments below!
Does your car function without gasoline or nowadays electricity? The answer is no. You must imagine your body as a vehicle and a tool that needs regular maintenance and fuel to operate properly!
Food is our fuel! We have mentioned in previous blogs having an overall healthy diet is key to longevity, top performance and a step towards a happy life! We could talk for hours and days about tips, tricks, do’s and don’ts, proper nutrition though today we will focus on how to snack to our advantage when kiteboarding (also relates to any exercise)!
When kiteboarding, it is always recommended to have water on hand to stay hydrated as our body can survive without food for 3 weeks and only 3 days without water! We do not recommend testing either of these as it will be extremely unpleasant and detrimental to your health.
Water checked. Now, what about food? We do not recommend doing high intensity exercise without fueling up two hours in advance. If you eat heavy before exercise you will most likely feel heavy, tired, get cramps and even possibly feel sick during the exercise.
Once you have eaten two hours out you should be ready for any challenge coming your way! If you are exercising for under an hour you won't have to worry about snacking up though if you are planning to exercise for extended periods of time at high intensity we would recommend you use snacks wisely to stay fueled up.
Staying hydrated and eating small amounts of light simple foods such as raisins, nuts, dried fruits or a banana, can help you stay energized throughout the exercise or session. After you are done exercising drink fluids such as water or 100% juices. Within the first hour it would be good to consume proteins and carbohydrates so your body can use that energy to help with recovery.
Getting in the habit of eating accordingly and snacking when appropriate will help you perform at a higher level longer.
Are you staying hydrated and snacking before/during or after kiting? What's your favorite snack?
In this day and age, most people understand that warming up before activities and stretching after exercise can help prevent injury - although few really understand why. Regular stretching lengthens the fibers of the muscles and with time, creates flexibility. When you deeply and slowly stretch a muscle group you are also helping to bring a good flow of oxygenated blood to the area.
This increase in irrigation has another important function, which is to allow the trillions of muscle cells to discharge their waste products, primarily lactic acid. Lactic acid build-up is the reason that the muscle fatigues and, in large quantities, can form trigger points or painful “knots” in the muscle body. For this reason, it’s important to stretch after your kite session.
Note that a flexible muscle is much stronger and more resilient than a rigid one. This means that a flexible muscle will most likely experience fewer injuries.
Now you might have questions running through your head like what stretches, how long, etc… Truth is… There is no right answer on how long to hold a stretch or even how long to stretch in general as it all depends on the individual.
A general rule of thumb when doing static or dynamic stretches is to try and hold each stretch for 5 long breaths, and if you feel like you need to go longer, just listen to your body and move accordingly. Stretching routines usually take a good 10-25 minutes to properly stretch overall.
Before you go kiting try to get the blood flowing and body warmed up to reduce chances of injury. Some ways to do that is by pumping up your kite, doing jumping jacks, quick swim anything that is light and easy though gets the heart pumping.
If you want to get the most out of stretching then do not worry so much about stretching directly after a session. Wait 4-5 hours after your session to do a stretching routine as this is when your muscles really begin to tighten up. A nice habit to develop is stretching right after brushing your teeth and going to bed. This will help you physically as well mentality unwind after a long day!
In our stretching series we will be releasing information, specific actionable stretches you can do anywhere, anytime and taking questions and requests.
We would like to know if you warm up before a kite session and stretch after you are done. If you do warm up and stretch tell us your favorite warm-up exercises, static stretches, and dynamic stretches.
Let’s all stay flexible and injury free from here on out!
If you want to check out the complete eCourse today on stretching check it out here.
Ever heard of the “Beaufort Scale”? How about Sir Francis Beaufort? If you have never heard of either, its alright… Not many people have and yet, majority of the world uses his wind reading method today!
The Beaufort Scale was a system devised in the 1800’s by Sir Francis Beaufort. It is a simple, objective way of observing your surroundings to gauge the wind speed. The Beaufort Scale has 13 levels ranging from no wind ‘calm’ to ‘hurricane’ winds (0-12).
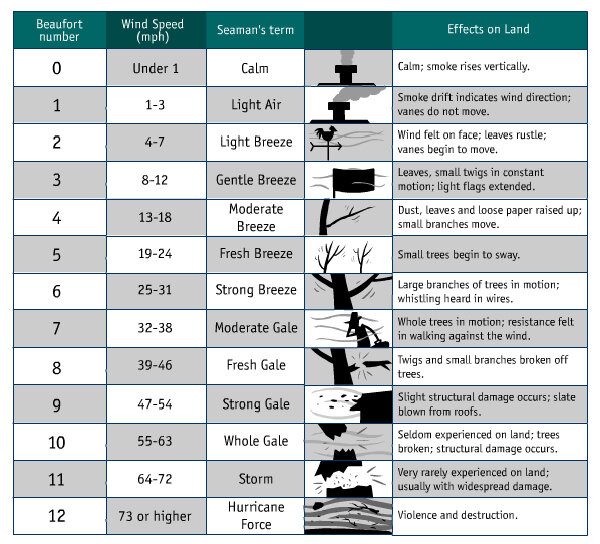
If you have ever estimated the strength of the wind by looking at the trees moving outside your house or the white caps out at sea; you are in a way using his method.
For most of us kiters we are aiming for a steady force between 4 & 6 though now with foiling and people wanting to chase storms to fly as high as possible we are seeing kiters out in forces as low as 2 (foiling) all the way up to 9 (mega looping)!
In relation to the Beaufort Scale what is your ideal wind force and what is the lowest/highest you have ever managed to kite in?
Let us know in the comments below!
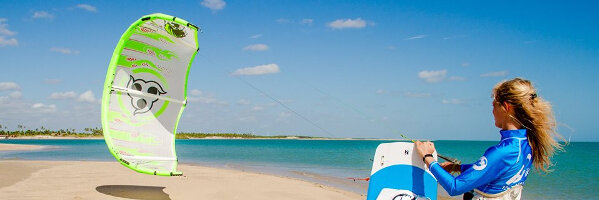
In general, for most people 2 kites will cover the basic needs to get out on the water. As time passes and depending on what you are doing a 3-4 kite set up will help fine tune every session.
Finally made the decision to invest into yourself and get a kite quiver to develop your passion and get on the water, though, you are now stuck on what to purchase! Is there such thing as the perfect quiver?
Anyone who tells you X, Y and Z is the perfect all around quiver might be innocently misguiding you. The perfect quiver doesn’t exist per say… everyone's local conditions, needs, budget and demands are different.
There is still hope though!
Purchasing the perfect quiver for yourself can be guided by these general questions though you can go much more in-depth and technical.
#1 What is your budget? This will help determine what is in the actual realm of possibilities for you! Whether you must go second hand, new or how much of a wind range you can cover?
#2 Common conditions where you plan to kite? Average wind speed, choppy or flat, river.
#3 Skill level.
#4 How often are you trying to get out on the water? Are you trying to go any day the wind blows no matter what or only when it is 20+ knots only?
#5 Do you generally prefer riding slightly under power / powered or powered / overpowered?
#6 Do you want to focus on only landing new wakestyle tricks or going for wave/surf session or riding around or trying hydrofoil or maybe
What board style and size to choose and whether to get a surfboard or foil will as well depend on your preference and kite goals!
What does your quiver look like and is it the perfect quiver for you?
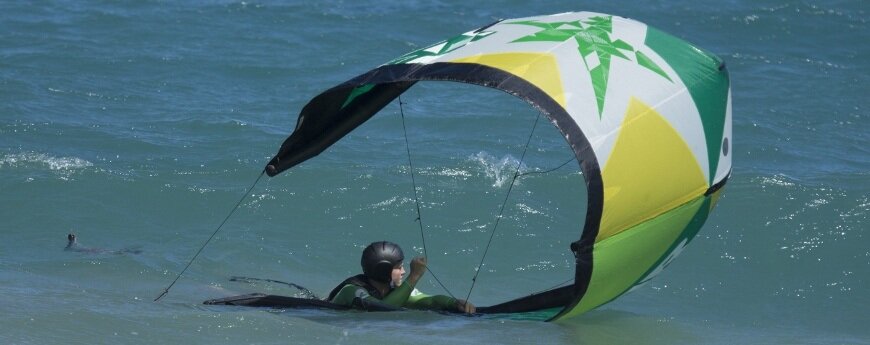
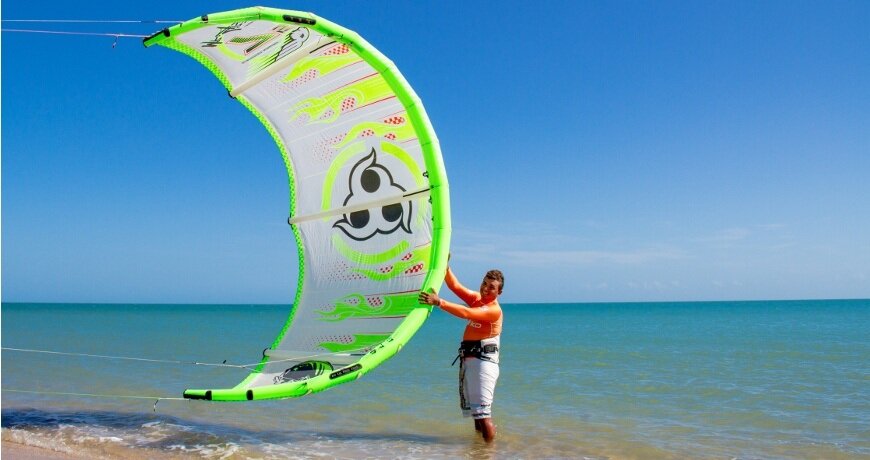
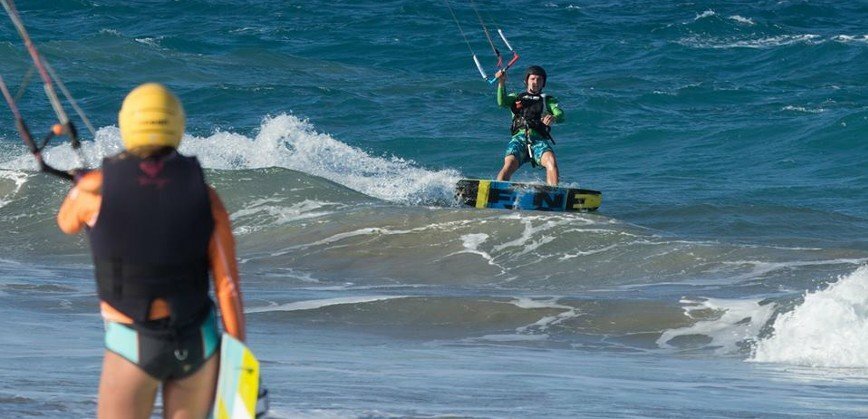
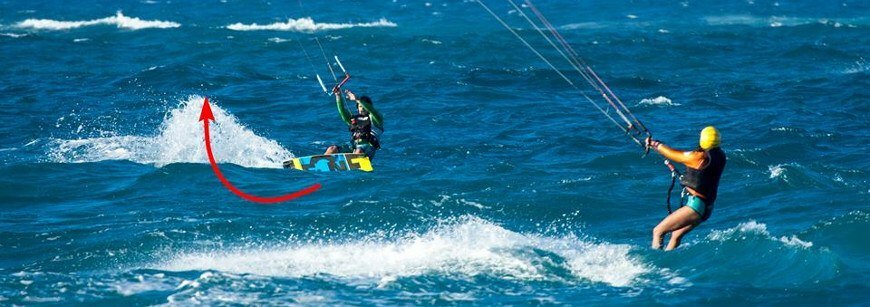
|
Right of Way - The Golden Rule
There are many Right of Way rules that kiters need to be aware of. The most important one is the Golden Rule! When two riders are kiting in the opposite direction, the one going upwind must keep the kite high and the one going downwind must keep the kite low. Being aware of this simple rule will allow you to kite in a crowded spot without tangling your lines with others. Many beginners are not aware of the Golden Rule and tend to bring their kite up every time they approach another kiter who, as a result, will have to bring his kite up too and stop. Learn all the Right of Way rules with an IKO Instructor to make the sport more enjoyable and safe for all!
|
 |
|
Jump safety
Are you ready to attempt your first jumps? What an exciting moment in every kiter’s life that is going to become 3 Dimensional! However make sure to respect the following basics to ensure your safety! Do not try your first jump on gusty winds or strong winds. Light steady wind is the one you are looking for! Always wear a helmet and an impact vest to avoid injuries. Remember to keep a clear zone of at least 30m upwind and 50m downwind. Never forget that when you jump you lose the right of way. A piece of advice, focus on the board’s pop without any kite movement at first, it is the key to jump very high later using the kite. To improve your jump technique faster, find an IKO Coach!
|
 |
|
Riding on a wave
Tired of flat water twin-tip riding? Challenge yourself and diversify your practice riding the waves! You can use your twin-tip for the first discovery attempts however it is recommended to switch for a directional board, keeping the straps for aggressive riding, or removing them for smooth or freestyle riding! You will be more in contact with the element. Be sure to know the tides, currents and that the waves are not too big for you! Never use a board leash as it is very dangerous and remember that the rider riding a wave has the priority over the others. To improve faster, you can attend an Evolution Course or Clinic with a certified IKO Coach!
|
 |
|
You wanna start kiteboarding, here are some beginner tips
Ready to finally jump off the plane and start kiteboarding? If not well organized, a first kite experience can be frustrating… You will need 3 to 5 days of practice to become an independent rider. This means 3 to 5 days of wind... So first of all, select the spot where you want to learn and check on several sources what the best time of the year is in terms of wind probability. Schedule a stay of at least 2 weeks so you have more chances to hit these windy days. After this, check out the IKO online videos to prepare your training. Get fit before the beginning of your course, this will help you have longer sessions as the time of practice is the key to ensure your progression. Then go for it and learn together with a certified IKO Instructor!
|
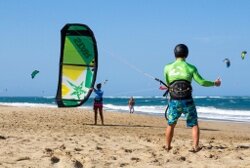 |
|
How to buy used kite gear
Now that your first course is done, you may want to buy your first kite equipment! You still might crash your kite from time to time and possibly break it. For this reason buying a second-hand gear is a good alternative as it will have fewer financial consequences. Before buying a second-hand kite, be sure to physically see it. First thing first, pump it up and control it stays inflated. While inflated check out for repairs, or small tears. Watch closer the leading edge, valves and especially the trailing edge. You must also control the lines and the general state of the fabrics all over the bar. Look for small knots that would weaken the lines. For boards, check if you see any holes due to impacts. Watch the fabric state of the straps and pads. Ask for the year of the equipment and compare the prices on the market to be able to negotiate it. If you are not experienced, the help of a more advanced kiter is always welcome!
|
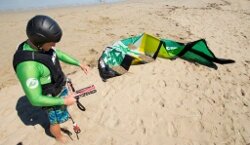 |
|
The drop zone The drop zone is located under the wind window. The drop zone must be kept clear of any obstacle for the rider’s safety and others’. Do you know how to calculate it? The drop zone is anywhere underneath the wind window where the kite can drop, plus the size of the leash in extension and the size of the kite span in the case the rider releases the chicken loop quick release. This means that for a 12 m kite on 25 m lines, the diameter of the drop zone will be around 60 m!!! This is one of the reason why IKO uses short lines to teach beginners.
|
|
The safety zoneThe safety zone corresponds to 3 lines length. This is the area beyond the drop zone that a pilot keeps clear of any obstacles because it takes time and distance to stop a kite. When the wind is stronger, the size of the safety zone should be increased. A cautious kiteboarder should also keep a safety zone upwind of him and not let another kiter get too close.
|
|
Advantages and inconvenient of the 5th lineThe biggest advantage of a 5th line is its safety system, like the 4 line re-ride, this safety system allows the rider to properly release most of the kite’s power in any situation. If checked often and looked after it will always be a safe companion for the riders who use it. Another advantage is to allow the rider to relaunch easily a C-Shape kite that would be almost impossible to do without it. However it has a main disadvantage that makes it a system only recommended for Advanced riders; if the kite turns on itself, the 5th line will wrap around the kite. In this situation if the rider does not react fast by releasing the quick release this may damage the kite.
|
|
Right of way - rulesWould you drive a car without knowing the right of way rules? The answer is no! The same logical applies to kiteboarding. Spots are every time more crowded and kiters travel a lot. It is important to have a common language to make the session safer and more enjoyable. There are many rules, but always remember that the kiter with the most manoeuvrability must give way to the other one or other beach users, exception made to the Starboard rider who has the ROW over the others. If you are not sure about this rules, have a look at the Kiteboarder's Handbooks and ask your nearest IKO Affiliated Center.
|
Rider-RescueWhile enjoying a good kite session, you may experience a situation in which you have to save a person, who is far away from the shore and cannot come back on his own. This happens often in high season to beach users who are not aware of the danger of a rip current that will take them away from the shore. An Intermediate Rider can easily save that person while body dragging. However be very careful because if that person panics, the situation can become very hazardous. It can be dangerous to do it on your own with no special training. Take time to review it in an IKO affiliated Center. |
|
Stay safe and know how to Self-rescueDid you know that self-rescue must be learned and mastered by every students before they attempt the water-start, corresponding to the end of the IKO Intermediate Course? You may have trouble with your equipment once in a while, or experience an unpredicted wind strength difference, making it impossible to go back riding to the shore. In these situations, mastering this technique will bring you and your equipment back to the shore without any trouble. Be careful, this is only working with on-shore winds conditions. It can be dangerous to do it on your own with no special training. Take time to review it in an IKO Center or watch the 3:35 min. video. |
|
Why should you learn in an IKO Affiliated Center?As mentioned in the past Tip Of The Week, safety procedures are very important and be must be mastered by all kiters. In all IKO Affiliated Center you are ensured to receive the safest teaching method worldwide. Find the closest IKO Affiliated Center to your location here. |
|
Wind windowThe wind window is the area where the kite can fly. On its edge, the kite generates its minimal power, because it only receives the true wind. It is also where we use the kite clock as reference for teaching. Positions 9 and 3 o'clock are also called launching and landing positions. 12 o’clock can be called the Zenith too. On the center of the wind window, the kite will be able to accelerate and create an “induced wind” which associated to the “true wind” will be called “apparent wind”. This is where the kite can generate its maximum power. |
The New Training Path Helps You at Any LevelDid you know that IKO helps every kiter from the beginner level to the more advanced one? Our most recent course, the Evolution Clinic enables advanced kiters to improve their skills and adquiere new theoretical knowledge. The Evolution level is only taught by IKO Coach. Check the details of all courses on our website! |
 |
Recover Your Board Faster and Easier Without the Board LeashThe board leash has been totally banned from IKO since 2011. Some non-certified Instructors still use it as is “makes it easier for the student and we never lose the board”. IKO wants to remind that it is very dangerous and it is best to lose a board than to have an unfortunate accident. Beginners can now use a buoy fixed on the board’s handle. This helps to spot the board that is pushed downwind for a faster and easier recovery even by an inexperienced rider.
|
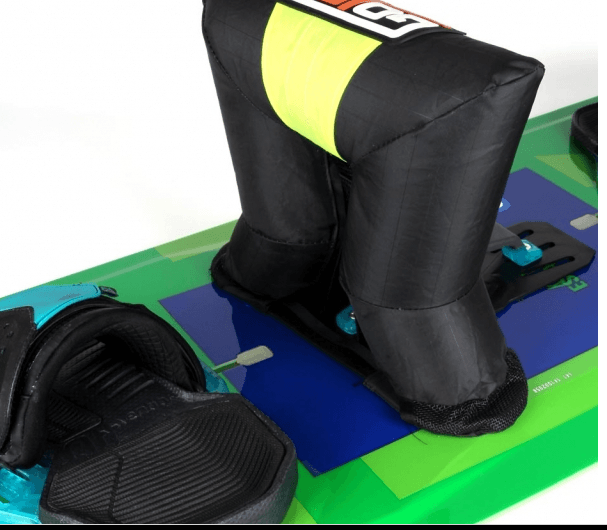 |
Avoid Being Hit by Your Own BoardThe new strapless wave riders tendency brings the board leash back to “avoid the board being pushed away by the wave”.Even if you do not jump, the risk of being hit by your own board isf high. Some may think, “but why surfers use one?” A surfer needs to have a board leash as his board is his only surviving help, his buoy. Kiteboarders should use their kite to help themselves. Have a look at the self-rescue and packdown procedure if you are not familiar with both. Any IKO Instructor will be happy to teach to you.
|
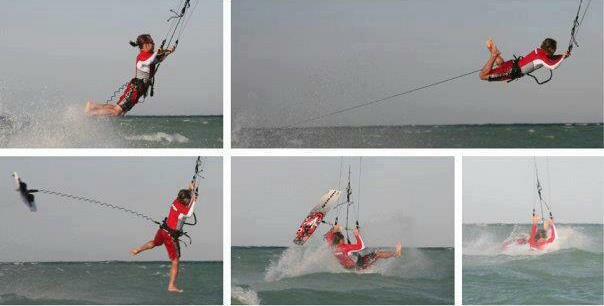 |
Do You Master the Self-landing?Did you know that self-landing is learned and mastered during the IKO Discovery Course? It is always better to land your kite to someone. Avoid landing on your own. However, in some occasion you might finish your session alone and would need to do a self-landing. It can be dangerous to do it on your own with no special training. Take time to review it in an IKO affiliated Center.
|
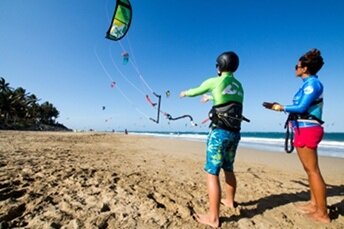 |
| Contact IKO | |
 |
Call us |
| Our office team is available from 12:00 p.m to 5:00 p.m and 6:00 p.m to 8:30 p.m UTC/GMT. +1(809) 5719530 |
|
 |
Email us |
| Not found your answer from the FAQs? We experience high volume requests, however we will do our best to answer as soon as possible. |
|
| Contact IKO | |
 |
Call us |
| Our office team is available from 12:00 p.m to 5:00 p.m and 6:00 p.m to 8:30 p.m UTC/GMT. +1(809) 5719530 |
|
 |
Email us |
| Not found your answer from the FAQs? We experience high volume requests, however we will do our best to answer as soon as possible. |
|
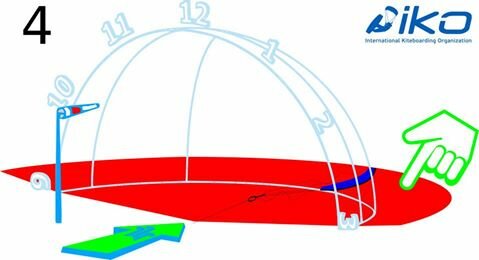

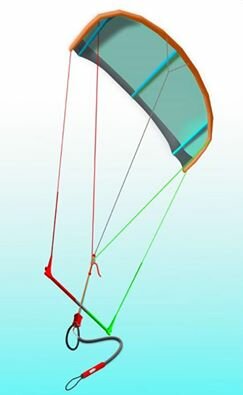
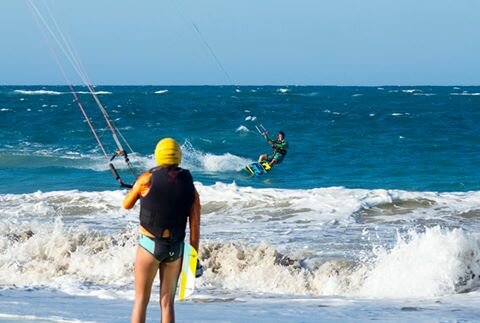
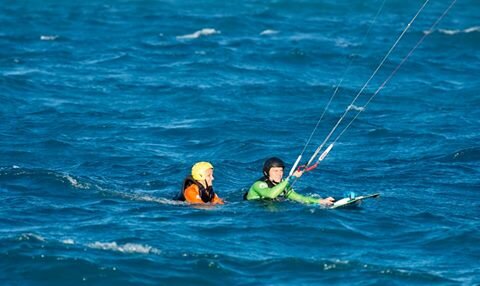
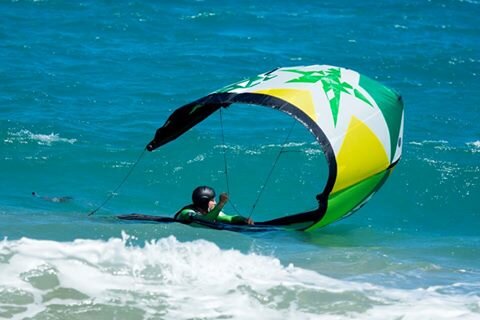
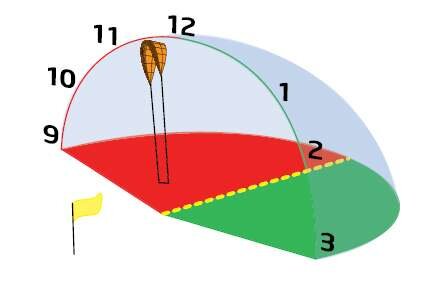
.png)

